
Install a replacement Sanyo PLC-WL2500 projector lamp
This step-by-step guide shows how to install a new Sanyo PLC-WL2500 projector lamp
Invest in authentic
OEM Compatible lamps have a longer life than counterfeits. They are less prone to explosions that can damage your projector and been have calibrated properly so they don’t damage the sensitive optics in your Sanyo PLC-WL2500 projector. Counterfeits are created with toxic substitute parts that are a health hazard and are missing the proper safeguards to protect your eyesight from damage. Your Sanyo PLC-WL2500 projector uses the Sanyo POA-LMP141.
Find this lamp on Amazon sold by these authorized dealers:
 End of life warning signs
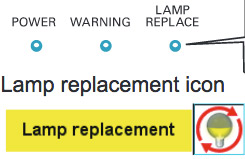
There is a Lamp Replace Indicator at top of the Sanyo PLC-WL2500 projector. When the projector lamp needs replacing, the Lamp Replacement Icon will appear on screen and the LAMP REPLACE indicator lights up yellow. Replace the lamp immediately. Other indicators of the lamp reaching end of life include distorted color and poor light.
Installing a new projector lamp
Before replacing any lamps follow these safety steps:
- Turn off the PLC-WL2500 projector.
- Unplug the power cord.
- Allow the projector to cool down for at least 45 minutes. It should be cool to the touch. The Sanyo PLC-WL2500 operates under extremely high temperatures and you can seriously burn yourself if you don’t give the projector time to cool.
To install the lamps:
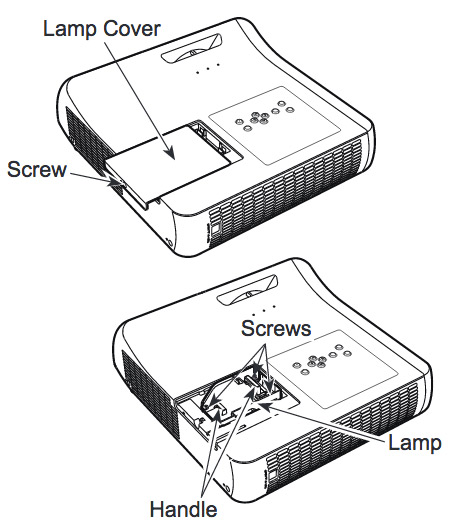
- Remove the screw holding Sanyo PLC-WL2500 lamp cover in place. Put the cover to one side.
- Loosen the three screws holding the Sanyo POA-LMP141 projector lamp in place.
- Grasp the wire handle and gently pull out the defective Sanyo POA-LMP141 lamp. Place to one side. Note: Be sure to properly recycle projector lamp. Don’t throw this projector lamp into the regular garbage as it contains mercury.
- Take the new Sanyo POA-LMP141 projector lamp by the handle and gently guide it into place.
- Tighten the three screws holding the Sanyo POA-LMP141 projector lamp assembly in place.
- Replace the Sanyo PLC-WL2500 Lamp Cover and tighten the screw to hold the lamp cover in place. Reset the Lamp Counter.
Reset the projector lamp counter
Each time you install a new Sanyo POA-LMP141 projector lamp, you’ll need to reset the lamp counter in order that the lamp life can be properly tracked.
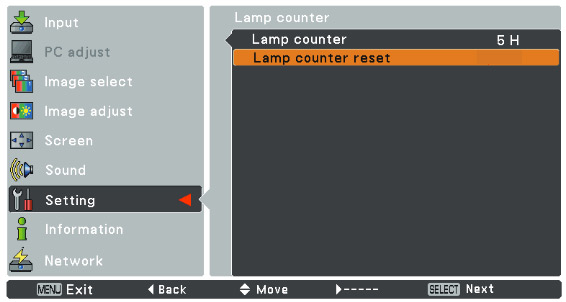
- Turn the PLC-WL2500 projector on.
- Press the MENU button to display the On-Screen Menu. Press enter.
- Scroll down to the Setting option. Press Select.
- Scroll over to select the Lamp Counter Reset
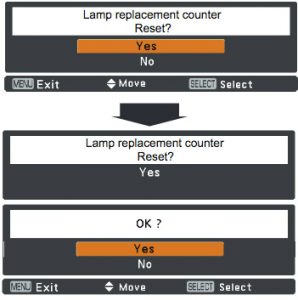 The Lamp Reset message appears.
- Select YES to continue.
- The Lamp replacement counter reset option will appear.
- Click on YES.
- Another confirmation dialog box appears.
- Select YES to reset the lamp counter back to zero.
Extend the lamp life
Extend the life of your newly installed Sanyo POA-LMP141 projector lamp by following these helpful tips:
- Don’t operate the projector continuously without letting it stand for at least one hour turned off every 24 hours.
- Cleaning the air filter regularly will also prolong the life of the Sanyo POA-LMP141 projector lamp and prevent the PLC-WL2500 projector from overheating.
Leave a Reply