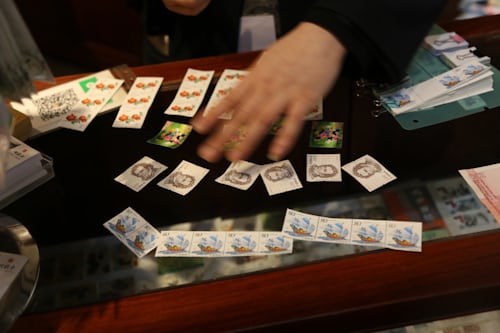
We're now Screen and Projector! For updated content, visit ScreenAndProjector.com and follow @screenandproj on social media!

Samsung_HLP4663WX XAA_TVFollow these instructions when it’s time to replace the Samsung HLP4663WX/XAA TV lamp

When the Samsung HLP4663WX/XAA TV lamp is reaching end of life you may notice all three LEDs on the front panel — Timer, Lamp, & Temp — are flashing. Colors may appear flattened and the brightness on the screen may be diminished.

Find this lamp on Amazon from the following authorized dealers:

Keep it authentic

The Samsung HLP4663WX/XAA TV lamp uses the Samsung BP96-00608A Replacement TV Lamp. Reduce hassles by always buying authentic. Counterfeits have several chronic problems including:

Replacing the lamp

Before replacing the lamp allow the Samsung HLP4663WX/XAA to cool down for one hour. There is a risk of a serious burn if the TV is not completely cool. Be sure to unplug the TV from the electrical socket.

Samsung_HLP4663WX:XAA_TV_replacement_lamp_BP96-00608A_remove_lamp_door

Step 1: Use a screwdriver to remove the screw holding the TV lamp cover in place.

Samsung_HLP4663WX:XAA_TV_replacement_lamp_BP96-00608A_lamp_door_2

Step 2: Remove the Lamp cover.

Samsung_HLP4663WX:XAA_TV_replacement_lamp_BP96-00608A_remove

Step 3: Using a screwdriver loosen the screws securing the BP96-00608A in place

Samsung_HLP4663WX:XAA_TV_replacement_lamp_BP96-00608A_replace

Step 4: Separate the Lamp from the engine by holding the handle and pulling it out.

NOTE: The contains mercury. Please recycle this lamp. Don’t throw it into conventional garbage.

Inserting the new lamp

  • Insert the new Samsung BP96-00608A Replacement TV Lamp.
  • Tighten the two screws on the lamp.
  • Replace the lamp cover and tighten the screws. NOTE: Be sure to tighten the lamp cover on the TV after changing the lamp. Note that the TV will not function if the lamp cover is not securely attached. Please tighten the holding screw on the lamp cover after it has been attached to the TV.

If any there is no picture or a very dark picture or if the TV won’t turn on, repeats the steps again to ensure the lamp has been installed properly and the lamp door has been re-installed correctly.

Extend the life of the Samsung BP96-00608A Replacement TV lamp by following these tips.

Tagged with: , , ,

3D_HMR-15 _projectorConsult this guide when its time to change your 3D HMR-15 projector lamp

Your 3D HMR-15 projector lamp can last up to 2000 hours. You’ll need to check lamp life to determine if it’s reaching end of life. As the 3D HMR-15 projector lamp begins to wear out you’ll notice the color becoming washed out and the light dimming. If the lamp is close to end of life and the projector will not switch on, you’ll need to replace the lamp immediately.
Buy this lamp on Amazon from the following authorized dealers:

SpArc Platinum 3D Perception 400-0003-00 Projector Replacement Lamp with Housing

Go with authentic

Your 3D HMR-15 projector uses the 3D Perception 400-0003-00 lamp. Be sure to purchase an authentic projector lamp and avoid the temptation of generic lamps and their associated problems:

Save yourself hassle and go with an authentic projector lamp.

Replacing the lamp

Before replacing the projector lamp:

  • Wait until the projector is cool to the touch before removing the lamp. These projector work at a high temperatures and you can get badly burned.
  • Be sure to unplug the projector before replacing the lamp.
3D_HMR-15_projector_lamp_400-0003-00_remove_cover
Remove the 3D HMR-15 projector lamp cover by loosening the
fixing screw and sliding the cover forward.
3D_HMR-15_projector_lamp_400-0003-00_remove
Undo the locking screw on the 400-0003-00 lamp
and disconnect the wiring to remove.
NOTE: The 3D Perception 400-0003-00 lamp contains mercury and should not be thrown into regular garbage. Recycle this lamp through a recycling company.
3D_HMR-15_projector_lamp_400-0003-00_insert_new

into the projector making sure the wiring element has been reconnected and clicked into place. (Step C and D) Fasten the screw on the lamp.

Slide the lamp cover back in place and refasten the screw on the cover.
NOTE: It’s critical the the 3D Perception 400-0003-00 lamp is in place the the lamp cover is correctly placed back in its slot. If either the lamp or the lamp cover is not properly secured the 3D HMR-15 projector will not turn on.
You must reset the lamp timer after replacing the lamp.

Resetting the lamp timer

 The 3D HMR-15 projector has a built in lamp hour timer. Each time you change the 3D HMR-15 projector lam you MUST reset the lamp timer.
 3D_HMR-15_projector_lamp_400-0003-00_reset_timer

To reset the timer:

  • Turn on the proector.
  • Select Projectors on the drop-down menu under Maintenance under the main File menu.
  • Scroll over to the LAMP option on the top menu.
  • You’ll see the Current lamp time and Total lamp timeThis will be the old lamp information.
  • Click on RESET to set the Total lamp time back to zero. Until you do this step, the 3D HMR-15 projector will think the lamp is still old and not turn on.

Extend the 3D HMR-15 lamp life

  • Keep your air filters clean to avoid overheating the projector.
  • Turn off the projector and let it rest for at least two hours a day.
  • Make sure there is enough airflow around the projector particularly if it’s mounted on the ceiling.
  • Learn more with Top tips for extending DLP projector lamp life.


Save

Save

Save

Save

Save

Tagged with: , , ,

Replace the BenQ MX660 projector lamp

Start off with authentic

Purchase an authentic BenQ MX660 projector lamp and eliminate any potential problems associated with generics. Counterfeit “compatible” lamps may appear to be a bargain but in the long run end up costing more due to their shorter lamp life. They are prone to explosions and can put your eyesight at risk. Protect your health and keep your BenQ MX660 working at optimum levels. Go with an authentic projector lamp.

Find this lamp on Amazon from the following authorized dealers:
MX660 BenQ Projector Lamp Replacement. Projector Lamp Assembly with Genuine Original Philips UHP Bulb Inside.

End of life warning signs

Your BenQ MX660 projector uses the BenQ 5J.J3T05.001 replacement projector lamp. When it’s time to replace the BenQ MX660 projector lamp you’ll see a series warnings appear on screen.

benq-MX660 -projector_benq-5j-j3t05-001_replacement_lamp-warnings

First warning: The BenQ MX660 projector lamp has been in operation equivalent to 4500 hours or for 6,000 hours Econo Mode, you have up to 6000 hours before changing the lamp. You can wait until the second warning to replace the projector lamp. Press MODE/ENTER to dismiss the message.

Second Warning: The BenQ MX660 projector lamp has been in operation equivalent to 4000 hours or 6,000 hours in Econo mode. You should replace the lamp immediately. Press MODE/ENTER to dismiss the message.

Out of lamp: The BenQ MX660 projector lamp has reached its end of life and the projector will shut down until the lamp is replaced. Install a new BenQ 5J.J3T05.00 projector lamp immediately.

Follow these safety instructions before changing the lamp:

  • Reduce the risk of electrical shock by disconnecting the power cord on the BenQ MX660 projector.
  • Reduce the risk of severe burns by allowing the projector to cool for at least 45 minutes. The projector should be cool to the touch.

Replacing the projector lamp


benq-MX660-projector_benq-5j-j3t05-001_replace_lamp_cover

  • The projector lamp cover is found on the side of the Benbenq-MX660 -projector_benq-5j-j3t05-001_replace_lamp_cover-2Q MX660 projector.
  • Loosen the screw holding the projector lamp cover in place
  • Lift up the projector lamp cover.


benq-MX660 -projector_benq-5j-j3t05-001_replace_lamp_screw-1

  • Loosen the screw that secures the lamp.
  • Lift the handle so that it stands up. Use it to slowly pull the BenQ 5J.J3T05.00 projector lamp out of the projector. Pulling out too quickly may cause the bulb to break. benq-MX660 -projector_benq-5j-j3t05-001_remove_lamp

NOTE: The BenQ 5J.J3T05.00 projector lamp contains mercury and should not be thrown into regular garbage. Recycle your used lamps!

benq-MX660-projector_benq-5j-j3t05_insertInsert the new BenQ 5J.J3T05.00 projector lamp.

  • Tighten the screw that secures the lamp. Loose screw may cause a bad connection,
    which could result in malfunction. Do not over tighten the screw. benq-MX660-projector_benq-5j-j3t05-001_replace_lamp_screw-2
  • Replace the lamp cover on the BenQ MX660 projector.
  • Reset the lamp timer.

Resetting the lamp timer

Do not reset the BenQ MX660 projector lamp timer if the lamp has not been replaced as this could cause damage. Don’t start the if the lamp cover has not been replaced. To reset the projector lamp timer:

  • Plug the BenQ MX660 projector and get it started.
  • Open up the menu and scroll over to SYSTEM/SETUP: Advanced. Press ENTER
  • Press MODE/ENTER to display the Lamp Settings page
  • Highlight Reset lamp timer to display a warning asking it you want to reset the lamp timer.
  • Select RESET. Press ENTER.
  • Lamp time will be reset to zero.

Extend the BenQ MX660 projector lamp

  • Keep your air filters clean to avoid overheating the projector.
  • Setting Lamp Power to Eco mode. Using Whisper mode reduces system noise and power consumption. It also extends the projector lamp life. To set Econo mode, go into the Advanced Setup > Lamp > Lamp Power menu.
  • Learn more with Top tips for extending DLP projector lamp life.


Save

Save

Save

Save

Tagged with: , , ,

Toshiba_42HM66_TVIt’s a breeze to change your Toshiba 42HM66 TV lamp when you follow our instructions.

When the Toshiba 42HM66 TV lamp is reaching end of life you may notice that colors appear flattened and the brightness of has diminished. The quartz glass also gets weaker so if you hear a very loud bang, it means the lamp has exploded and needs to be replaced.

Buy this lamp on Amazon from the following authorized dealers:

Keep it authentic

Reduce hassles by always buying authentic. Look for the seal of approval — don’t get caught with a copycat generic projector lamp!

6 reasons to avoid generic projection lamps:

Your Toshiba 42HM66 uses the Toshiba D42-LMP TV Lamp 

Replacing the lamp

Before replacing the lamp allow the Toshiba 42HM66 TV to cool down for one hour. There is a risk of a serious burn if the TV is not completely cool. Be sure to unplug the TV from the electrical socket.

Toshiba_42HM66_TV_projector_lamp_D42-LMP_door

Step 1

Step 1: The Toshiba 42HM66 TV lamp door is located on the side of the TV.  Loosen the screw and then remove the lamp unit door.

Note: The lamp unit door is provided with an interlock to reduce the risk of electric shock and excessive ultraviolet radiation. Never defeat its purpose or attempt to servicewithout removing the lamp unit door completely. Failure to follow this WARNING may result in death or serious injury.

Toshiba_42HM66_TV_projector_lamp_D42-LMP_door_screws

Step 2

Step 2: Using a slotted screwdriver or a coin, loosen the two screws on the Toshiba D42-LMP lamp.

Toshiba_42HM66_TV_projector_lamp_D42-LMP_remove

Step 3

Step 3: Grasp the Toshiba D42-LMP lamp by the handle and gently pull it straight out of the TV. Set the old lamp unit aside.

NOTE: The contains mercury. Please recycle this lamp. Don’t throw it into conventional garbage.

Toshiba_42HM66_insert_TV_projector_lamp_D42-LMP_

Step 4

Step 4: Carefully insert the new lamp unit straight into the TV until it is fully seated. Avoid touching the actual bulb as this can affect image quality.

Toshiba_42HM66_TV_projector_lamp_D42-LMP_lamp_screw_tighten

Step 5

Step 5: Hand-tighten the screws on the Toshiba D42-LMP lamp Do not use an electric screwdriver

Toshiba_42HM66_TV_projector_lamp_D42-LMP_replace_door

Step 6

Step 6: Reattach the lamp unit door, making sure to insert the hooks on the left side of the lamp unit door inside the
opening in the TV cabinet. Replace the door screw and tighten.

Plug in the power cord and turn on the TV. After the initial warmup period (which may take several seconds for full
picture brightness), the TV should operate normally.

If any there is no picture or a very dark picture or if the TV won’t turn on, repeats the steps again to ensure the lamp has been installed properly and the lamp door has been re-installed correctly.

Extend the life of the Toshiba D42-LMP lamp by following these tips.

Tagged with: , ,

Install a replacement Optoma HD300X projector lamp

When the  Optoma HD300X projector lamp approaches end of life, a replacement message will flash on screen. You may also notice the picture quality starting to have poor resolution with washed out colors. Change your projector lamp immediately. The projector will not work if the lamp has burnt out or broken.

Optoma_HD300X_projector_lamp_BL-FP230I-lamp warning

Buying the right brand of projector lamp

Your Optoma HD300X projector uses the Optoma BL-FP230I projector lamp. Be prepared and have your authentic replacement projector lamp ready and waiting.


Buy this lamp on Amazon from the following dealers:


If you are buying over the Internet, avoid projector lamps with a low price tag for the following reasons:

Learn 7 ways to spot a counterfeit projector lamp.

Installing the Optoma Home Theater HD2200 lamp

Before replacing the Optoma BL-FP230I follow these important safety tips:

  • Switch off the power to the Optoma HD300X projector by pressing the Power/Standby button.
  • Disconnect the power cord.
  • Allow the projector to cool down for at least 30 minutes. If should be cool to the touch. These projectors run using high temperatures and you can burn yourself badly if you don’t allow the projector to cool down.

Optoma_HD300X_projector_lamp_BL-FP230I-replace

1. Use a screwdriver to undo the two screws holding the lamp cover in place. The screws on the lamp cover and the lamp cannot be removed.

2. Remove the lid and place to one side. Don’t lose the lid as the Optoma HD300X projector will not turn back on until the lamp cover has been properly installed.

3. Remove the two screws holding the Optoma BL-FP230I in place.

Note: The used Optoma BL-FP230I lamp contains mercury and should be properly recycled. Don’t throw it into regular garbage. Please recycle this lamp.

4. Lift up the wire handle on the Optoma BL-FP230I lamp and slowly remove it from the projector.

Be careful not to bang the lamp against the projector as this may case the bulb to break. Learn how to clean up a broken lamp.

5. Remove the new Optoma BL-FP230I from its packaging. Taking care not to touch the actual bulb, lift up the handle on the new lamp and insert it gently into the Optoma HD300X projector.

6. Tighten the two screws on the lamp.

7. Replace the lamp cover and tighten its two screws. You are now ready to reset the Lamp Replacement Timer.

Reset the Lamp Replacement Timer

The Optoma HD300X projector has an automatic lamp timer that tracks the numbers of hours left in the lamp. If you don’t reset the lamp replacement timer you run the risk of the lamp being used beyond its recommended life and possibly exploding in the projector.

Optoma_HD20_Optoma_BL-FP230D_reset_lamp_timerTo reset the Lamp Replacement Timer:

  • Turn on the projector.
  • Press MENU.
  • Select SYSTEM.
  • Select Lamp Settings.
  • Select Lamp Reset.
  • Select Yes.
  • Press MENU to exit.

Tips for extending projector lamp life:

  • Keep your air filters clean to avoid overheating the projector.
  • Every 24 hours, turn off the projector and let it stand for 1 hour
  • Make sure there is enough airflow around the Optoma HD300X projector particularly if it’s been permanently mounted.
  • Learn more with Top tips for extending DLP projector lamp life
Tagged with: , , ,

SMARTBoard_680iv_projector

Learn how to replace the Smartboard 800iv projector lamp

The Smartboard 800iv projector lamp needs to be replaced when projector turns off automatically and the “Lamp Failure” message appears on screen. at the Smartboard 600i projector lamp has reached end of life is when the image gets darker or starts to deteriorate.

Go with authentic

An authentic projector lamp makes all the difference in keeping your Smartboard 8v00i projector working. If the price is too good to true, then you should avoid the lamp. Bargain basement prices mean problems down the road. Scroll down to learn more.

Find this lamp on Amazon from these authorized dealers:

Changing the Smartboard projector lamp

Your Smartboard 800iv projector uses the SmartBoard 50030764 projector lamp. BEFORE replacing the projector lamp:

  • Wear protective eyewear while changing the lamp.
  • Turn off the power switch and disconnect the power cord and all connected cables to the Smartboard 600i projector.
  • This projector operates under high temperature and there is a burn risk so be sure to wait at least one hour minutes for the projector’s housing to completely cool.

To remove the Smartboard from its boom:

SMARTBoard_680iv_projector_lamp_50030764Using the screwdriver, loosen the screw from the boom end cap, and then remove and set aside the boom end cap and screw.

SMARTBoard_680iv_projector_lamp_50030764_remove_boomLoosen the locking screw and the knob on the projector mounting plate.
Slide the projector mounting plate and projector off of the boom.
SMARTBoard_680iv_projector_lamp_50030764_turn_overTurn over the Smartboard 800iv projector so that the outer lamp cover is visible.  Using the screwdriver, remove the two screws from the lamp cover.
SMARTBoard_680iv_projector_lamp_50030764_remove_old_lampRemove the lamp cover, and then set it and the two screws aside in a safe place.

Remove the lamp protection film, and then set it in a safe place.

SMARTBoard_680iv_projector_lamp_50030764_remove_old_lamp_screw


Using the screwdriver, loosen the screw on the SmartBoard 50030764 lamp. SMARTBoard_680iv_projector_lamp_50030764_remove_old_lamp-2

Pull up on the SmartBoard 50030764 lamp’s handle, and then remove the lamp.

NoteThe SmartBoard 50030764 projector lamp contains mercury and should be properly recycled. Don’t throw it into regular garbage.

SMARTBoard_680iv_projector_lamp_50030764_insert_new_lamp-2Get the new SmartBoard 50030764 projector lamp ready by removing all its packaging. Lower the replacement lamp into the slot, aligning it with the holes in the Smartboard 800iv slot.

SMARTBoard_680iv_projector_lamp_50030764_insert_cover

SMARTBoard_680iv_projector_lamp_50030764_insert_cover-2Using the screwdriver, tighten the screw on the new lamp. Place the lamp protection film over the slot.

SMARTBoard_680iv_projector_lamp_50030764_replace_boom-2Slide the Smartboard 800iv projector mounting plate and Smartboard 800iv projector onto the boom.

Tighten the knob and the locking screw.

Replace the boom end cap.

Connect the cables to the projector.

Connect the power cable to a power outlet.

Press the Power button once on the remote control to confirm that the projector is operating and that the lamp module is correctly installed, and then wait for the projector to turn on completely.

Wait five minutes for the projector to warm up. You must now reset the lamp timer.

Resetting the lamp timer

After replacing the lamp you need to reset the lamp timer back to zero so the Smartboard 8v00i projector can accurately track the projector lamp. To reset:
  • Turn on the projector.
  • Access the service menu.
  • Activate the projector’s alert e-mails and lamp warnings if they’ve been deactivated.
  • Using the remote control, press Down, Up, Up, Left, Up to access the Service Menu.
  • Scroll down to the LAMP HOUR REST option. Press ENTER.
  • Scroll down to the EXIT option and press ENTER to exit the service menu.
  • Do not reset the lamp timer unless you have changed the lamp.

Learn how to extend the life of your SmartBoard 50030764 projector lamp with Top tips for extending DLP projector lamp life.

6 reasons to avoid generic lamps:


Save

Save

Save

Save

Save

Tagged with: , , ,

Dell_5100MP-projectorThis guide shows how to replace the Dell 5100MP projector lamp

End of projector lamp warnings

It’s time for a new Dell 5100MP projector lamp when  when you see “Lamp is approaching the end of its useful life in full power operation. Replacement suggested! www.dell.com/lamps.” Don’t wait to change the projector or it may explode.

Find this lamp on Amazon sold by these authorized dealers:

The importance of authentic lamps

The Dell 5100MP projector needs an authentic projector lamp to keep working at its best. While counterfeits are tempting due to their bargain prices, they aren’t calibrated properly and can damage the sensitive optics in your Dell 5100MP projectorThey also have much shorter life due to their tendency to explode and present a health hazard. Save yourself hassles and purchase an authentic projector lamp! Look for the seal of approval before purchasing.

Replacing the Dell 5100MP projector lamp

Your Dell 5100MP projector needs DELL 310-6896 . Before replacing the projector lamp follow these safety tips:

  • Turn the projector off and disconnect the AC plug.
  • Let the Dell 5100MP projector cool down for at least 30 minutes so it’s cool to the touch. Don’t attempt to change the lamp when the projector is still hot as you can get severely burned.

To change the lamp:

Dell_5100MP_Projector_Lamp+310-6896_replace

Loosen the two screws holding the Dell 5100MP lamp cover in place. Remove the cover and place to one side.

Loosen the two screws holding the DELL 310-6896 projector lamp in place.

Pull up the lamp by its metal handle.

NOTE: The DELL 310-6896 lamp contains mercury so must be properly recycled.

Place the new DELL 310-6896 into the Dell 5100MP projector making sure to line it properly. Tighten the two screws.

Replace the Dell 5100MP lamp cover and tighten the two screws.

You are now ready to reset the Lamp timer

Resetting the Dell 5100MP lamp timer

Dell_5100MP_Projector_Lamp+310-6896_reset_timer

  • To access the Main Menu press the left or right buttons on your projector’s control panel or remote control.
  • Scroll over the the Management Menu. Press ENTER to access.
  • Scroll down to the Menu Location icon. Press ENTER.
  • Scroll over to the Lamp Reset icon. Press ENTER.
  • Scroll down to answer YES and press ENTER to reset the projector lamp timer.

Tips for extending Dell 5100MP projector lamp life:

  • Keep your air filters clean to avoid overheating the projector.
  • Every 24 hours, turn off the projector and let it stand for 1 hour
  • Make sure there is enough airflow around the Dell 5100MP projector particularly if it’s been permanently mounted.
  • Learn more with Top tips for extending DLP projector lamp life.

Find this lamp on Amazon

Tagged with: , , ,

Sony_KDS-R50XBR1_TV

Use our guide to replace the Sony KDS-R50XBR1 TV lamp

Don’t settle for anything but the best Sony KDS-R50XBR1 TV lamp. Don’t get caught with a counterfeit projector lamp!

Find this lamp on Amazon sold by these authorized dealers:


6 reasons to avoid generic projection lamps:

When to replace

If the screen becomes dark, the color looks unusual, or the LAMP indicator on the front of the Sony KDS-R50XBR1 TV flashes, this indicates the lamp needs to be replaced with a new one.

To replace theprojection lamp

The Sony KDS-R50XBR1 uses the Sony XL-500 TV Lamp model. Before installing the new lamp, follow these safety precautions:

  • Turn off the power.
  • Let the cooling fan operate for two minutes after the power is turned off.
  • Unplug the power cord.
  • Wait an additional 30 minutes to allow the lamp to cool down. It should be cool to the touch.
  • Avoid touching the glass bulb of the new lamp since oil from your hands can leave a mark.

Sony_KDS-R50XBR1_TV_projector_lamp_Sony XL-5100

Turn the screw with a screwdriver counterclockwise and remove the outside lamp cover.

Sony_KDS-R50XBR1_TV_projector_lamp_Sony XL-5100_replaceTo remove the Sony XL-500 TV lamp place your index finger through the hoop of the lamp handle and pull it upwards, while placing your thumb on the dent on the top. Then pull the lamp out.

NOTE: Be sure to recycle the Sony XL-500 TV because it contains mercury and should not be thrown into regular garbage. Recycle it!

To insert a new lamp: 

Sony_KDS-R50XBR1_TV_projector_lamp_Sony XL-5100_replace-2Place the Sony XL-500 TV lamp halfway in.
Sony_KDS-R50XBR1_TV_projector_lamp_Sony XL-5100_tiltFollow the gutter in the compartment to mount the new lamp. See close up photo:


Sony_KDS-R50XBR1_TV_projector_lamp_Sony XL-5100_insert_newSlide it in slowly by pressing the PUSH part of the front corners of the lamp until it stops with a firm clicking sound to lock.  To ensure the lamp is securely installed, press the area marked PUSH before closing the lamp cover.

If the lamp is not securely reattached, the self-diagnostic function may be triggered and the POWER/STANDBY indicator flashes in red three times

Sony_KDS-R50XBR1_TV_projector_lamp_Sony XL-5100_doorPlace the outside lamp cover back in its place. Turn the screw with a screwdriver clockwise and secure the cover.


Find this lamp on Amazon.

Tagged with: , , ,

Optoma_HD141X_projector Replace the Optoma HD141X projector lamp using this guide

With its wide screen format the Optoma HD141X projector is perfect for 3D gaming or HD viewing. The Optoma HD141X projector lamp will need to be changed after 6500 hours of use.

Find this lamp on Amazon:

Optoma BL-FP190E for DW333/S312/S316/X316/W316/DX346/BR323/BR326/HD26/GT1080/HD141X/EH200ST/DH1009

Why buy authentic?

Counterfeit lamps have a variety of problems including:

Buy an authentic projector lamp in order to keep your Optoma HD141X projector working properly while protecting your health and safety .

When to replace

When the Optoma HD141X projector lamp life is reaching end of life, you’ll see a warning sign appear on screen.

Optoma_HD141X_projector_warning_Optoma_BL-FP190E

Replace the lamp immediately when you see this warning signs. Using the lamp beyond its recommended 6500 hours can result in the lamp exploding inside the projector.  Watch for these other signs that the Optoma BL-FP190E lamp may be reaching it’s end of life:

  • the Lamp LED flashing amber
  • poor colour quality
  • image has deteriorated

Installing a new projector lamp

Your Optoma HD141X uses the Optoma BL-FP190E projector lamp. Follow these important safety tips before installing a new Optoma BL-FP190E:

  • Switch off the power to the projector by pressing the Power/Standby button.
  • Allow the projector to cool down for at least 30 minutes. If should be cool to the touch. The Optoma HD141X runs at a high temperature and you can burn yourself badly if you don’t allow the projector to cool down.
  • Disconnect the power cord.

Remove the old lamp

  1. Use a screwdriver to loosen the screw holding the projector lamp cover in place.
  2. Remove the lamp cover and place to one side. Remove both screws holding the projector lamp in place.

3. Lift the wire handle on the lamp.

4. Press on the both sides then lift up and remove the lamp cord.

5. Unscrew the one screw on the lamp module.

6. Grab the wire handle on the lamp

7. Carefully lift the lamp out of the projector.

Install the new lamp:

  • Gently place the Optoma BL-FP190E into the Optoma HD141X projector making sure not to touch the actual bulb. Oil from your fingers will burn black spots onto the lamp when it heats up.
  • Tighten the Optoma BL-FP190E lamp screw.
  • Connect the lamp cord.
  • Put the wire handle in place.
  • Close the lid. Tighten the cover screw.
  • You are now ready to reset the lamp timer.

Reset the Optoma HD141X projector lamp timer

Your Optoma HD141X comes equipped with an automatic projector lamp timer that tracks the number of hours left for the Optoma BL-FP190E lamp. Each time you change the lamp you need to reset the lamp timer. Failure to do so may cause the projector to use the lamp over the recommended period of time resulting in the lamp exploding.

To reset the lamp timer:

Optoma_HD141X_projector_lamp_reset_timer_Optoma_BL-FP190E

  • Press MENU
  • Select OPTIONS
  • Select Lamp Settings
  • Select Lamp Reset
  • Select Yes

Learn TOP Tips for extending the lamp life in your Optoma  HD141X projector.

Tagged with: , , ,

home_theater-1

Which is better a home theater projector or flat screen TV?

It turns out size does make a difference when it comes to your home theater. As we move into 3D viewing, the difference between a projector and flat screen TV is even more noticeable. A projector with similar specs to a flat screen TV will share the same clear and crisp image but the difference is the size of that image.

home_theater_screenProjectors have a bigger image that can be anywhere from double to quadruple the size of a flat screen TV for about the same price or even less.

Compare the difference between a projector’s 120-inch HD display to a flat screen 60-inch display. It’s obvious the larger screen is going to create a more immersive viewing experience with more lifelike colors and details.

Since a projector is easier to move, your home theater is also easier to set up.  It’s lighter and less fragile than a flat screen TV, which can be bulky and difficult to transport. Another bonus to the projector with a screen is its portability. Projectors and screens can be moved from room to room or even outdoors.

Set up is a simple and for a more sophisticated viewing you can easily install your projector on the ceiling. Flat screen TVs, particularly the plasma model usually require a technician for installation and once installed are usually not moved. Unlike the fixed size of the flat screen TV, a projector’s screen size can be adjusted to fit your environment.

A projector home theater wins hands-down over the flat screen tv.

Tagged with:
Join the discussion on Facebook! All your questions, answered! The Screen & Projector Group