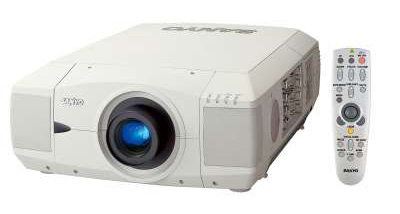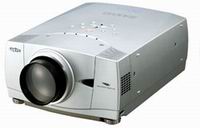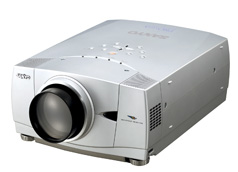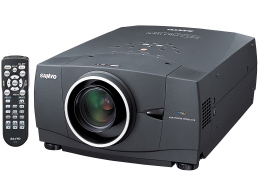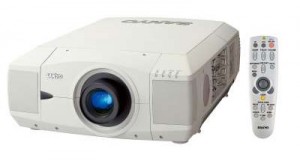
Sanyo PLC-UF10 projector
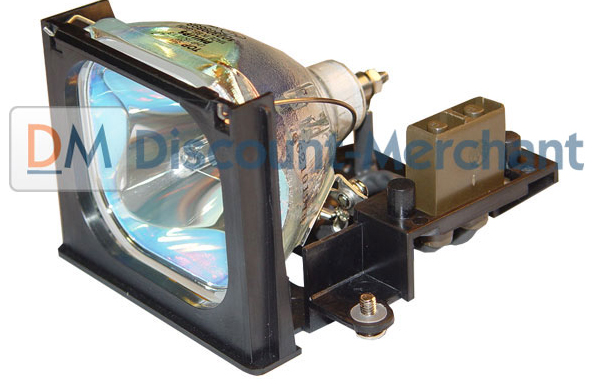
Your Sanyo PLC-UF10 projector is equipped with four Sanyo POA-LMP42 (service part 610-292-4831) projector lamps. 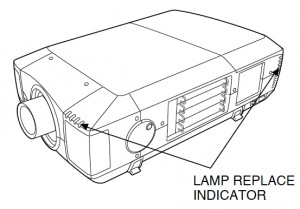
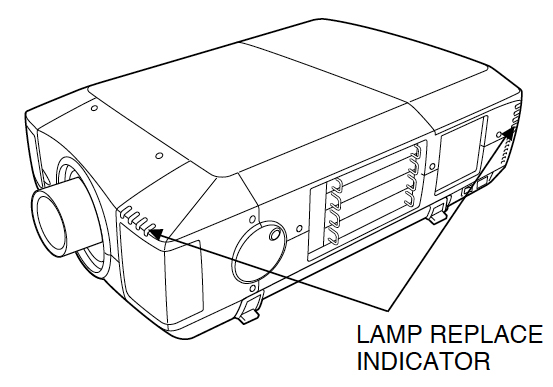
There is a Lamp Replace Indicator at the front and at the back of the projector. When any four of the projector lamps is nearing end of life, these indicators will flash yellow. In order to determine which of the four Sanyo POA-LMP42 (service part 6102924831) projector lamps needs to be replaced, you’ll need to consult the Lamp Status Display on the Sanyo PLC-UF10 projector screen.
Buy an authentic Sanyo POA-LMP42 (service part 6102924831) projector lamp and make life easier. Generic lamps look like a great bargain but these knock-off lamps are created with inferior materials making them susceptible to explosions when installed. They also have a shorter life span and can damage the precise components in your Sanyo PLC-UF10 projector. Learn more about spotting dangerous projector lamps by reading our article: 7 tips for spotting counterfeits.
LAMP STATUS DISPLAY SETTINGS
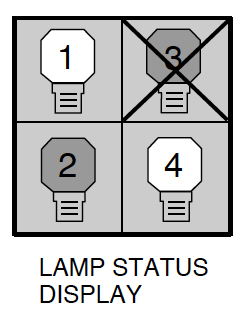
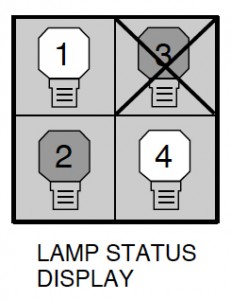 The Lamp Status Display shows the status of each lamp:
Yellow Lamp: projector lamp is lighting normally.
Dim Lamp: projector lamp is off
Red Lamp: projector is nearing end of life and should be replaced.
X Mark on Lamp: the lamp is not functioning and needs to be replaced immediately.
LAMP MANAGEMENT FUNCTION
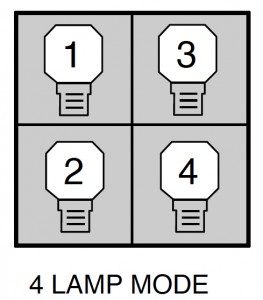
The Lamp Management Function automatically changes the combinations of lighting lamps by detecting which lamps are still working.
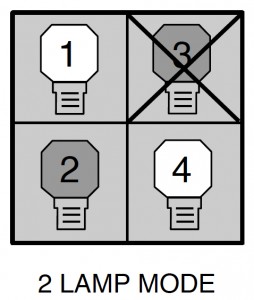
When any of the four Sanyo POA-LMP42 lamps goes out, Lamp Mode will automatically switch from using four Sanyo POA-LMP42 (6102924831) lamps to using two lamps.
 When any of the two Sanyo POA-LMP42 (service part no 610-292-4831) lamps are out, the projector will operate using only one lamp.
NOTE: Make sure of the number of lamps that need to be replaced by referring to the Lamp Status Display and the Lamp Management Function.
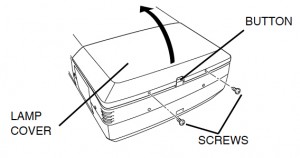
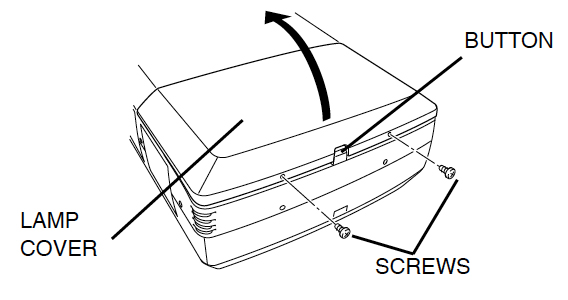
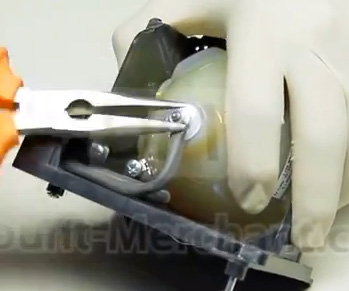
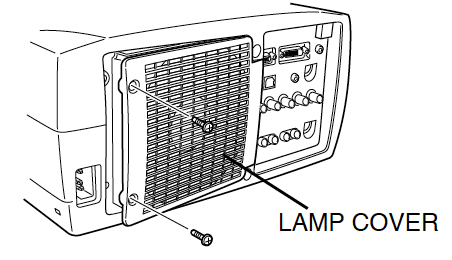
- Remove the two screws on the Sanyo PLC-UF10 Lamp Cover and press the top button to open the Lamp Cover.
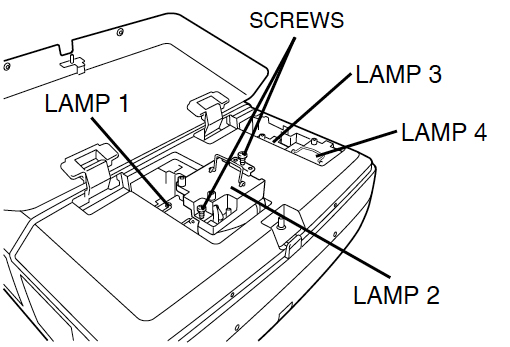
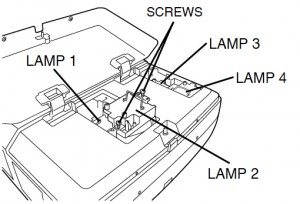
- Choose which lamp needs to be replaced. BE SURE TO PICK THE CORRECT LAMP THAT NEEDS TO BE REPLACED.
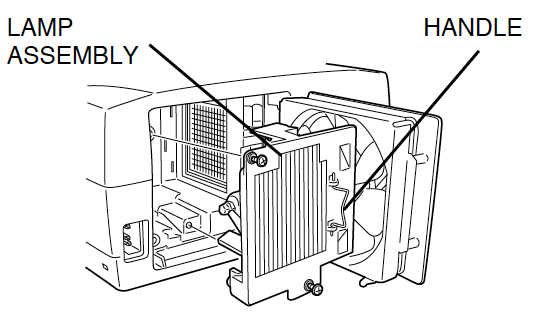
- Loosen the two screws holding the Sanyo POA-LMP42 (service part no 610-292-4831) lamp in place.
- Grasp the handle and gently pull out the defective Sanyo POA-LMP42 lamp.
 Place to one side. Be sure to dispose of the used Sanyo POA-LMP42 lamp through a local recycling program. Don’t throw this lamp into the regular garbage as it contains mercury.
 - Take the new Sanyo POA-LMP42 lamp by the handle and gently guide it into place.
- Tighten the two screws holding the Sanyo POA-LMP42 (service part 6102924831) lamp assembly in place.
- Replace the Sanyo PLC-UF10 Lamp Cover and tighten the two screws to put the lamp cover back in place.
- Reset the Lamp Counter following the instructions below.
LAMP COUNTER RESET FOR SANYO PLC-UF10
- Turn the projector on
- Press the MENU buttons to open the ON-SCREEN MENU.
- Press POINT LEFT/RIGHT button to get the red frame pointer to move to the SETTING menu icon.
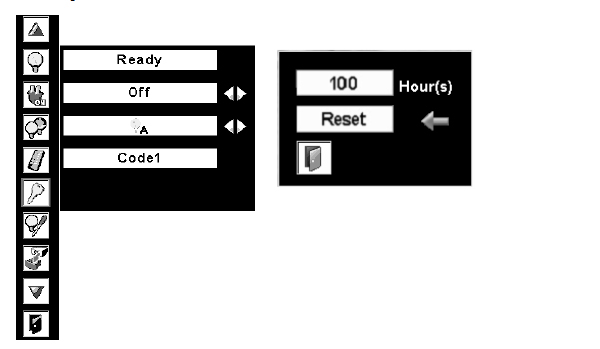
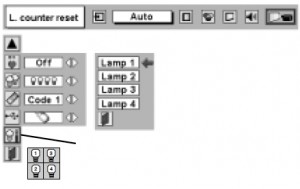
- Press POINT DOWN button to Lamp counter reset. Press SELECT.
- Move the arrow to the replaced lamp number (Lamp 1, Lamp 2, Lamp 3 or Lamp 4). Press SELECT. BE SURE TO RESET THE CORRECT LAMPS
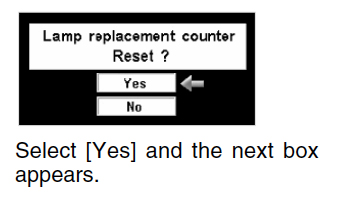
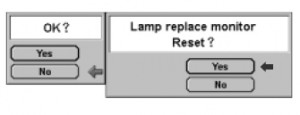
- The message “Lamp replace counter Reset?” will be displayed with YES or NO underneath.
- Move the pointer to YES. Press the SELECT button.
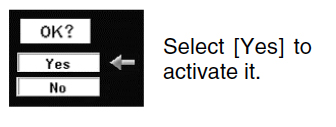
- Move to the second confirmation box and select YES.
NOTE: BE SURE TO RESET THE CORRECT LAMP otherwise the lamp replace indicator will continue lighting YELLOW.
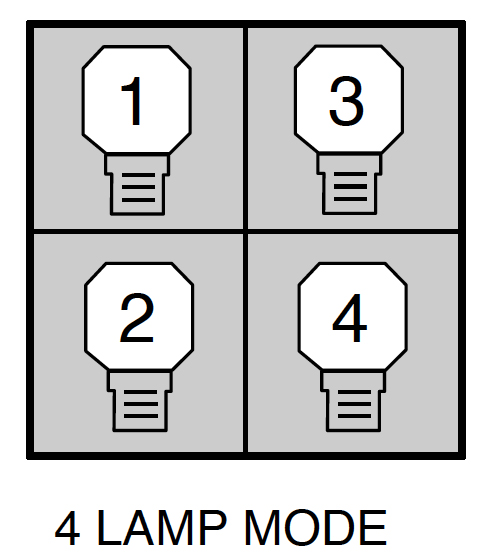
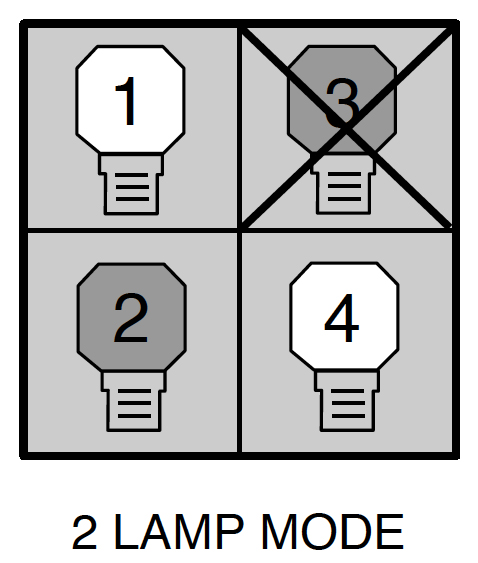
You can set the lamp mode to use either four lamps or two lamps. Using 2 lamps will prolong the life of the projector lamps.
To change the lamp mode:
Press MENU button so the ON-SCREEN Menu will appear.
Using the POINT LEFT/RIGHT button move to SETTING. Press SELECT button.
A second dialog screen appears.
Press the POINT DOWN button to move to LAMP MODE.
4 lamps mode using all lamps. Picture will become brighter.
2 lamps mode using only 2 lamps. Picture will become darker
NOTE: You must wait 90 seconds after changing the Lamp Mode before changing it again.
Tips to make your Sanyo POA-LMP42 lamps last longer
Extend the life of your newly installed Sanyo POA-LMP42 (service part no 610-292-4831) by following these helpful tips:
- Wait at least five minutes before turning the Sanyo PLC-XU10 projector off.
- Don’t operate the projector continuously without letting it stand for at least one hour turned off every 24 hours.
- Cleaning the air filter regularly will also prolong the life of the Sanyo POA-LMP42 and prevent the Sanyo PLC-XU10 projector from overheating.