We're now Screen and Projector! For updated content, visit ScreenAndProjector.com and follow @screenandproj on social media!

If you haven’t heard, Toshiba is being forced to give out refunds through a class-action settlement that claims Toshiba knowingly misrepresented the life of their proprietary, direct current, DLP lamps, which we all know to be extremely short compared with their Philips Lighting counterparts, whom use alternating current in their UHP brand lamps.

Wired staff writer Jose Fermoso writes:

“The class-action lawsuit, Ersler v. Toshiba of America Inc., had a claim that Toshiba ‘knowingly misrepresented the life span of the bulbs in the lamps contained in the lamp assembly component of its 2004 and 2005 DLP television models.’ If true, this would mean the sale of the TVs had brought about a ‘breach of express and implied warranties,’ and a violation of the State’s consumer Fraud Act.”

If you own one of the TVs and know have the right to the claim, you can go to the site created for the settlement at www.dlplampsettlement.com, or you can call the toll-free 1-800-894-1766.

Customers with DLP televisions using generic lamps have all complained that the cost of lamps has been high and the life of the bulbs is all too short. Buying the right brand DLP TV or other rear projection television lamp will be the most cost efficient, which is why we’ve always recommended Philips brand lamps – the inventor of UHP lighting technology.

Via Wired Magazine

Tagged with: , , , , ,

Please read carefully!

FixYourDLP.com has identified a potential hazard that may severely damage your Samsung TV with lamp code BP96-01653A!

Samsung DLP lamp units, model BP96-01653A may fail due to improper insertion. We discovered this while doing some tests on these enclosures. If you don’t install the BP96-01653A firmly into the TV, the housing connector may cause damage to both the ballast and the lamp—or even worse a fire.

You’ll know immediately if there’s something wrong because as soon as you turn your television on, and there’s white smoke emanating from the back of your television.

You should shut your television off immediately and open your lamp door and pull out that lamp. Inspect it and hopefully, you’ve just burned the connectors to the ballast, and not the ballast itself. Our testing has only caused the connectors to burn or melt, but don’t take any chances—we’ve never seen a fire, but we also don’t rule out the possibility of fires either.

Here is a correct installation method and the reasons why a bad installation will cause the connectors to burn:

IMPORTANT SAFETY WARNING

Regarding the installation of a BP96-01653A lamp  unit into a Samsung DLP Television.

Installation

Step 1

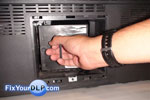
Figure A – Open panel, lamp unit removed

You must install the lamp unit to fit snug with the ballast connector.

To do this, align the lamp unit with the female ballast connector facing down, on the bottom side of the enclosure, then slide the lamp unit until it snaps into place. Check to make sure the unit is firmly inside the television.

Step 2

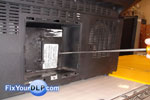
Figure B – Snapping the lamp into place

Snap the wire brackets in tightly by lifting the bottom set up to meet with the top bracket. The wire bracket keeps the lamp and lamp enclosure seated properly to reduce the risk of fire.

when installed properly, the unit should sit secure and slightly elevated from the floor of the compartment.

Step 3

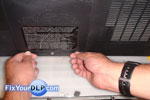
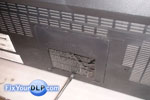
Figure C – Close back panel securely

Once the lamp is firmly secure, close the back panel to engage the blue lamp door sensor switch. Leaving the door open will prevent the television from starting up.


Important Damage or Fire Warning

Because of the nature of the ballast or lamp driver, there is a risk of damage or fire to your television set.

The ballast ignites the lamp with up to 20kV of electricity to arc the gas tube inside. If the ballast does not have a firm connection with the lamp unit, the arc will occur between the ballast connectors (from the ballast to the lamp), which may cause a fire, or melt your plastic connectors. Indications of this are a rapid clicking sound, a burning smell, and/or a non-functioning lamp. If you improperly install the lamp into your television causing a ballast or lamp failure, this may void your warranty for the television or the lamp product.

Tagged with: , , , , , ,

Sony replacement lamp for your Grand WEGA and XBR TVs –
Part Number: XL-2100, otherwise known as the Sony A-1606-034-B.

For the absolute best prices, click to buy this original lamp module complete or as a bare lamp

The Sony XL-2100U lamp is known as a few different part numbers:
XL2100U, XL-2100, XL2100
XL-2100E, XL2100E
XL-2100J, XL2100J
XL-2100C, XL2100C
XL2100U
A1606034B, A-1606-034B, A-1606-034-B, A1606-034B

Yeah, there are all the same part! This was Sony’s way of distinguishing which markets their products where released. For example, the “U” represents United States, while “E” stands for europe, “J” signifies Japan, and “C” is for China

The Sony A-1606-034B is the technical part number. Sony refers to most of its TV parts and accessories with the “A-” designation.

This lamp fits in various Grand WEGA and Bravia Projection LCD (or LCOS) rear projection tvs (RPTVs) from 42″ all the way to 70″ TV sets. Models in particular compatible with this lamp are:

KDF42WE655 (5.8MB PDF manual: check page 16-22 for the lamp replacement instructions)
KF42WE610 (7.7MB PDF manual: check page 11-16 for the lamp replacement instructions)
KF-42WE620 (11.4MB PDF manual: check page 15-19 for the lamp replacement instructions)

KDF50WE655 (5.8MB PDF manual: check page 16-22 for the lamp replacement instructions)
KF50WE610 (7.7MB PDF manual: check page 11-16 for the lamp replacement instructions)
KF-50WE620 (11.4MB PDF manual: check page 15-19 for the lamp replacement instructions)

KDF-60XBR95 (5.4MB PDF manual: check page 13-16 for the lamp replacement instructions)
KDF60XBR950 (5.4MB PDF manual: check page 13-16 for the lamp replacement instructions)
KF60WE610 (7.7MB PDF manual: check page 11-16 for the lamp replacement instructions)

KDF70XBR950 (5.4MB PDF manual: check page 13-16 for the lamp replacement instructions)
KDF-70XBR95 (5.4MB PDF manual: check page 13-16 for the lamp replacement instructions)
XBR950 (5.4MB PDF manual: check page 13-16 for the lamp replacement instructions)

There’s just so much misinformation out there about these TVs. Some TV models have dashes in them, some don’t…to be quite honest, I’m not sure if they should or shouldn’t have dashes. Please chime in with your TV model number as it is exactly written!

BTW, here is a youtube video we made of the disassembly and reassembly of the lamp module:

A step-by-step guide on this can also be found HERE

Remember if you’re not comfortable with the installation, we do recommend saving yourself the headache for disassembly and go with the complete module kit.

Note finding a trustworthy supplier of original lamps is crucial to protecting your Sony set from damage caused by after-market and sub par products. Your Sony lamp module was engineered exclusively with the help of Philips Lighting, the innovator of UHP Technology. Do not substitute any other brand in place of the original. We suggest reading the following articles:

Cloned Philips lamps article

How to extend the life of your lamp

Beware of Third-Party & Generic DLP TV Lamps, Counterfeit, Copy Lamps

Related Content:
Does your Sony TV have a weird color problem? A lot of REDS, or GREENs, or BLUEs? You are not alone!
Need to troubleshoot your TV? Try the FixYourDLP.com Troubleshooter Wizard

Tagged with: , , ,

The Livingstation Projection Display Systems came in two flavors. The 57″ LS57P1 & LS57P2 and the 47″ LS47P1 & LS47P2. Technically speaking, these were identical sets with the exception of the screen size and weight. Epson, one of the pioneers in projection technology entered the consumer projection TV market with these two TV sets. Although they did not catch on with the masses as anticipated, the picture quality is among the best 720P TVs and projectors on the market, even today, three years after the product launch.

Some key features:

  • 100W / 120W 1.0 Philips UHP Lamp (Part Number: V13H010R02 or ELSLP1)
  • 720P, native 19:9 aspect ratio
  • Proven Epson 3LCD Digital Technology w/ DNX w/ upconversion
  • Photo on Demand (View, print, and store digital images)
  • ATSC Tuner

Epson LS57P1-2_LS47P1-2-Brochure
Epson LS57P1-2_LS47P1-2-Quick-Setup-Guide
Epson LS57P1-2_LS47P1-2-User-Manual 136 pages

The Epson Livingstation idea was ahead of it’s time. Epson was thinking of the TV as the center of a home’s media center with memory card readers, a great GUI for viewing images, and even a builtin high resolution photo color printer! Today, in 2010, we see TVs coming on the marketplace with built-in wifi, hard drives, web browsers and applications such as Youtube, Twitter, Facebook, Myspace, NY Times, etc.

One of the great things about 3LCD Technology is it’s virtually zero maintenance requirements. You get a commercial caliber product that only needs it’s lamp replaced every 4,000 to 6,000 hours. If you’ve paid close attention to the technical details on this product, you might ask yourself why Epson claims 10,000+ hours. In hindsight, that number has been revised 🙂

Tagged with: , ,

This article is sponsored by Discount-Merchant.com, the leader in LCOS replacement lamps for your Sony TV. Buy your replacement lamps at rock bottom prices knowing you’re getting genuine parts!

Complete Module
Bare Lamp

Sony has created a bit of confusion with their LCOS TVs and the replacement aftermarket lamps. Not only is there confusion about the actual TV model numbers, but there is a lot of confusion about the lamp part numbers.

To illustrate this point, we will use the replacement lamp part number F-9308-750-0. Wait a minute, Sony also refers to this part as the: Sony XL-2400 lamp. But they went one step further to confuse people with a third part number, the Sony A-1129-776-A. If anyone knows why they’ve done this, please share with us!

So they’ve got three different part numbers:
F-9308-750-0
A-1129-776-A
XL-2400

what TVs are they compatible with?

This is a problem too as some venders show the TV models with dash (“-“) separators and others don’t.

With dashes
KDF-42E2000, KDF-46E2000, KDF-50E2000, KDF-50E2010, KDF-50EA11, KDF-55E2000, KDF-E42A10, KDF-E42A11, KDF-E50A10, KDF-E50A10PRMO, KDF-E50A11, KDF-E50A12U, KF-42E200, KF-50E200, KF-55E200, KFE-42A10, and KFE-50A10

without dashes:
KDF42E2000, KDF46E2000, KDF50E2000, KDF50E2010, KDF50EA11, KDF55E2000, KDFE42A10, KDFE42A11, KDFE50A10, KDFE50A10PRMO, KDFE50A11, KDFE50A12U, KF42E200, KF50E200, KF55E200, KFE42A10, and KFE50A10

I’m sure there are other models numbers, but that’s beside the point.

Apart from the three distinct part numbers, there are variations within them depending on sales region.

I.E.,
XL2400, XL-2400U, XL-2400E, XL-2400J, XL-2400C, XL2400U, XL2400E, XL2400J, XL2400C, A1129776A, A-1129-776A, A-1129-776-A, A1129-776A

XL-2400U, with the U standing for United States

XL-2400E, as in the European markets

This is another strange point. With the Internet being what it is today, you would think a clear answer would have materialized by now…but no….

Reply to this with your feedback with your TV model number and your TV Lamp part number please! We will keep a organized list above to get everyone on the same page!

Tagged with: , , , , ,

This content is password protected. To view it please enter your password below:

Tagged with: , , , , , , , , , ,

We value your contributions!

FixYourDLP.com is the leading resource for consumers with DLP, LCD, and Plasma televisions. We have a few guidelines to follow if you want to help contribute:

  1. Stay on topic
  2. Use correct grammar (We know it’s hard, and we’re always guilty of poor grammar too, but we’re trying to clean this site up!)
  3. Add your post to the correct catagory (Sometimes we see Panasonic ballast questions under Philips Lamps and that just creates more work for us)
  4. Add tags. Tags are quick keywords, or ideas in your post you want to get across. For example if you have an article about Samsung DLP lamps, the tags would contain “samsung, lamps, dlp.” It’s very simple.
  5. If you have a question or an exisiting issue, please post to the forums instead of the blog. The blog is an area for concise information and over the course of the years, people have been posting their problems on comments or creating new posts for things they can find via our search engine.

We’ll leave all of the previous articles and posts as is with little modifications, but hopefully in the future, everyone will learn to use the website correctly.

All posts are reviewed and comments are moderated to keep spam and other unwanted items off of our website. If you need to post photos, you can do so using the media icon above your text area. Photos are extremely helpful in explaining your situation!

PLEASE try and use the forums for all tech support issues.

Thanks!

Tagged with: , , ,

Having trouble with your television and pesky blinking lights?
Don’t know what to do when the lamp light comes on?
Check out our TV Troubleshooting wizard!

Tagged with: ,

Do it yourself lamp installation guides for all major DLP and LCD projection television manufactures like Samsung, Mitsubishi, Sony, and Hitachi.

Tagged with:

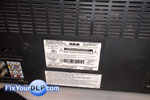
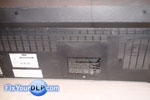
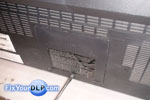
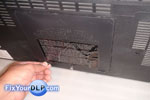
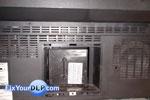
How to replace Samsung lamp enclosure for your DLP TV.

Step 1. First of all, unplug the TV from the wall outlet.

You have a few thousand volts going through your ballast, be very careful!

It’s also a good idea to let the TV cool down for a good 15-20 minutes as the bulb itself can get extremely hot.
Locate the lamp enclosure door; it’s usually at the back of your television.


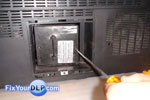
Step 2. There is a screws on the bottom of the lamp door, remove them using a Philips screw driver.

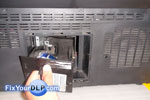
Step 3. Take the lamp door out by dismounting it from the buttom.

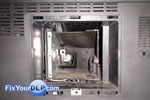
Step 4. inside you’ll find the lamp enclosure.

Step 5. On the side of the plastic enclosure there is a screw that secures the enclosure, uninstall it with a Philips screwdriver.

Step 6. Pull it out the old enclosure from your TV and slide in the new one.


Step 7. Reinstall the screw on the lamp enclosure.

Step 8. Place the lamp door back in its place.

Step 9. Secure it tightly with the screws on the buttom of the door.

Tagged with: , , ,
Join the discussion on Facebook! All your questions, answered! The Screen & Projector Group