We're now Screen and Projector! For updated content, visit ScreenAndProjector.com and follow @screenandproj on social media!

Hello there, we continue this week with the Panasonic manuals set.

Stayed tuned for more TV owner’s manual from Fixyourdlp.com

You can download or view them here:

Panasonic  PT-43LC14, PT-50LC14, PT-60LC14 Click here.

Panasonic  PT-43LCX64, PT-50LCX64, PT-60LCX64 Click here.

Panasonic  PT-44LCX65, PT-52LCX65, PT-61LCX65, PT-52LCX35, PT-61LCX35 Click here.

Panasonic  PT-50LC13, PT-60LC13 Click here.

Panasonic PT-50LCX63, PT-60LCX63 Click here.

Panasonic PT-52LCX15 Click here.

Tagged with: , ,

Today we are going to include a bonus manual for the JVC TV’s.

Stayed tuned for more TV owner’s manual from Fixyourdlp.com

You can download or view them here:

HD-52G787, HD-56G787, HD-61G787, HD-52G887, HD-56G887, HD-61G887, HD-70G887 Click here.

HD-52G456, HD-55G466, HD-55G456, HD-61Z456 Click here.

HD-52G586, HD-52G576, HD-52G566 Click here.

HD-52G886, HD-52G786, HD-56G886, HD-56G786 Click here.

HD-61Z585, HD-52Z585, HD-61Z575, HD-52Z575 Click here.

HD-56FH96, HD-61FH96, HD-70FH96 Click here.

HD-70G886, HD-61Z886, HD-61Z786 Click here.

HD-P61R1U, HD-P70R1U Click here.

Tagged with: ,

Samsung TV Owner’s Manuals

samsung_logo

Hello again, this week’s owner’s manuals are for the Samsung DLP TVs. All of the Samsung manuals are available in PDF format.

Stayed tuned for more TV owner’s manual from Fixyourdlp.com

You can download or view them here:

  • Samsung HL-T5656W, HL-T6156W, HL-T6756W Click here.
  • Samsung HL-S4266W, HL-S4666W, HL-S5066W, HL-S5666W, HLS6166W Click here.
  • Samsung HL-T5055W, HL-T5655W Click here.
  • Samsung HL-R4266W Click here.
  • Samsung HL-S5087, HL-S5687W, HL-S6187W Click here.
  • Samsung HL-R5688W Click here.
  • Samsung HL-P4667W, HL-P5067W, HL-P5667W, HL-P6167W Click here.
  • Samsung HL-S5086W, HL-S5686W, HL-S6186W Click here.
  • Samsung HL-R4264W, HL-R4264W, HL-R5064W, HL-R5664W, HL-R6164W Click here.
  • Samsung HL-R5078W, HL-R5678W, HL-R6178W, HL-R7178W Click here.
  • Samsung HL-R5668W, HL-R6168W, HL-R6768 Click here.
  • Samsung HL-R4656W, HL-R5056W, HL-R5656W, HL-R6156W Click here.
  • Samsung HL-P4663W, HL-P5063W, HL-P5663W, HL-P6163W Click here.
  • Samsung HL-R4667W, HL-R5067W, HL-R5667W, HL-R6167W, HL-R6767W Click here.
  • Samsung HL-R4262W, HL-R4662W, HL-R5062W, HL-R5662W, HL-R6162W Click here.
  • Samsung HL-R4677W, HL-R5677W Click here.
  • Samsung SP43L2HX, SP50L2HX, SP61L2HX, SP46L5HX, SP56L5HX, Click here.
  • Samsung HL-M4365W, HL-M5065W, HL-M437W, HL-507W, HL-M617W Click here.
  • Samsung HL-T5656W, HL-T6156W, HL-T6756 Click here.
  • Samsung HL-N467W1, HL-N567W1, HL-N4365, HL-N5065W1, HL-N437W1, HL-N507W1, HL-N617W1 Click here.
  • Samsung HL-T5089S, HL-T5689S, HL-T6189S Click here.
  • Samsung HL-T7288W Click here.

The importance of authentic

It’s important that you install an OEM lamp and avoid a generic, compatible lamp.

Knock-off, compatible generic lamps may seem like a bargain in the beginning. They actually cost more in the long run since they can damage the color wheel and ballast mechanisms in your RPTV. They also give off poor light, are prone to messy explosions and actually have a shorter life.

We recommend purchasing from an Authorized Philips dealer such as Discount-Merchant.com to insure that you are receiving a genuine Philips brand replacement lamp. Beware of knock-off and counterfeit Philips lamps floating around in the market.

There are also health concerns associated with these lamps. Generic lamps are made with toxic substances that can compromise your family’s health. Read more about the dangers of Krypton-85.

When you purchase an OEM replacement lamps you’re guaranteed the best lamp for your RPTV.


Tagged with: , , ,

This is an in depth look at the Mitsubishi Mitsubishi 915P043010 replacement lamp module. It’s worth noting, the lamp unit is compatible with the 52″ and 62″ Series DLP television sets (WD-52530, WD-52531, WD-62530, and the WD-62531).

Here are some cool 3D images for the housing and lamp combination:

You can see the cage and lamp, but no connector here!


Awesome pic!

The original bare lamp inside this enclosure was manufactured by Matsushita and has the following stamped on the lamp:

HS130AR10-1R UHP 132W-75V

FixYourDLP.com does not recommend Matsushita (Panasonic) replacement lamps, EVEN THOUGH this would be the original replacement lamp. We recommend the Philips replacement lamp in this case as there have been many, many, many issues with this lamp. Discount-Merchant.com carries the recommend replacement part to ensure optimal brightness and better than OEM reliability. There are countless forums and usergroups online with class action attempts against Matsushita for their defective or short life lamps.

Here’s some boring, plain old images of the enclosure:

Mitsubishi 915P043010 Enclosure only

Mitsubishi 915P043A10 Overview of Lamp Housing

The suggested replacement lamp is distributed by Discount-Merchant.com.

Here are some pictures of this lamp.

Philips replacement lamp for the Mitsubishi 915P043010
Mitsubishi replacement lamp by Philips

We have the replacement step-by-step instructions as well as video for this in our GUIDES section of the site.

Please post your comments!

Tagged with: , , , , , ,

This week we are proud to provide you with another set of Owners for you Zenith or LG projection TV’s.

For the D60WLCD TV you can downloaded or view it here.

For the D52WLCD TV you can downloaded or view it here.

For the E44W46LCD, E44W48LCD, M52W56LCD TV you can downloaded or view it here.

Stayed tuned for more manuals and new articles next week.

Tagged with: , ,

Visit the FixYourDLP forum!

Get answers to your questions and help from experts when you visit our forum

Tagged with: , , ,

This week we are providing the Toshiba Service manual for the DLP’s TV. This manual is normally used for technicians to repair the TV’s specified below. Models: 50HM67, 57HM67, 65HM67, 57HM117/167, and 65HM117/167. You can downloaded or view it here. Stayed tuned for more manuals.

Tagged with: , ,

Here is a service manual for many Akai Rear Projection TV’s

You can download it or view it here.

http://www.fixyourdlp.com/blog/manuals/AKAI/AKAI-Service-Manual.pdf

Sony LCD Projection TV Owner’s Manuals

sony_logo

We’ve got a lot of television manuals for you to check out. This set is a compilation of Sony TV manuals we’ve found over the years. All of them are available for download in PDF format.

You can download or view them here:

  • Sony KDF-42WE655, KDF-50WE655, KDF-55WF655, KDF-60WF655 Click here.
  • Sony KDF-60XBr950, KDF-70XBR950 Click here.
  • Sony KF-42WE610, KF-50WE610, KF-60WE610 Click here.
  • Sony KF-42WE620, KF-50WE620 Click here.
  • Sony KDS-R50XBR1, KDS-R60XBR1 Click here.
  • Sony KDS-50A2000, KDS-55A2000, KDS-60A2000 Click here.
  • Sony KDS-50A3000, KDS-55A3000, KDS-60A3000 Click here.
  • Sony KDS-50A2020, KDS-55A2020, KDS-60A2020 Click here.
  • Sony KDS-50XBR800, KDS-60XBR800 Click here.
  • Sony KDS-60DX100 Click here.
  • Sony KDF-E55A20, KDF-E60A20 Click here.
  • Sony KDF-WF655, KDF-XS955 Click here.
  • Sony KDF-55XS955, KDF-60XS955 Click here.
  • Sony KL-37W1U, KL-50W1U Click here.
  • Sony KDF-50E2000, KDF-50E2010 Click here.
  • Sony KDF-42E2000, KDF-46E2000, KDF-50E2000, KDF-55E2000 Click here.
  • Sony KDF-E42A10, KDF-E50A10 Click here.
  • Sony KDS-50A2020, KDS-55A2020, KDS-60A2020 Click here.
  • Sony KL-W7000, KL-W9000 Click here.
  • Sony KF-50XBR800, KF-60XBR800 Click here.
  • Sony KDS-R50XBR1, KDS-R60XBR1 Click here.
  • Sony KDS-50A2000, KDS-55A2000, KDS-60A2000 Click here.
  • Sony KDF-42/50 WE655, KDF-55/60 WF655, KDF-55/60 XS955 Click here.
Tagged with: , ,

Step 1.- Before you start doing anything, unplug the TV from the wall outlet. There are a few thousand volts going through your ballast, be very careful! It’s also a good idea to let the TV cool down for at least 15-20 minutes as the bulb itself can get extremely hot and you can severely burn your hand.

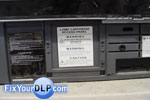
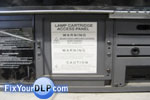
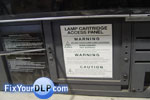
Step 2.- On the front of your TV locate the lamp door below the TV screen.


Use a Philips screw driver to unlock it and remove it.


 Step 3.- Inside you’ll be able to find the lamp enclosure.

Uninstall the two screws holding the enclosure in place.


Step 4.- Pull it out from your TV using the metal handle.


The inside will look something like this.


Step 5.- Place the new enclosure inside & secure it in place using the screwdriver.


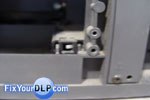
Step 6.- Place the lamp door before trying to turn the TV, that’s because there is a white switch that needs to be pressed in order to turn on.


Step 7.- Reinstall the screw on the lamp door and your finished.


Tagged with: , , , ,
Join the discussion on Facebook! All your questions, answered! The Screen & Projector Group