
Replace the Sony VPL-AW10 projector lamp
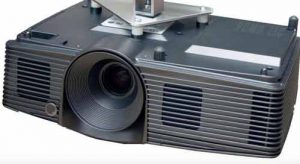
 Our guide shows you how easy it is to replace the Sony VPL-AW10 projector lamp.
Be sure to invest in an authentic Sony VPL-AW10 projector lamp. Don’t settle for anything but the best for your Sony VPL-VW40 projector and install an authentic projector lamp. When buying look for the seal of approval — don’t get caught with a counterfeit lamp. They have shorter lamp and are more toxic due to the substitute materials used by counterfeit manufacturers. These lamps often don’t work properly with the sensitive electronics in your projector and are prone to explosions. Keep your projector working properly and invest in an authentic projector lamp.
When to replace?
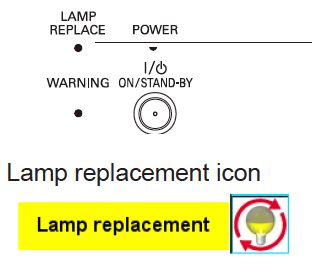
 When Sony VPL-AW10 projector lamp is reaching end of life, the Lamp/Cover light will continue to flash red in 3 second intervals. The message “Please replace the Lamp/Filter” will also start flashing on screen. If the projector lamp dims or the color looks strange, change it immediately. Sony recommends replacing the air filter at the same as replacing the lamp.
Preparations:
- Unplug the AC power cord on the Sony VPL-AW10 projector.
- Your Sony VPL-AW10 projector uses the Sony LMP-H160 projector lamp. Before installing the lamp, let the projector cool for at least 40 minutes. It should be cool to the touch. Don’t rush the cooling as these projectors operate using extremely high temperatures and you run the risk of a serious burn.
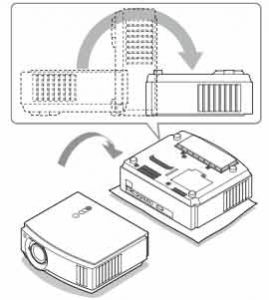
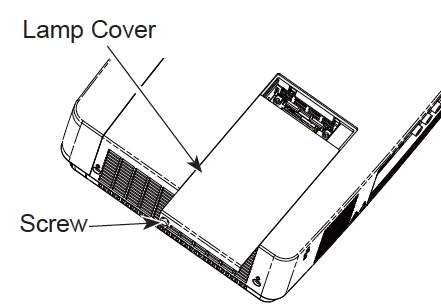
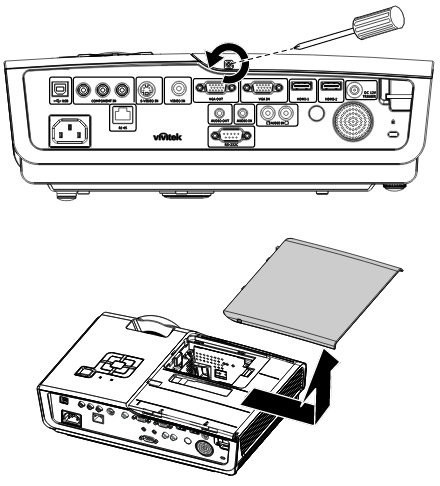
- The projector lamp cover is on the bottom of the projector so you will need to turn it over. Put down a soft cloth on a flat surface to prevent the projector getting scratched. Turn the projector over gently. Don’t lean on the projector and make sure the surface is flat and stable.
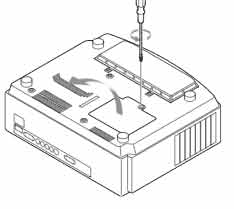
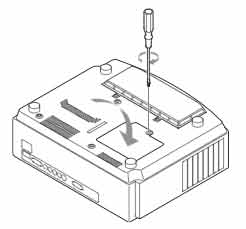
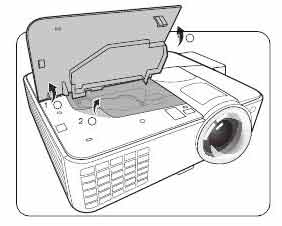
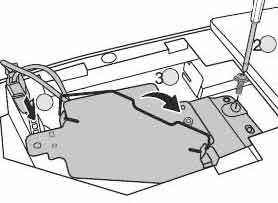
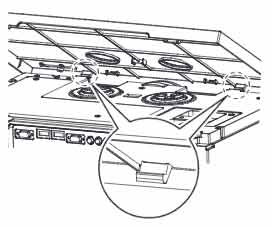
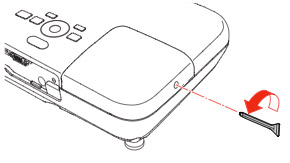
 Using a Philips screwdriver, loosen the screw holding the projector lamp cover in place. Slide the projector lamp cover. Put it to one side.
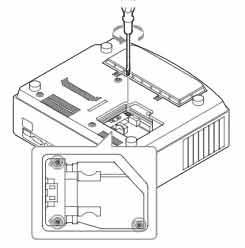
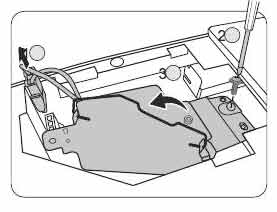
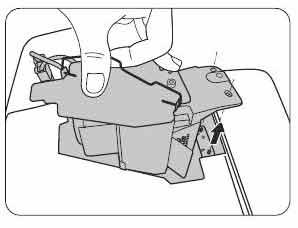
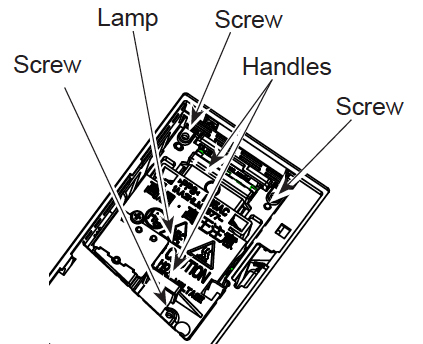
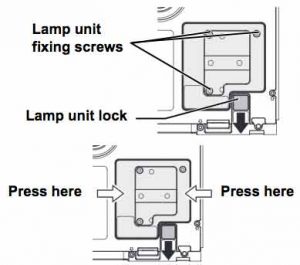
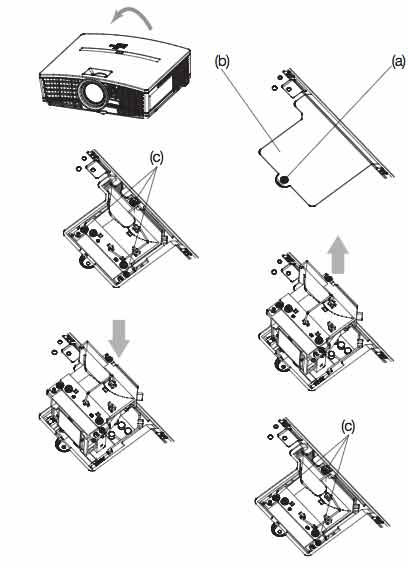
Loosen the 3 screws on the Sony LMP-H160 projector lamp using a Phillips screwdriver. 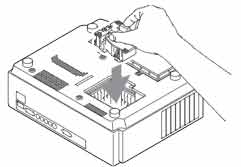
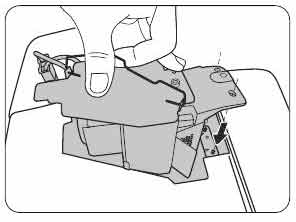
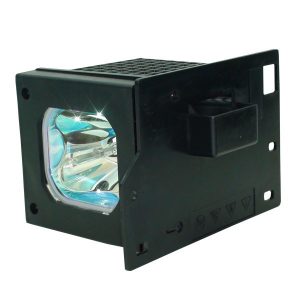
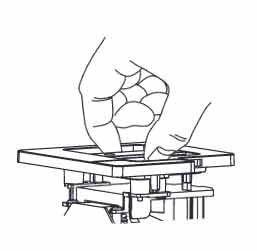
Grab the wire handle on the Sony LMP-H160 projector lamp and gently pull the lamp straight out. Take care not to bang the lamp as you can cause the bulb to break.
 Also don’t touch the actual bulb in the new lamp as oily fingerprints can burn a black spot on the lamp when it heats up. NOTE: The Sony LMP-H160 projector lamp contains mercury and should not be thrown into regular garbage. Recycle this lamp!
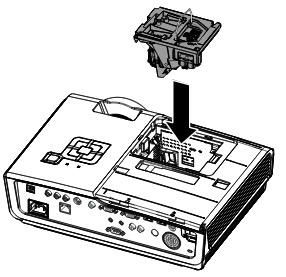
Lift up the handle and slowly lower the Sony LMP-H160 projector lamp into the projector. Push it in securely until it reaches the end. Tighten the three screws on the lamp. Replace the lamp cover.
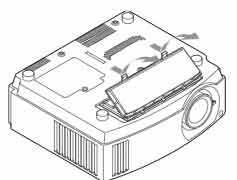
- Remove the filter holder. The air filter will be inside the holder. Don’t touch the fan inside as this can damage the projector.

- Remove the old Sony VPL-AW10 filter and put it to one side. Attach the new air filter so that is fits into the 10 claws properly on the holder.
- Aligning the air filter with the shape of the filter holder will make it easier to install.

- Be sure to put the air filter holder back into the projector aligned up properly. If not, the projector will not turn back on!
- Wipe off any dust. Put the projector back in its original position.
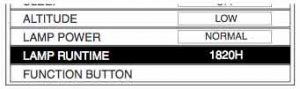
Resetting the Sony VPL-AW10 projector lamp
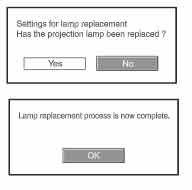
- To reset the projector lamp timer, plug the AC power cord back into Sony VPL-VW40 projector
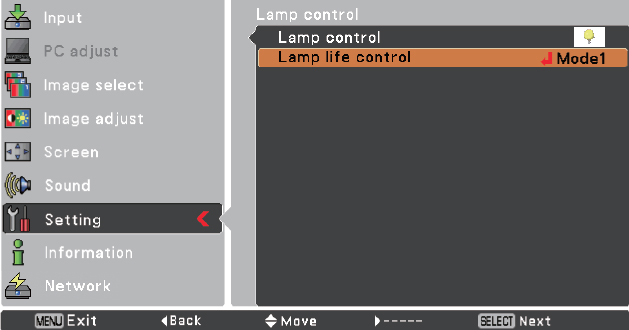
- Using the remote, scroll down to the Setup Menu.
- Press Enter.
- A Lamp Setting message will appear asking you if the projector lamp has been replaced.
- Click on Yes.
- You will see a confirmation message and the Projector Lamp Timer will be automatically reset to zero.
You can extend the life of the Sony LMP-H160 projector lamp by always making sure the filter is clean and there is enough airflow around the projector. Learn how to get a longer projector lamp life with top tips for extending DLP projector lamp life.
 Change the BenQ DX818ST projector lamp
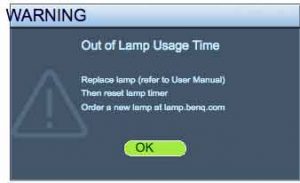 A flashing red light BenQ DX818ST projector lamp is reaching end of life. You’ll see four warning screens on the projector screen. You may also notice the image

 When it’s time for a new Hitachi 50V720 TV lamp, use this guide to help you through the installation.
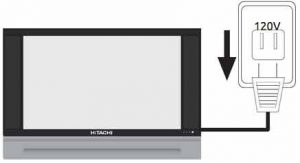
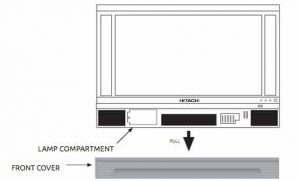
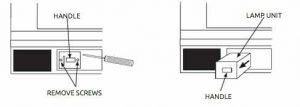
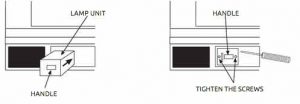
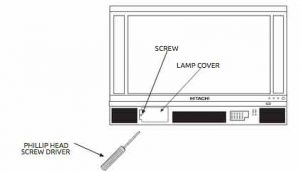
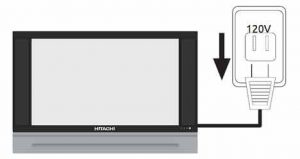
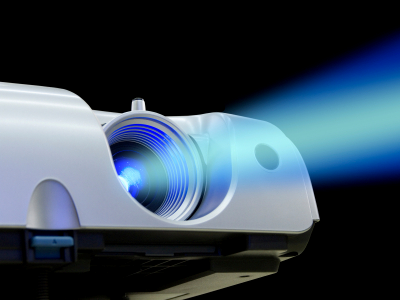
 Table for lumens
 This instructional guide shows you how to install a new Panasonic Panasonic PT-AE1000 projector lamp.
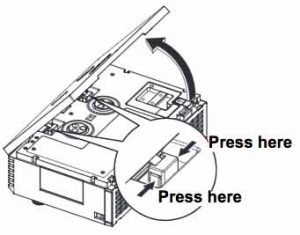

 To finish the installation:
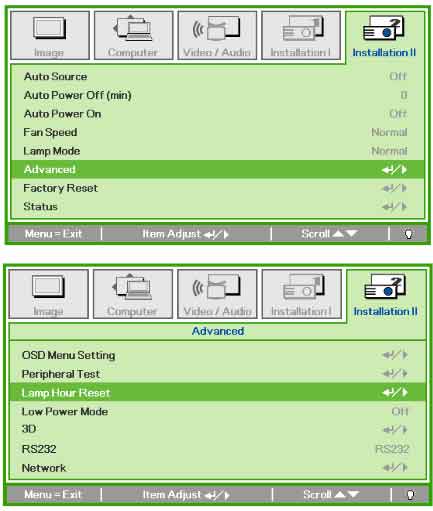 Resetting the projector lamp timer without changing the lamp can make it work beyond its recommended hours and cause harm to your Vivitek D965 projector.
 Loosen the lamp cover screw and slide the 500 projector lamp cover off.
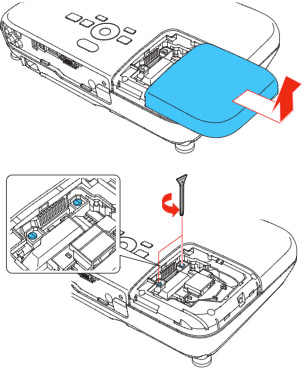 Loosen the two screws holding the
 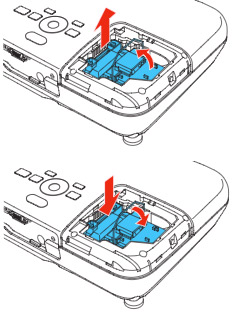 Grab the
 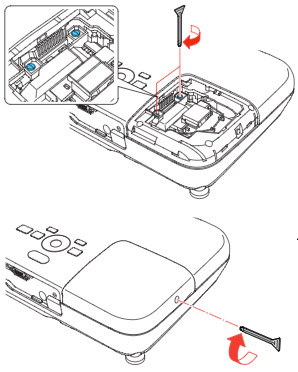 Tighten the screws on the new
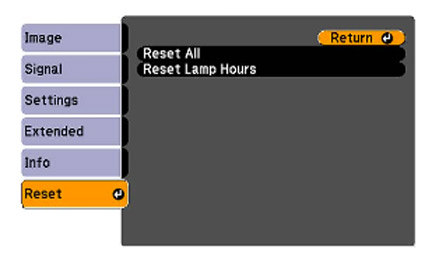


 The arc tube in counterfeit lamps is usually no filled with the proper gas. Authentic projector lamps use a mercury-argon mixture but this patented technology not available to counterfeit manufacturers. Most counterfeit manufacturers substitute
  Your projector emits an extremely bright lamp that does have some UV rays. All PHILIPS projector lamps have special coated reflectors to reduce harmful rays and protect your eyes if you do look into the projector. Without this coating, looking into the projector lamps is similar to looking directly into the sun.