Install a replacement Vivitek D963HD projector lamp
 Follow this guide when it’s time to replace the Vivitek D963HD projector lamp.
Warning signs
When you notice the Vivitek D963HD Power LED flashing 5 times consecutively, your projector lamp is reaching its end of life and needs to be replaced immediately.
Invest in authentic
Be sure the purchase an authentic projector lamp for your Vivitek D963HD projector. Avoid knock-off counterfeit lamps. Not only do they have a shorter lamp life than original lamps they also been created with toxic substitues such as Krypton-85. Because they are prone to explosions counterfeit lamps often damage the sensitive electronics in your projectors. Invest in authentic.
Find this lamp sold on Amazon by this authorized dealer:
Replacement Lamp with Housing for VIVITEK5811116701-S with Philips Bulb Inside
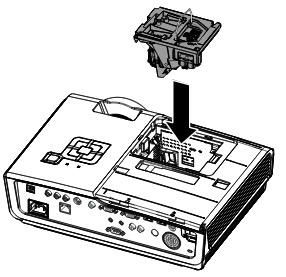
Replacing the projector lamp
The Vivitek D963HD projector uses the Vivitek 5811116701-SVV projector lamp. Before changing the Vivitek D963HD projector lamp:
- Reduce the risk of electrical shock by disconnecting the power cord on the Vivitek D963HD projector.
- Reduce the risk of severe burns by allowing the projector to cool for at least 45 minutes.
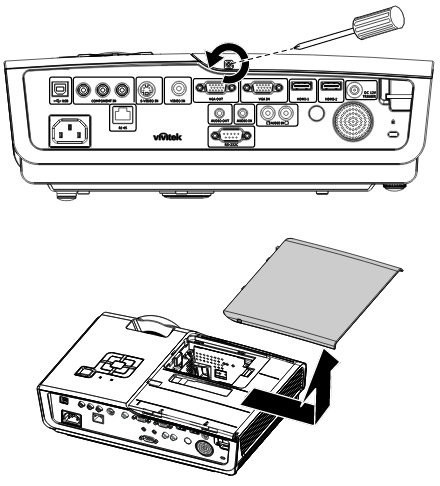

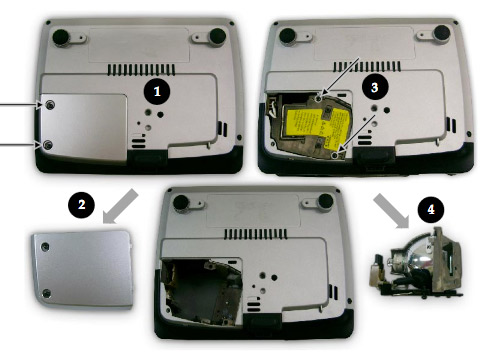
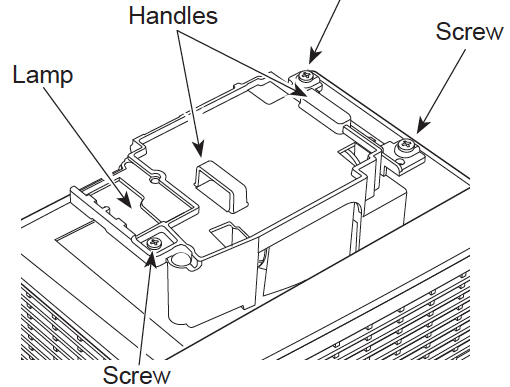
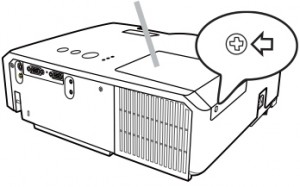
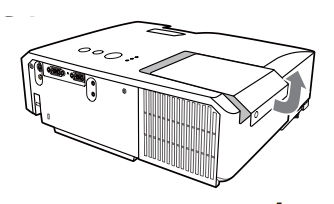
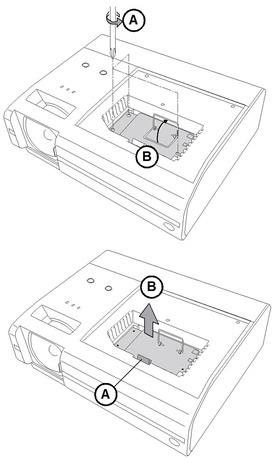
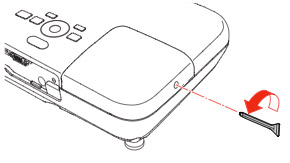
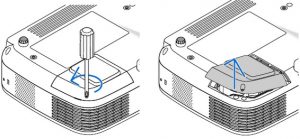
- Loosen the captive screw holding the lamp cover in place.
- Slide the lamp cover off and place it to one side.
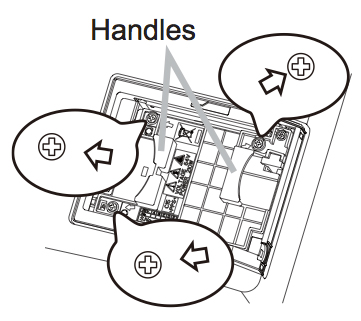
- Remove the tw0 screws holding the Vivitek 5811116701-SVV projector lamp in place.
- Remove the two captive screws holding the lamp cover place.
- Remove the lamp cover and place it to one side.
- Remove the three screws holding the Vivitek 5811116701-SVV projector lamp in place.
- Click up the wire handle and gently pull out the Vivitek 5811116701-SVV projector lamp. Pulling too quickly can cause the projector bulb to shatter. Learn what to do should the bulb shatter.
NOTE: The Vivitek 5811116701-SVV projector lamp contains mercury and should not be thrown into regular garbage. Recycle your used lamps!
 To finish the installation:
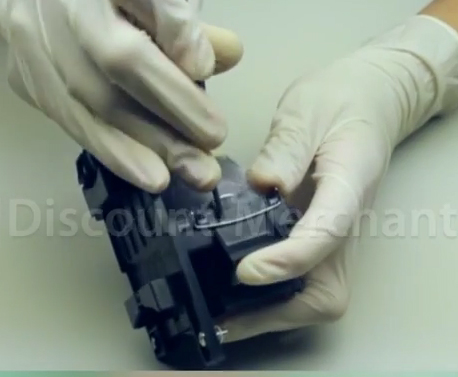
- Take the new Vivitek 5811116701-SVV projector lamp out of its packaging. Lift up the wire handle and gently guide it into the Vivitek D963HD projector.
- Take care not to touch the actual bulb as the oil from your fingers can leave a smudge that will burn into a black spot when the projector heats up.
- Tighten the lamp screw.
- Re-install the Vivitek D963HD projector lamp cover and tighten the screw.
- Reset the total lamp hour timer.
Resetting the Vivitek D963HD Lamp Hour Timer
It’s important to only reset the lamp timer when the Vivitek 5811116701-SVV(5811100760S) projector lamp has been replaced.
Resetting the projector lamp timer without changing the lamp can make it work beyond its recommended hours and cause harm to your Vivitek D963HD projector.
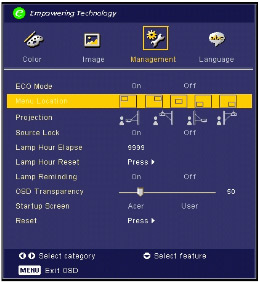
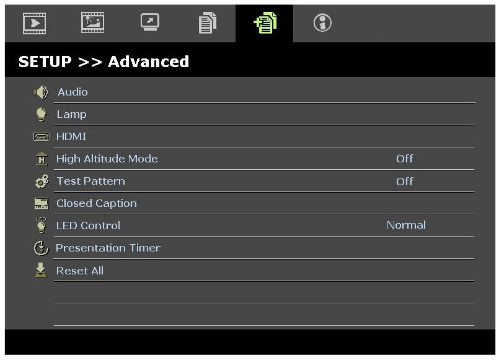
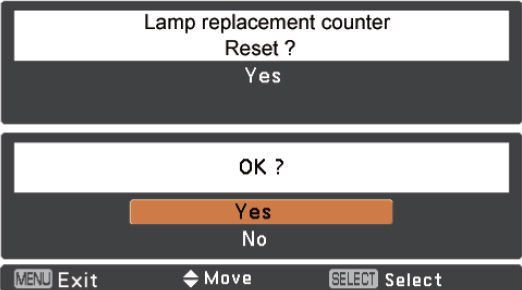
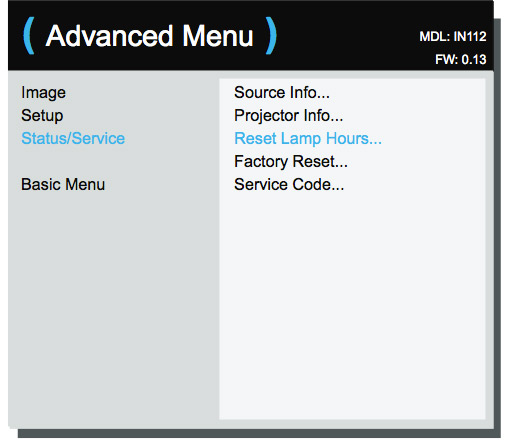
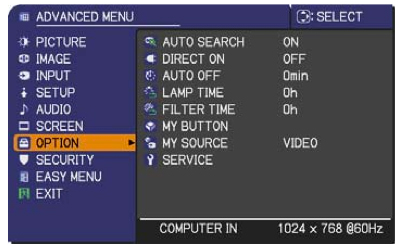
- Press the Menu button to open the OSD menu.
- Press left/right arrow keys to move to the Advanced menu.
- Press up/down arrows to move to the Lamp menu.
- Press Enter.
- Using the or up/down arrow keys to move down to the Reset Lamp Timer menu.
- Press Enter.
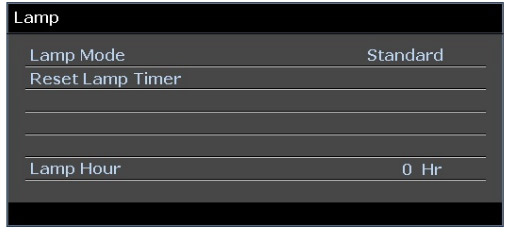 A message will appear saying the Lamp Hour has been reset to zero.
- Press the Menu button to return to the main menu.
Extending the life of the projector lamp:
- Keep your air filters clean to avoid overheating the projector.
- Use the Lamp Power option on the Vivitek D963HD projector and set to Eco Mode to reduce the amount of power used but extend projector lamp life.
- Learn more with Top tips for extending DLP projector lamp life.
 This guide shows you how to replace the Eiki LC-XBL20 projector lamp.
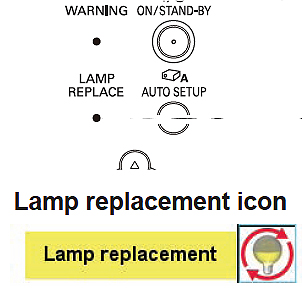
 or the Eiki LC-XBL20 projector. Loosen the screw to remove the cover.
 Install a replacement Infocus IN114 projector lamp using this guide.
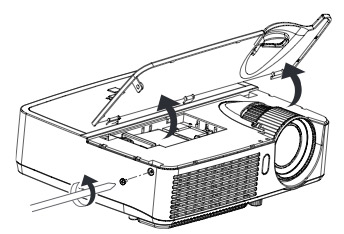

 This guide shows you how to replace the Panasonic PT DZ6700 projector lamp.
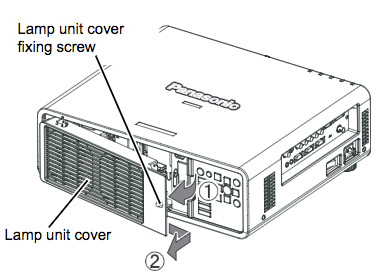 Using a screwdriver, loosen the screw holding the projector lamp cover. Slide the lamp unit cover to the buttons and pull to remove.
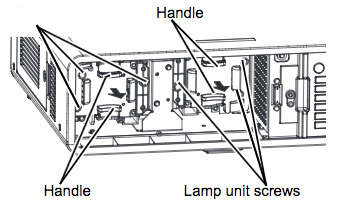
 Loosen the two screws on the outer lamp cover with a Phillips No. 2 screwdriver. These screws cannot be removed. Raise the outer lamp cover using a flat screwdriver or your finger. Keep the outer lamp cover in a safe place.
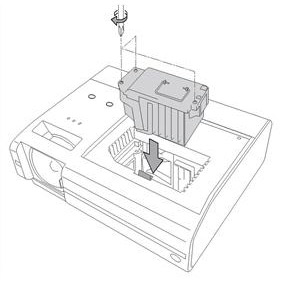
 shows how to replace the Acer PH730 projector lamp.
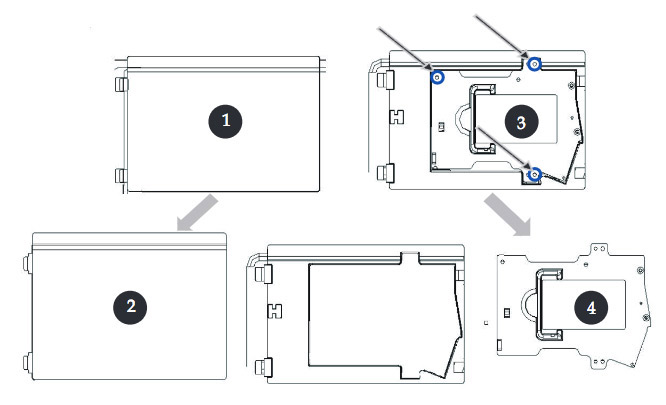
 It’s important to always reset the lamp timer after replacing the projector lamp in your Acer PH730 projector. You want the projector to track how many hours the lamp has been used and send out warning messages when the
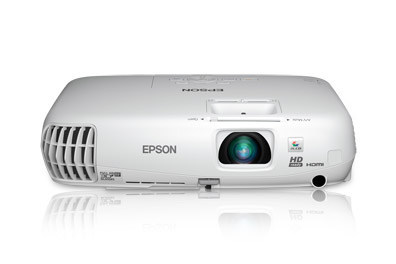
 Loosen the lamp cover screw and slide the 750HD projector lamp cover off.
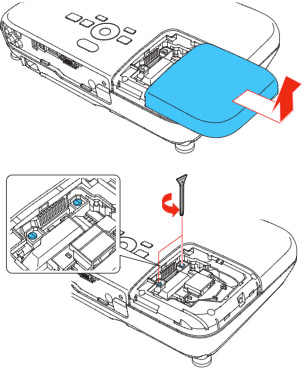 Loosen the two screws holding the
 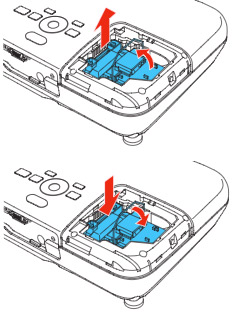 Grab the
 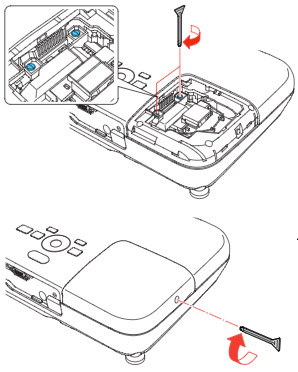 Tighten the screws on the new
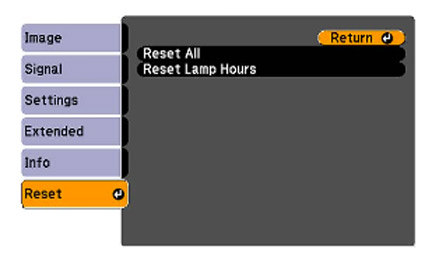
 These instructions show how to change the Dukane I-PRO 8762 projector lamp.
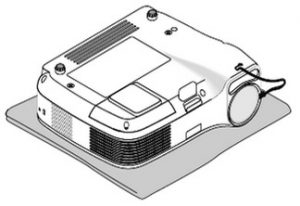
 Loosen the screw holding the projector lamp cover in place. Click the cover to remove the cover.
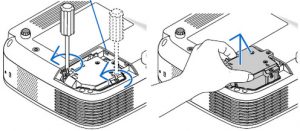 Remove the two screws holding the
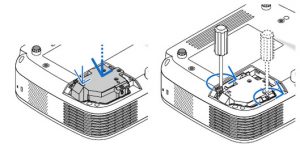
 This guide helps you replace the Acer PD322 projector lamp.