
Change the Sharp XR-10S projector lamp
 This guide shows you for the quickly replace the Sharp XR-10S projector lamp.
When to replace
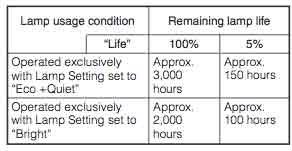 Your Sharp XR-10S projector lamp operates for 3,000 hours in Eco Mode and 2,000 hours when on the Bright setting. When there are only 150 hours left, the projector lamp indicator will start flashing red. Other end of life signs include a deteriorating picture and color quality. When it’s time to replace the lamp, you’ll need model Sharp DT-510.
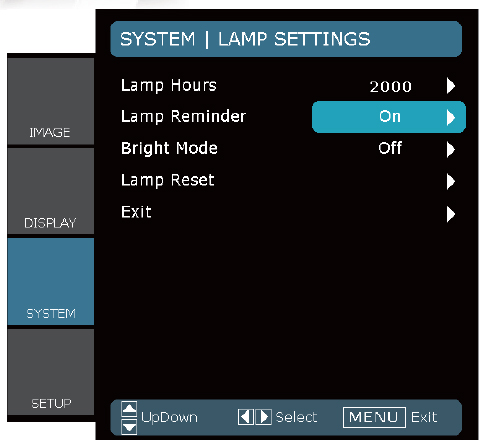
You can see the hours remaining for Lamp Life Status. The remaining hours will be shown on the chart Lamp Usage chart.
Six reasons to invest in authentic
The Internet has been flooded with counterfeit projector lamps claiming to be “compatible” with the Sharp XR-10S projector. For the few dollar you save, these projector lamps bring more problems to the table.
- can damage the sensitive electronics in your projector
- shorter lamp life than original lamps
- no safeguards to protect your eyesight
- created with toxic materials and carcinogenic parts
- prone to explosions
- installing a generic lamp voids your projector’s warranty.
Invest in authentic. Don’t be fooled. How to recognize an authentic projector lamp.
Find this lamp sold on Amazon by these authorized dealers:
- SHARP DT-510 Projector Replacement Lamp with Housing
- Sharp Dt-510 High Quality Compatible Replacement projector Lamp Bulb with Housing
- Sharp DT-510 Replacement Projector Lamp bulb with Housing – High Quality Compatible Lamp
- SHARP DT-510 Projector Replacement Lamp with Housing
Installing the projector lamp
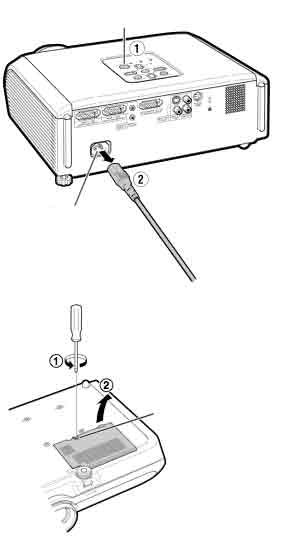
Before replacing the Sharp DT-510 projector lamp follow these important safety tips:
- Press STANDBY/ON on the projector or STANDBY on the remote control to put the projector into standby mode.
- Wait until the cooling fan stops.
- Disconnect the power cord.
- Unplug the power cord from the AC socket.
- Allow the projector to cool down for at least one hour. If should be cool to the touch.
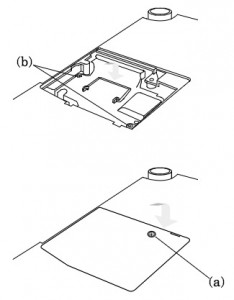
Place the Sharp XR-10S projector onto a soft service and turn over to access the lamp cover. Remove the user service screw holding the projector lamp cover in place. Slide the cover off away from the projector and place it to one side.
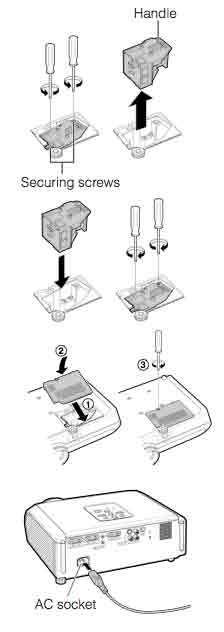 Remove the screws holding the Sharp DT-510 projector lamp in place. Grab the wire handle and gently pull out the lamp.
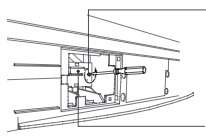
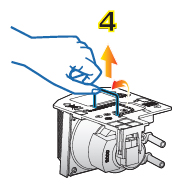
Hold the Sharp DT-510 projector lamp by the handle and pull it in the direction of the arrow. DO NOT tilt it.
Take the new Sharp DT-510 projector lamp and align the tab on the lamp unit cover and place it while pressing the tab to close it. Be careful not to touch the actual bulb as the oil from your fingers left on the lamp will burn black holes onto the lamp that appear on screen.
Note: The used Sharp DT-510 projector lamp contains mercury and should be properly recycled. Don’t throw it into regular garbage.
Fasten the securing screws. Slide the lamp cage cover back on in the direction of the projector. Then tighten the user service screw.
Reset the lamp timer
To reset the Sharp XR-10S projector lamp timer:
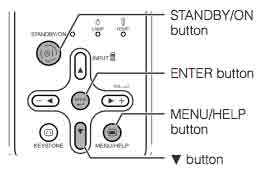
- While simultaneously holding down MENU/HELP, ENTER and the down arrow on the projector.
- Press STANDBY/ON on the projector.
“LAMP 0000H” is displayed, indicating that the lamp timer is reset
Extend the life of the Sharp DT-510 projector lamp:
- Chose the ECO MODE mode to to dim the projector lamp and lower power consumption. This will extend the lamp life by up to 130%.
- Keep your air filters clean to avoid overheating the projector.
- Every 24 hours, turn off the projector and let it stand for 1 hour
- Make sure there is enough airflow around the Sharp XR-10S projector particularly if it’s been permanently mounted.
- Learn more with Top tips for extending DLP projector lamp life.
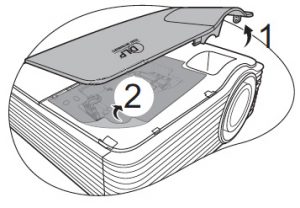
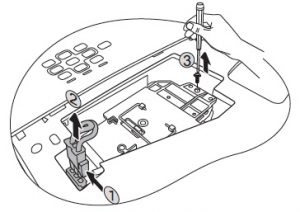
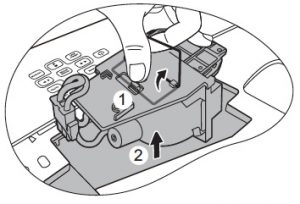
 Don’t call the technician. Follow this easy guide to replace the BenQ MW811 projector lamp.
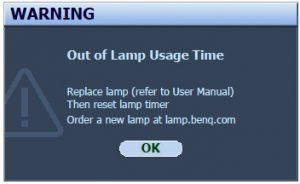 When the BenQ MW811 projector lamp is reaching end of life, three warning messages will appear on screen. The lamp indicator on the projector will start flashing orange. You may notice the image
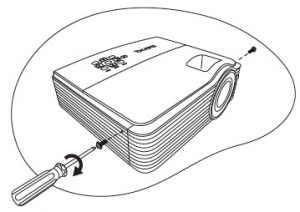

 When the
 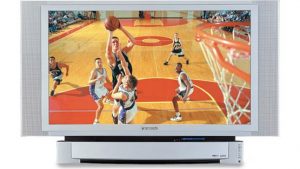 Install a replacement lamp in the Panasonic PT-50LC14 TV using this step-by-step guide.
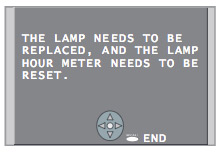 When the Panasonic PT-50LC14 TV lamp has reached end of life, the LAMP indicator light will be lit and a warning sign will appear on screen.
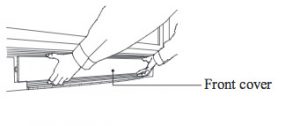 To remove the front cover, please your fingertips under the front cover and gently pull it away from the body of the TV.
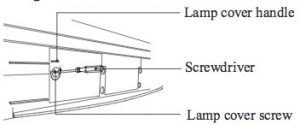
 Loosen the screw holding the
 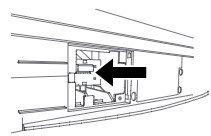 Insert the new lamp unit paying close attention to the direction of the new lamp. Press on the arrow mark making sure insertion is correct. Tighten the lamp unit/cover screw. Reset the lamp timer following the instructions that came with your new lamp.
 Adding multimedia can bring your worship to a new level. Here’s how to find the right church projector for your congregation.
 Lumens
 Resolution
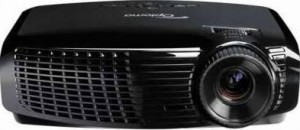 This guide walks you through installing a replacement Optoma Home Theater HD2200 projector lamp.
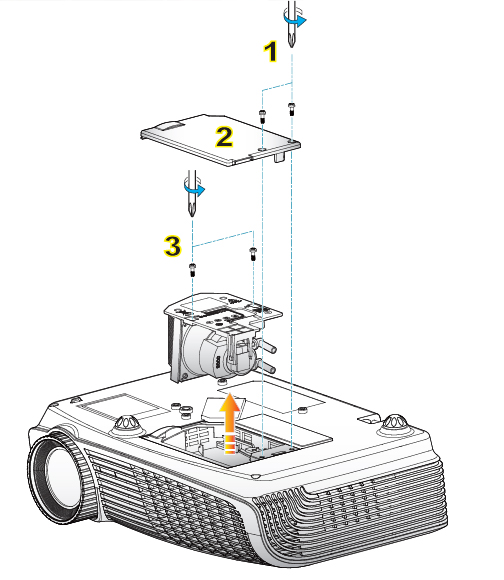
 Learn how to keep a healthy classroom when using a projector.
 Distance and light
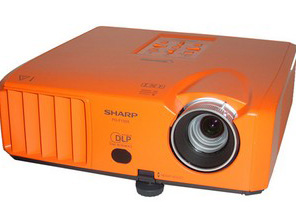 Change the Sharp PG-F150X projector lamp using this step-by-step guide.
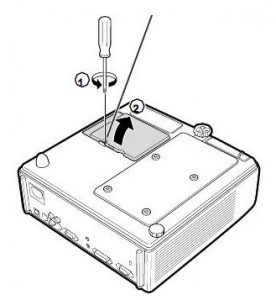 The Sharp PG-F150X projector operates using high temperatures and you can burn yourself badly if you don’t allow the projector to cool down. If should be cool to the touch before installation.
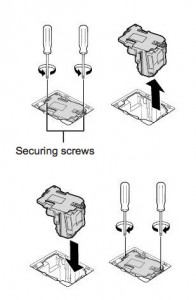 Remove the screws holding the
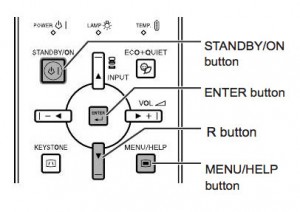
 This guide helps you replace the Mitsubishi LVP-XL1U projector lamp.
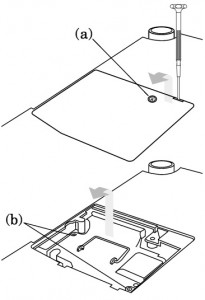 The lamp cover is found underneath the Sanyo LP-Z2 projector. Gently turn it upside, making sure to protect the top of the projector. Using a screwdriver loosen the screw holding the cover in place. Put the cover to one side.
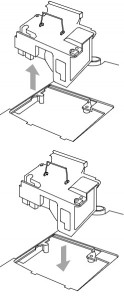
 Once the lamp is in, tighten the screws on the Lamp Assembly.
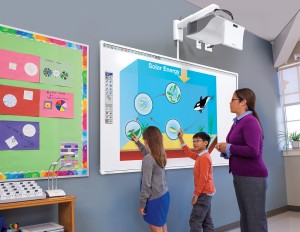
 Don’t stress over needing to change your SMART Board UF55 projector lamp. Our guide shows you how.
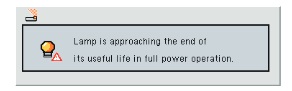 The SMART Board UF55 is an integral part of the SMART Board 600i3 Interactive Whiteboard series. When it’s time to replace the projector lamp, you’ll see a warning message appear on screen. It uses the
 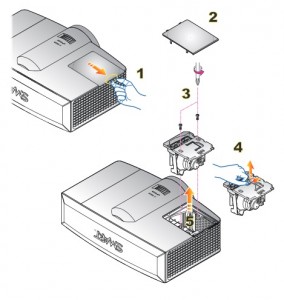 Steps to remove the old projector lamp
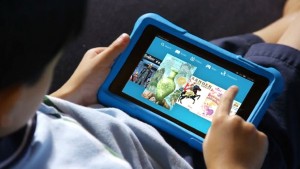 Learn the warning signs of digital eye strain and how to protect your child’s eyesight.
 When staring at a computer screen, tablet or cell phone, we tend to blink less. Since our eyes work harder to see thing closer than in the distance, sitting too close to the small screens can lead to muscle fatigue. Over time the eyes get weaker, more easily tired and strained. This can cause CVS digital eye strain.
 The AOA has put out guidelines for both the classroom and at home to help prevent or reduce digital eyestrain: