Install a new Geha Compact 565+ projector lamp
 Use this guide to replace the Geha Compact 565+ projector lamp.
Go with authentic
Stay away from copycat counterfeits lamps in order to keep your Geha Compact 565+ working properly. Counterfeit lamps will damage the sensitive optics in the projector and has a shorter life particularly since they are likely to explode. Knock offs are also created with toxic materials that pose a health threat. Authentic lamps are safer and come with a money-back guarantee as well as keeping your warranty intact. Avoid counterfeit lamps and go with an authentic Geha Compact 565+ projector lamp!
Find this lamp on Amazon sold by these authorized dealers:
- SpArc Platinum for Geha 60-246697 Projector Replacement Lamp with Housing
- AuraBeam Economy Replacement Projector Lamp for Geha 60-246697 With Housing
- AuraBeam Professional Replacement Projector Lamp for Geha 60 246697 With Housing (Powered by Philips)
End of life
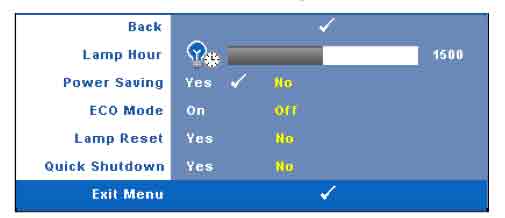
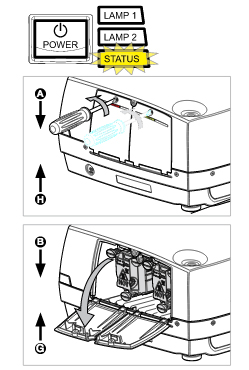
 When it’s time to replace your Geha Compact 565+ projector lamp a warning sign will appear on screen. Replace the lamp immediately when you see this warning. Other warning signs includes a dark image or one with colors that are faded.
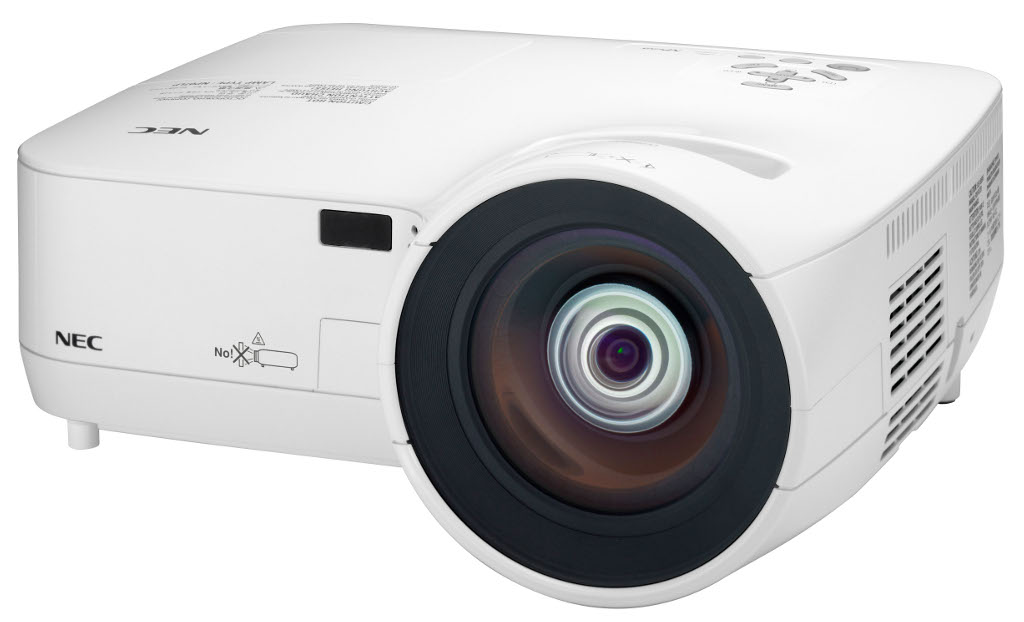
Replacing the Geha Compact 565+ projector lamp
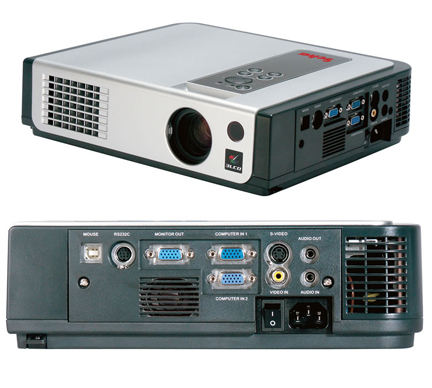
The Geha Compact 565+ uses the Geha 60-246697 projector lamp. Before installation follow these important safety steps:
- Turn off the Geha Compact 565+ projector and unplug the AC cord.
- These projectors operate under high temperatures and there is a risk of burning if the projector has not cooled enough. Allow the Geha Compact 565+ to cool for one hour. It should be cool to the touch.
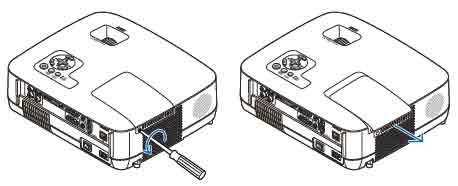
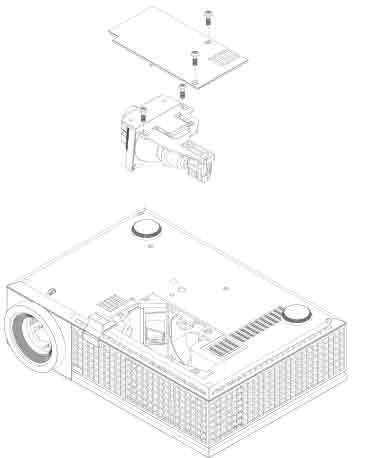
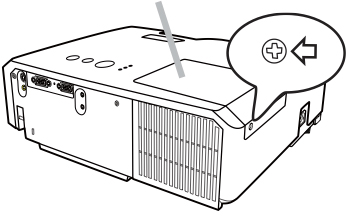
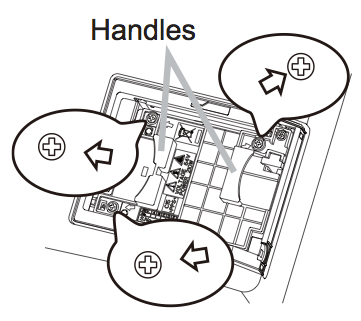
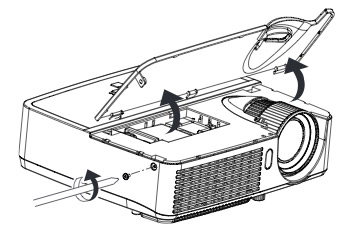
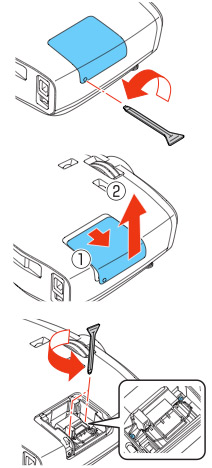
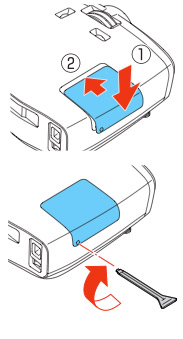
1. Remove the two screws from the cover.
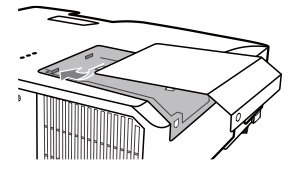
2. Lift the cover off the projector and place it to one side.
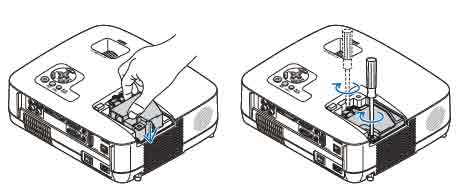
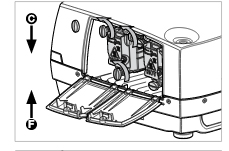
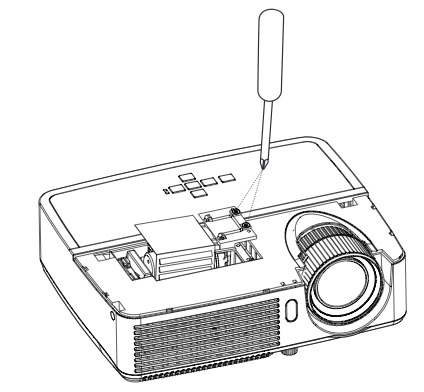
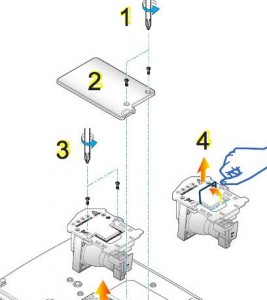
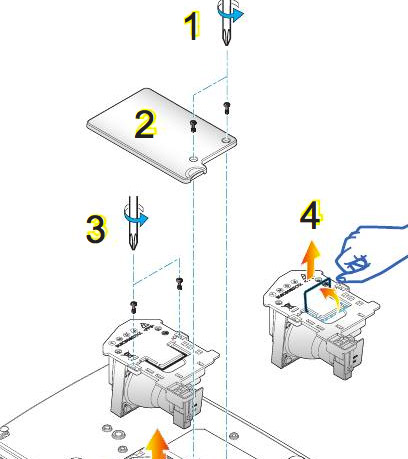
3. Remove the two screws holding the Geha Compact 565+ projector lamp in place. screw from the cover.
3. Lift the wire handle on the Geha 60-246697 lamp and gently pull the lamp up to remove it.
Don’t throw the old Geha 60-246697 into regular garbage as it contains mercury — send it to a local recycling program.
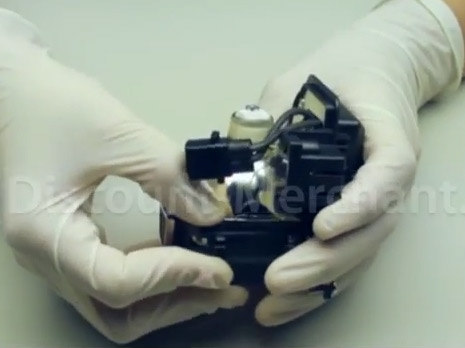
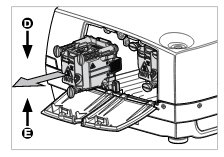
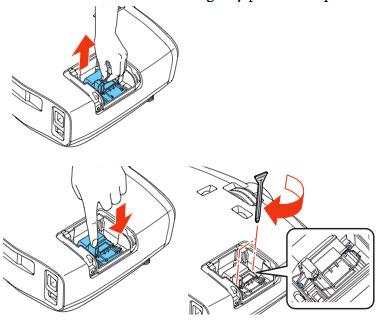
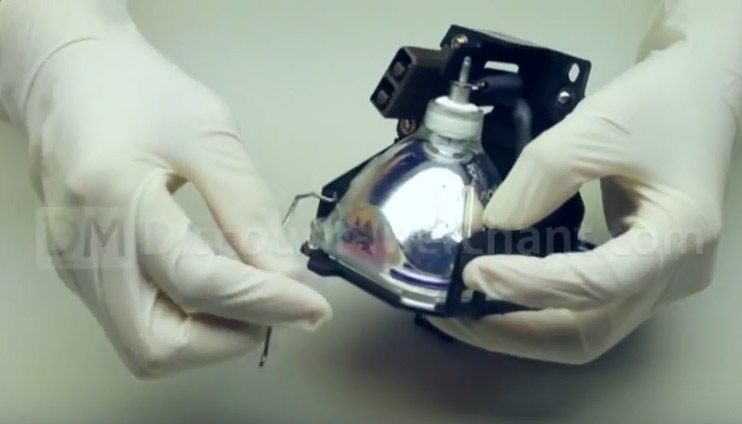
4. Take the new Geha 60-246697 projector lamp using the wire handle. Avoid touching the bare bulb; the oil on your finger can leave a black mark on the lamp affecting the projected image. Tighten the screws on the new Geha 60-246697 projector lamp.
Put the lid back onto the projector. Tighten the screw holding the lid in place. Plug the AC cables back into the projector. Turn the project on so you can reset the lamp timer.
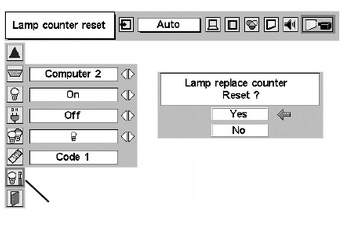
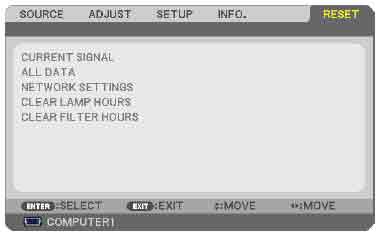
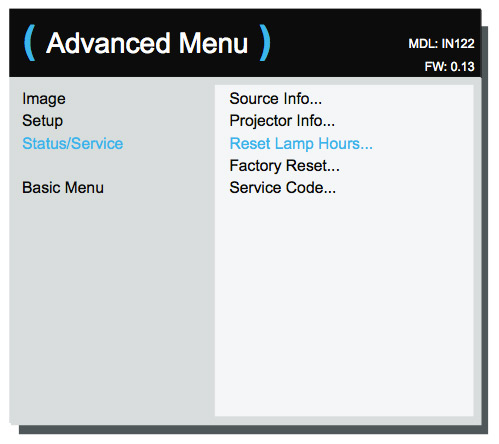
Resetting the projector lamp timer
It’s important to always reset the lamp timer after replacing the projector lamp in your Geha Compact 565+ projector. You want the projector to track how many hours the lamp has been used and send out warning messages when the Geha 60-246697 projector lamp reaches end of life.
To reset the Projector Lamp timer:
- Turn on the projector
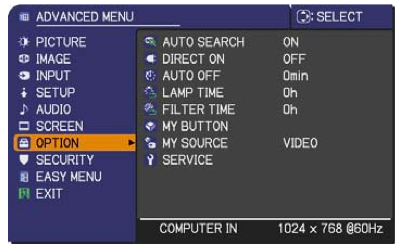
- Press MENU
- Scroll down to OPTIONS
- Choose Lamp Settings. Press ENTER.
- Select Lamp Reset to open an additional dialogue box.
- Select YES. Press Enter
Extending the projector lamp life
- Use the Eco Mode for more lamp hours.
- Keep your air filters clean to avoid overheating the projector.
- Make sure there is enough airflow around the Geha Compact 565+ projector.
- Learn more with Top tips for extending DLP projector lamp life
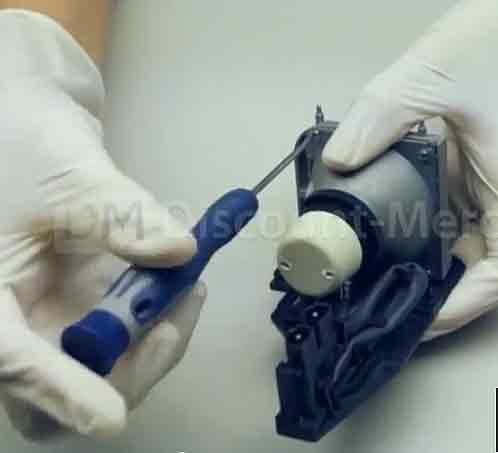
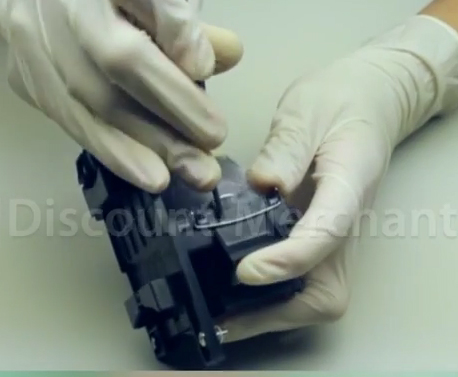
A green alternative
The Geha Compact 565+ projector has the option of just replacing the actual bulb and re-using the plastic cage. A great was to reduce, recycle and reuse. Watch our training video to learn more.