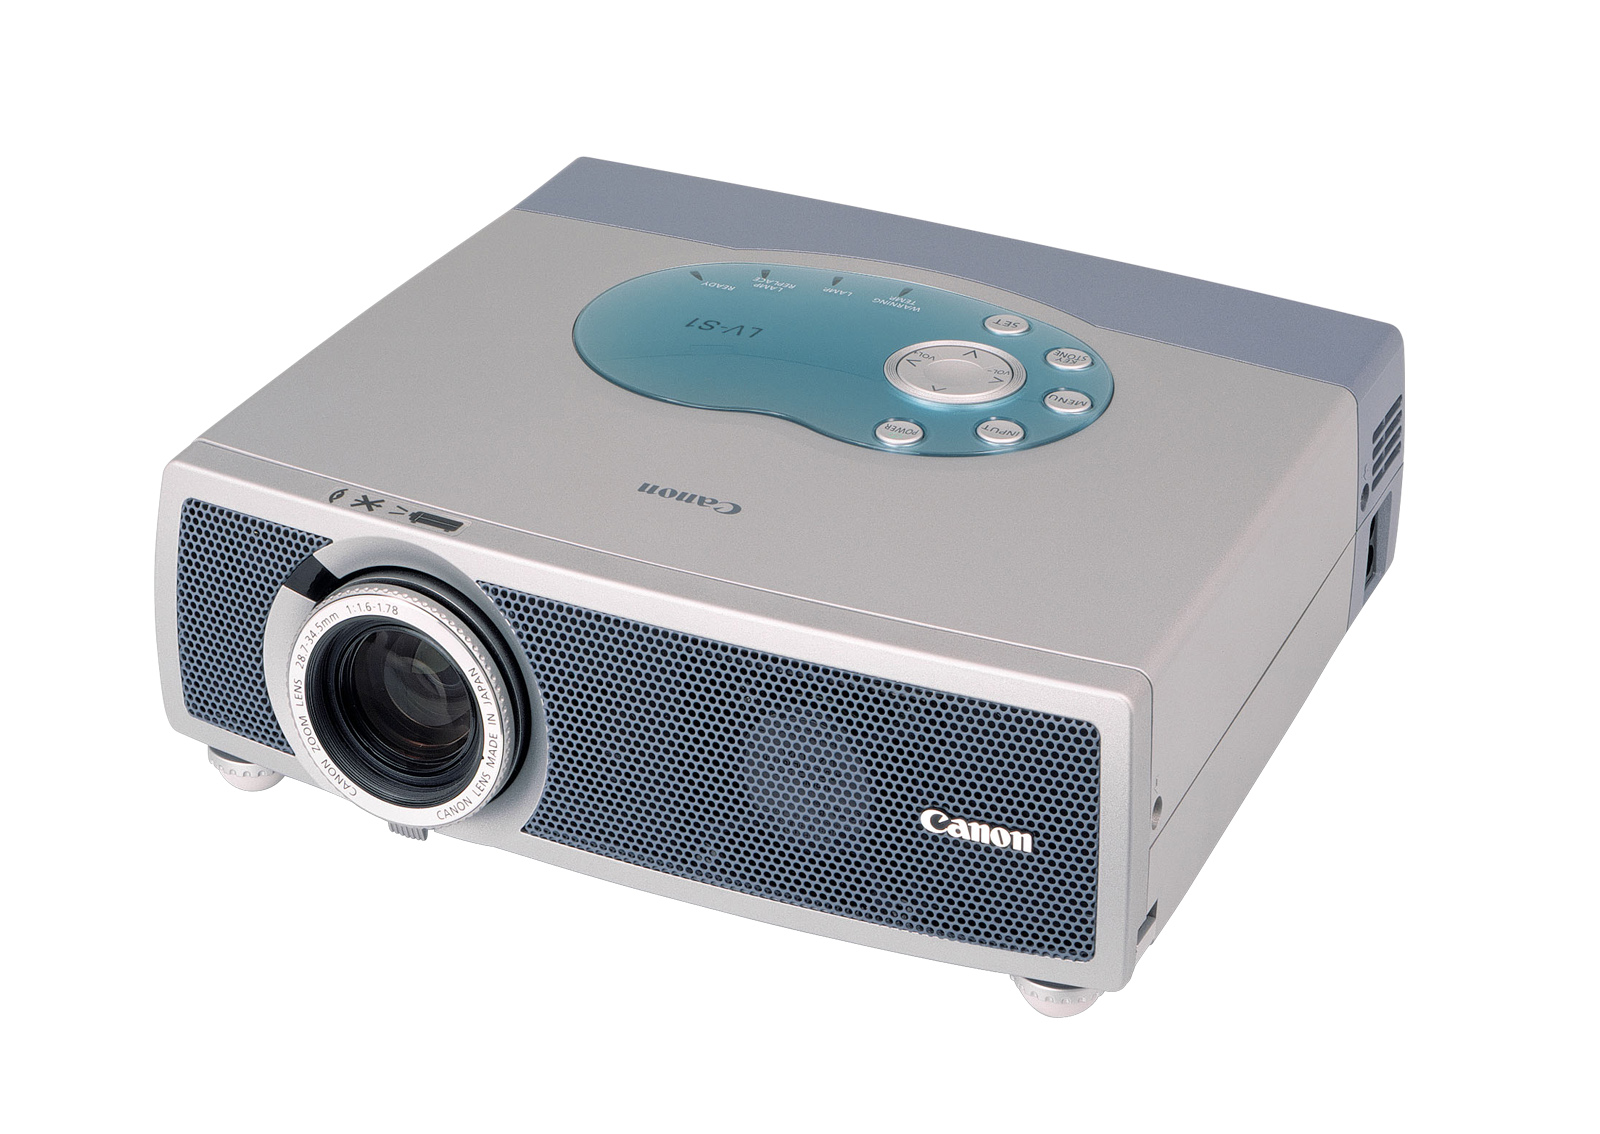
Installing a replacement Christie LU77 projector lamp
 Install a replacement Christie LU77 projector lamp by following this step-by-step guide.
Go with authentic
Your Christie LU77 uses the Christie 03-000709-01P projector lamp. Go with an authentic Christie LU77 projector lamp to keep your projector working at its bestlamp. Counterfeit lamps have a shorter lamp life and are prone to explosions. Along with missing safeguards to protect your eyes, counterfeits can’t be properly calibrated so can damage the projector’s sensitive optics.
Buy this lamp on Amazon sold by these authorized dealers:
- Lutema 03-000709-01P-L02 Christie 03-000709-01P LCD/DLP Projector Lamp (Premium)
- Christie 03-000709-01P OEM Replacement Projector Lamp bulb – High Quality Original Bulb and Generic Housing
Tracking the lamps
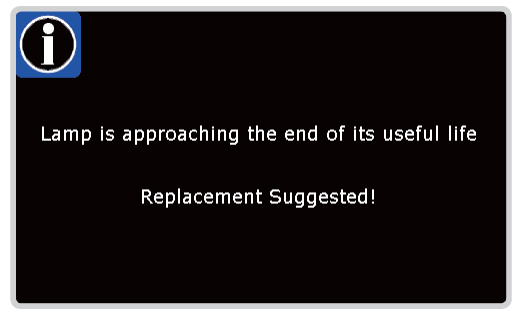
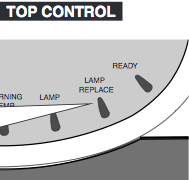
Control the four Christie LU77 lamps from the Management Menu. When the projector lamp is reaching end 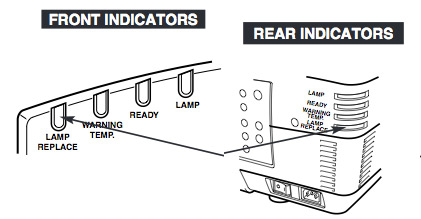 of life the LAMP REPLACE indicator lights yellow. Replace the lamp immediately.
Check number of lamp on Lamp Status Display and replace lamp.
- Yellow Lamp: Projector lamp lights normally
- Dim Lamp: Projector lamp is turned off.
- Red Lamp: Projector lamp is nearing its end. When image becomes darker or color becomes unnatural, replace lamp.
- X Mark on Lamp: Projector lamp is defective or has reached end of life and won’t turn on. Restart the projector on, and if the mark still appears, replace the corresponding projector lamp marked with the X.
Installing the projector lamp
Before replacing the Christie 03-000709-01P projector lamp, follow these safety steps:
- Check number of lamp to be replaced on Lamp Status Display.
- Unplug the Christie LU77 projector.
- Wait until the projector is cool to the touch before removing the lamp. These projector work at a high temperatures and you can get badly burned.
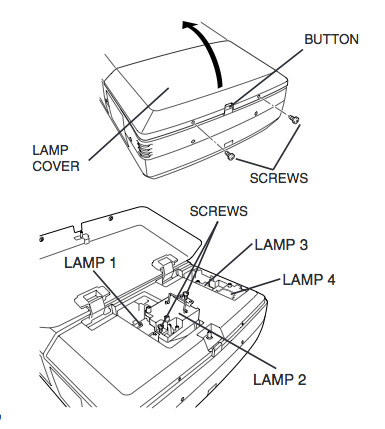
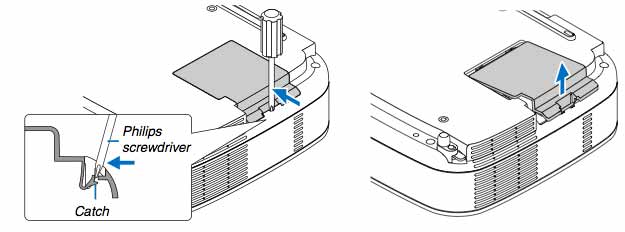
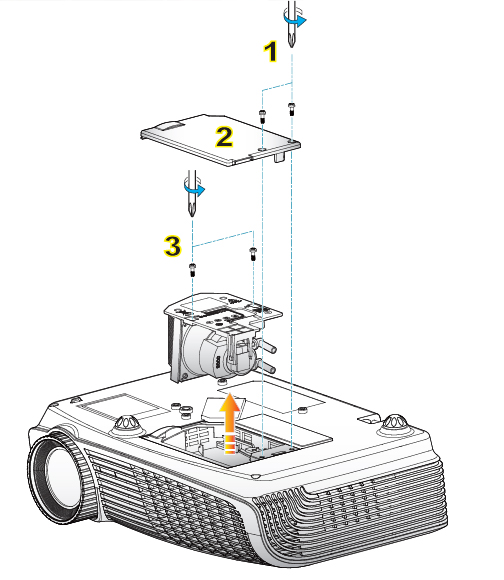
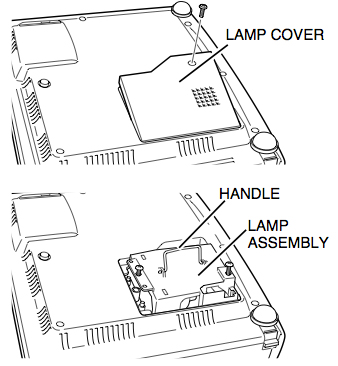
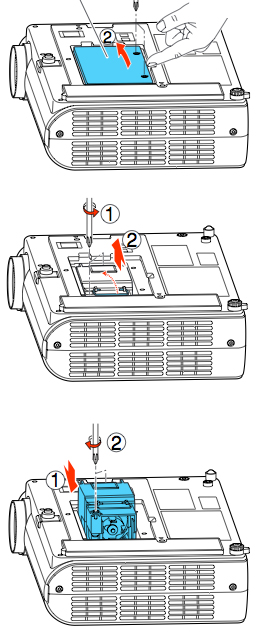
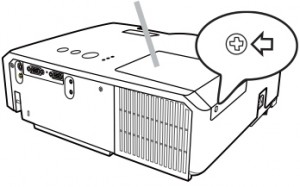
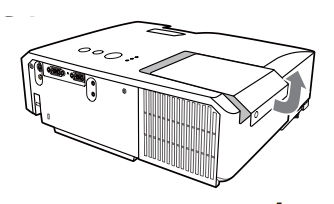
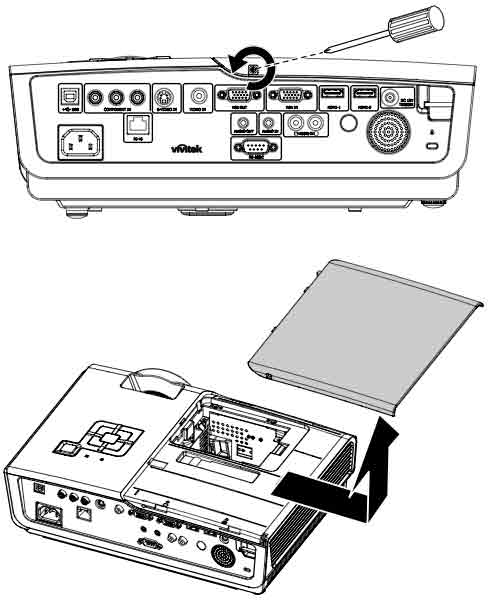
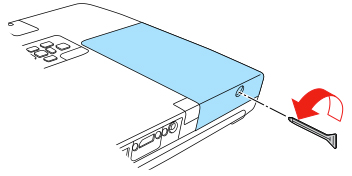
- Remove two screws on projector lamp Cover. Press button to open the projector lamp Cover.
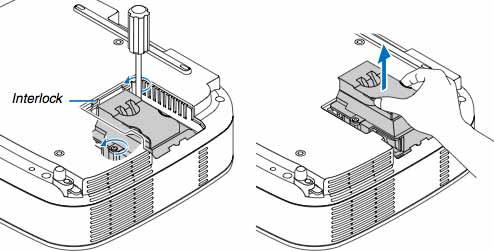
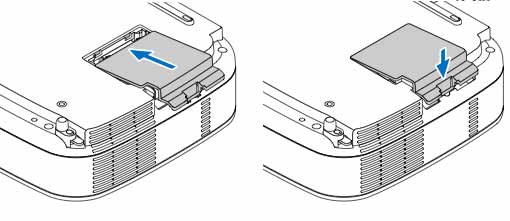
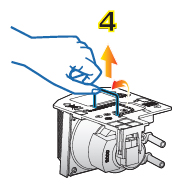
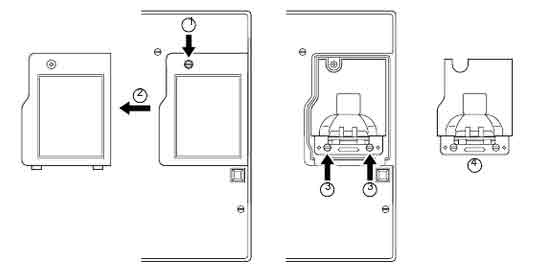
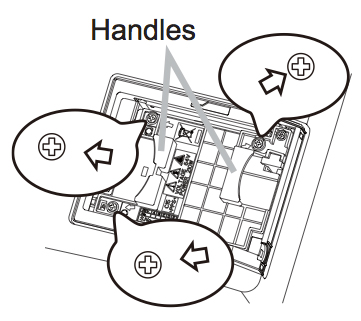
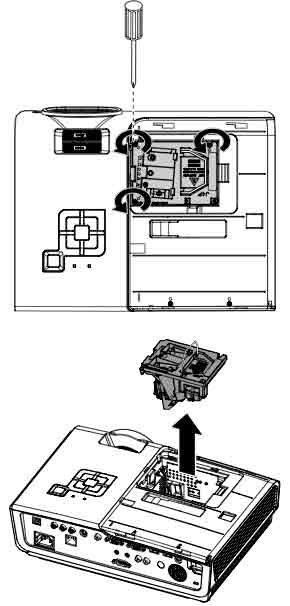
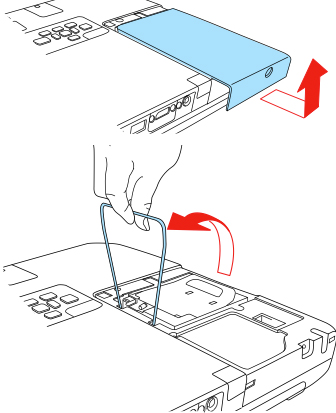
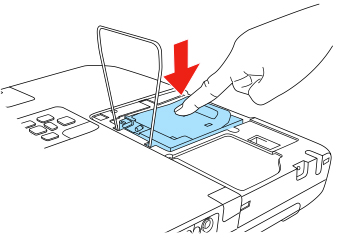
- Loosen two screws and pull out projector lamp to replaced by grabbing the handle.
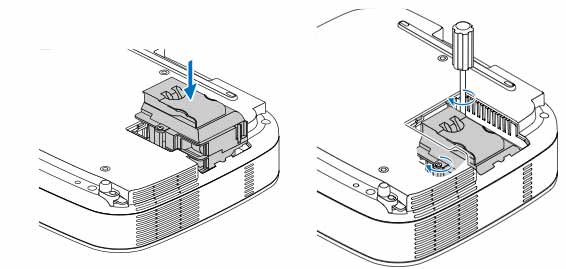
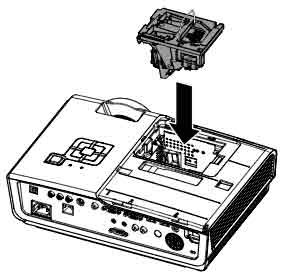
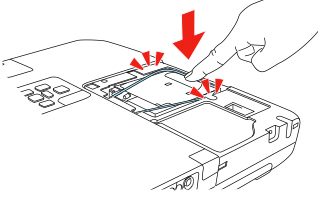
- Replace the Christie 03-000709-01P projector lamp and tighten two screws. Make sure the projector lamp is set properly. NOTE: The Christie 03-000709-01P projector lamp contains mercury and should not be thrown into regular garbage. Recycle this lamp.
- Follow these steps to replace each projector lamp that needs replacing.
- Replace the projector lamp cover and tighten two screws.
- Connect AC power cord and turn the projector on.
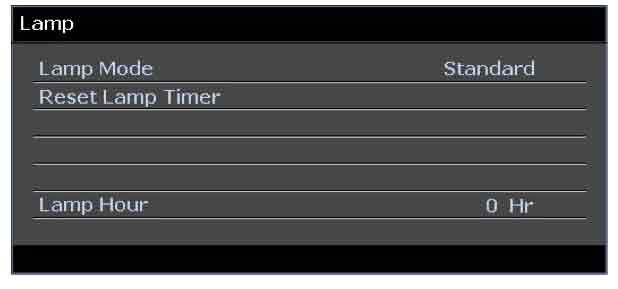
- Reset Lamp Replacement Counter
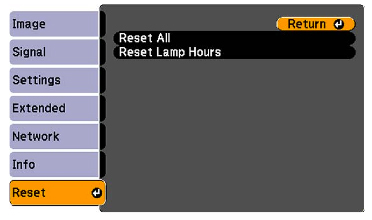
Reset the lamp timer
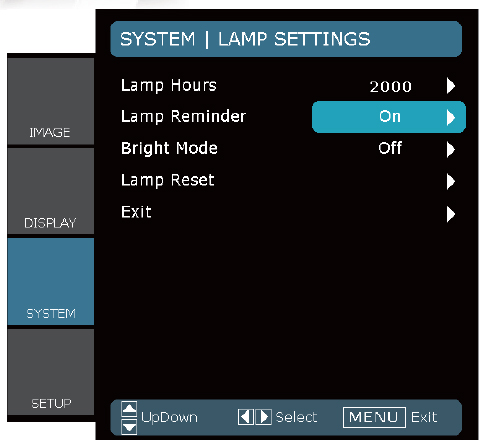
Your Christie RoadRunner LU77 comes equipped with a lamp timer that tracks the number of hours left for each lamp.
 To reset the lamp timer:
- Turn projector on.
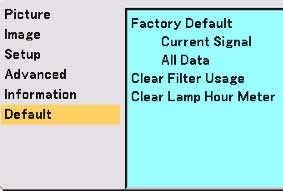
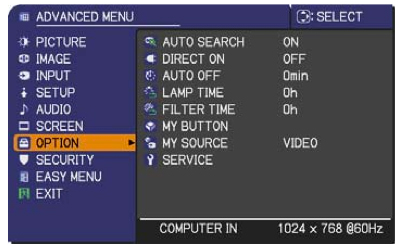
- Press MENU button and ON-SCREEN MENU will appear.
- Press POINT LEFT/RIGHT button(s) to move a red frame pointer to SETTING Menu icon.
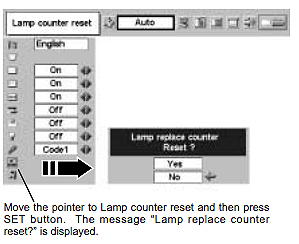
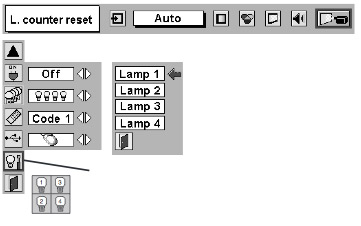
- Press POINT DOWN button to move a red frame pointer to Lamp counter reset
- Press SELECT button.
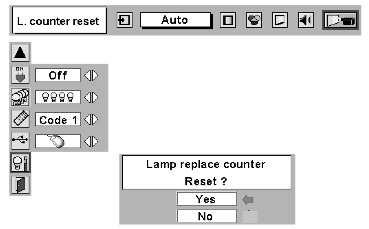
- Another confirmation dialog box appears.
- Select YES to reset Lamp Replace Counter.
- Move arrow to replaced lamp number (Lamp 1, Lamp 2, Lamp 3 or Lamp 4)
- Press SELECT button. Message “Lamp replace counter Reset?” is displayed. Move pointer to YES.
- Press SELECT button.
Tips for longer lamp life
- Don’t operate the projector continuously without letting it stand for at least one hour turned off every 24 hours.
- Cleaning the air filter regularly will also prolong the life .
- Use the Lamp Menu to move to MODE and switch between dual or single projector lamp life. Using only one lamp will prolong usage.
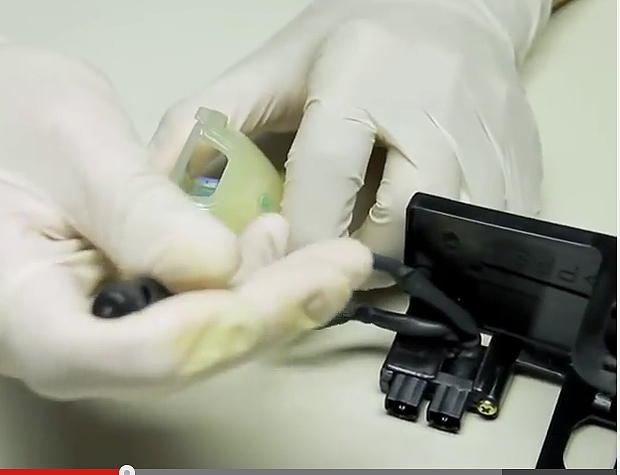
Greening your projector
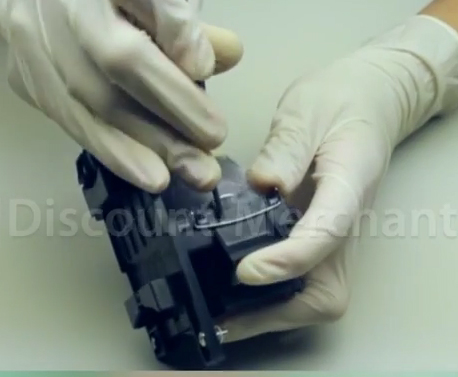
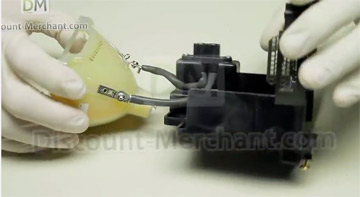 If you’re interested in making your projector more environmentally friendly, consider recycling the projector lamp plastoc housing and installing only a new replacement bulb. Our step-by-step video shows you how easy it can be.