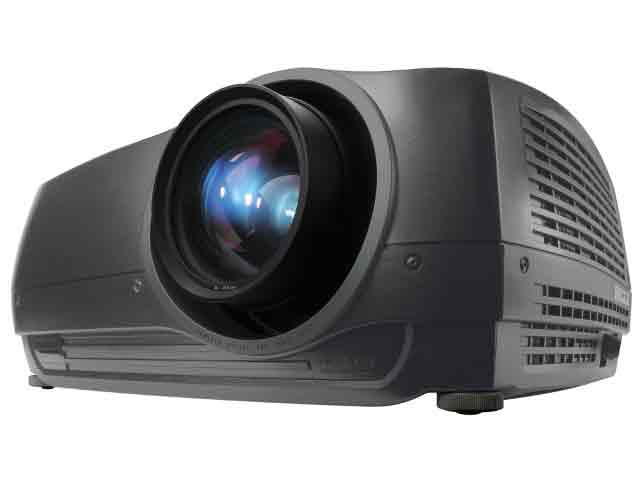
Replace the Acer X1230PK projector lamp
 This guide shows you how to install a new Acer X1230PK projector lamp.
Start off with the right lamp
Counterfeits lamps have flooded the market and while they seem to be a true bargain, you should avoid them. In order to keep working properly your projector working at it’s best, you need to install an OEM authentic Acer X1230PK projector lamp lamp. Unlike counterfeit lamps, an authentic Acer X1130P projector lamp will NOT damage the sensitive optics in the projector and is less likely to explode. Counterfeits are also created with toxic materials that pose a health threat. Authentic lamps come with a money-back guarantee as well as keeping your warranty intact.
Buy this lamp on Amazon sold by these authorized dealers:
- Acer EC.J9000.001 Projector Brand New High Quality Original Projector Bulb
- EC.J9000.001 Acer X1230S Projector Lamp
- EC.J9000.001 Acer X1230K Projector Lamp
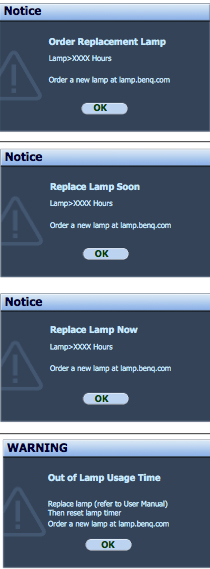
End of life warnings
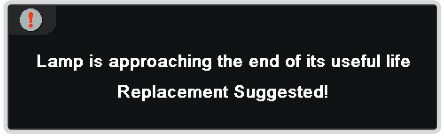
Your Acer X1230PK projector will detect the end of lamp life and show the warning message: Lamp is approaching the end of its useful life in full power operation. Replacement Suggested!”
Replacing the Acer X1230PK projector lamp
The Acer X1230PK projector uses the Acer EC.J9000.001 projector lamp. Follow these safety guides to get the projector ready for a new projector lamp:
- Turn off the Acer X1230PK projector and unplug the AC cord.
- These projectors operate under high temperatures and there is a risk of burning if the projector has not cooled enough. Allow the Acer X1230PK to cool for one hour. It should be cool to the touch.
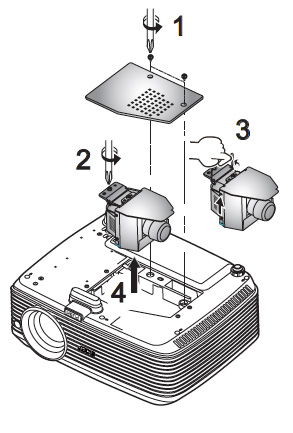
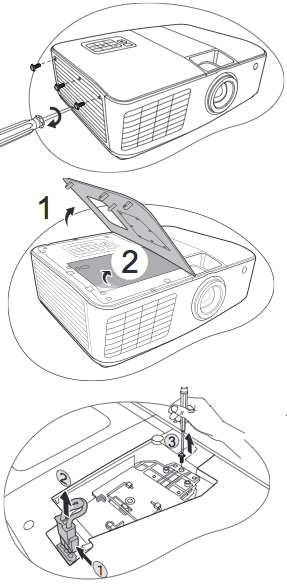
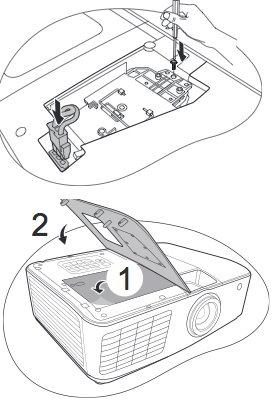
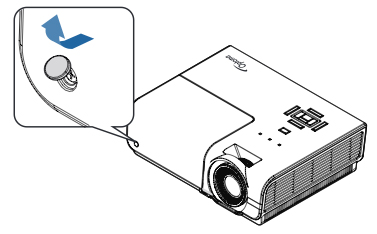
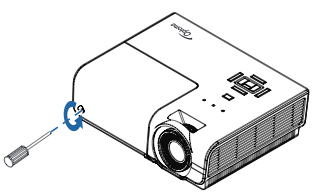
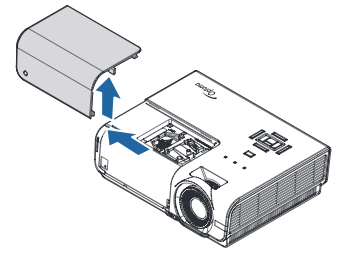
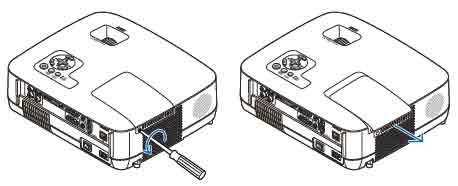
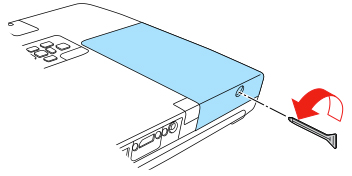
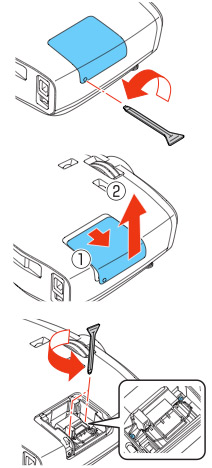
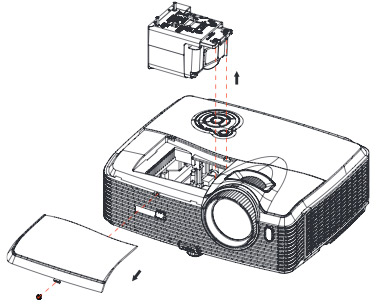
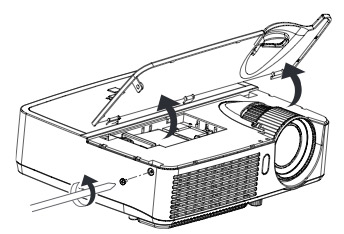
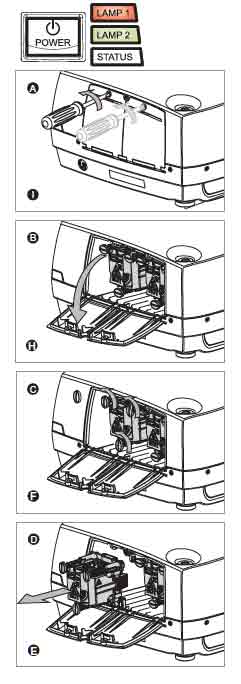
1. Remove the two screws from the projector lamp cover. Lift the cover off the projector and place it to one side.
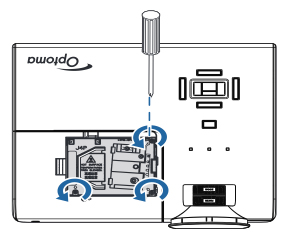
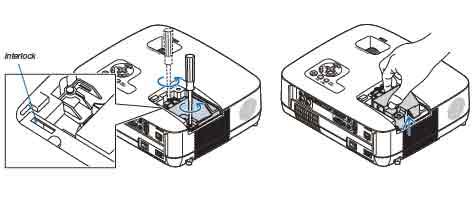
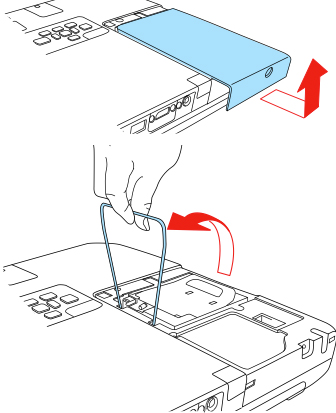
2. Remove the two screws holding the Acer X1230PK projector lamp in place. screw from the cover.
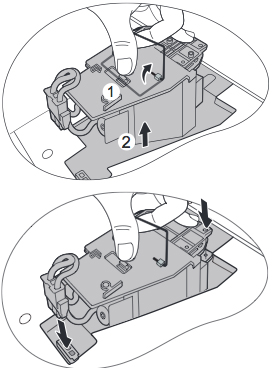
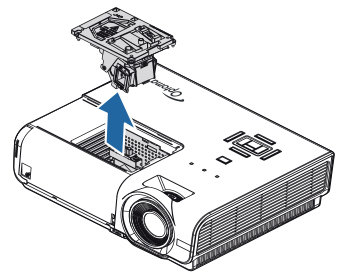
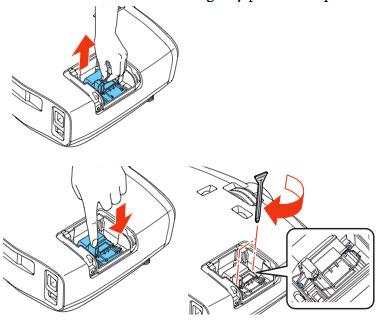
3. Lift the wire handle on the Acer EC.J9000.001 bulb and gently pull the lamp up to remove it.
Don’t throw the old Acer EC.J9000.001 projector lamp into regular garbage as it contains mercury — send it to a local recycling program.
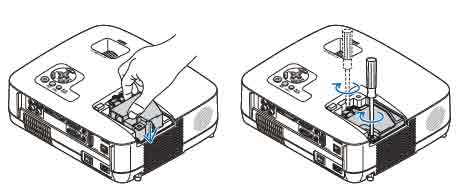
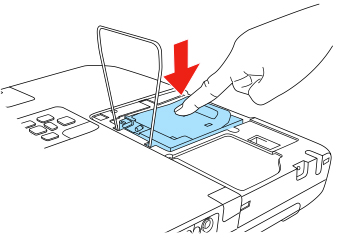
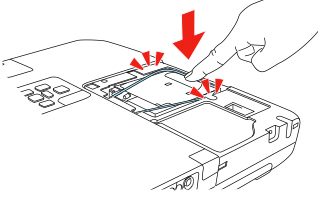
4. Take the new Acer EC.J9000.001 projector lamp projector lamp using the wire handle. Avoid touching the bare bulb; the oil on your finger can leave a black mark on the lamp affecting the projected image. Tighten the screws on the new Acer EC.J9000.001 projector lamp.
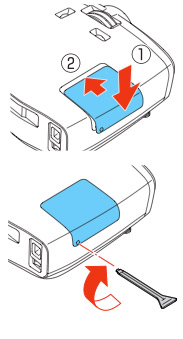
Put the lid back onto the projector. Tighten the screw holding the lid in place.
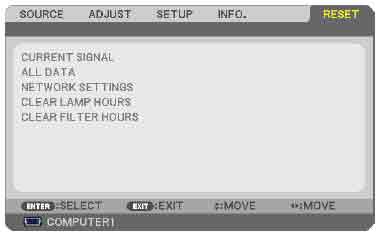
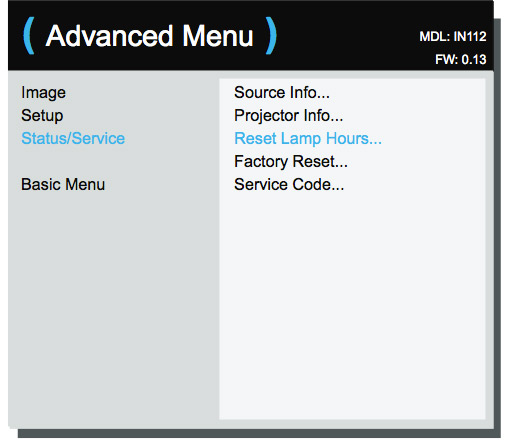
Resetting the projector lamp timer
It’s important to always reset the lamp timer after replacing the projector lamp in your Acer X1230PK projector. You want the projector to track how many hours the lamp has been used and send out warning messages when the Acer EC.J9000.001 reaches end of life.
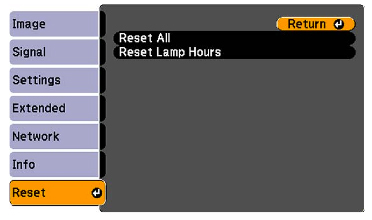
 To reset the Projector Lamp timer:
- Plug the AC cables back into the projector.
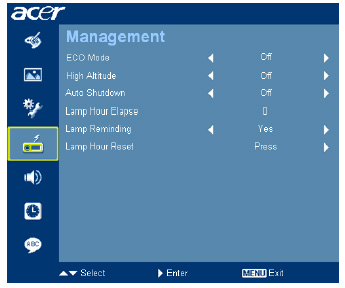
- Turn the project on so you can reset the lamp timer.Open the MAIN MENU. Press ENTER.
- Scroll down to the MANAGEMENT menu. Press ENTER.
- Scroll down to the Lamp Hour reset option.
- Press the right arrow.
- The lamp will be reset to zero.
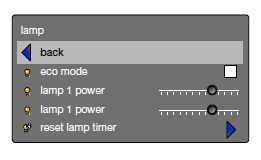
Extending the projector lamp life
- Use the Eco Mode for more lamp hours.
- Keep your air filters clean to avoid overheating the projector.
- Make sure there is enough airflow around the Acer X1230PK
- Learn more with Top tips for extending DLP projector lamp life
Learn more tips for extending lamp life.
A green alternative
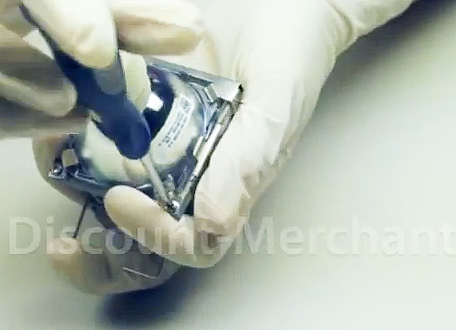
If you want an eco-friendly option you can re-use the plastic lamp cage in the Acer X1230PK projector and install only a new bulb. Our training video shows you how.