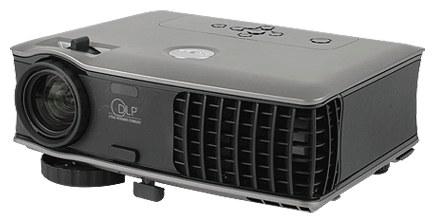
How to change the Infocus IN24 projector lamp
 When it’s time for a replacement Infocus IN24 projector lamp, this guide can help you out.

Importance of authentic
Resist the temptation to buy a cheaper generic lamp as they can cause your InFocus N24 projector to not work properly. When you purchase an authentic projector lamp, you’re guaranteed a lamp that has been manufactured with high quality parts and calibrated to your projector. Generics don’t offer the same performance. Invest in an authentic Infocus IN24 projector lamp.
6 reasons to avoid generics
- shorter lamp life
- created with toxic materials and carcinogenic parts
- prone to explosions
- damage the sensitive electronics in your projectors
- hurt your eyesight since they have no safeguards
- installing a generic lamp voids your projector’s warranty.
Learn the 7 Ways to spot a counterfeit lamp.
Buy this lamp on Amazon sold by these authorized dealers:
- InFocus SP-LAMP-024 Projector lamp – for Learn Big IN24EP, Work Big IN24, IN26
- Replacement Lamp, IN24 & IN26/3000 Hours, SP-LAMP-024
- Lampedia SP-LAMP-024-001 Replacement Lamp for Infocus IN24/IN24EP/IN26/W240/W260
Replacement warning signs
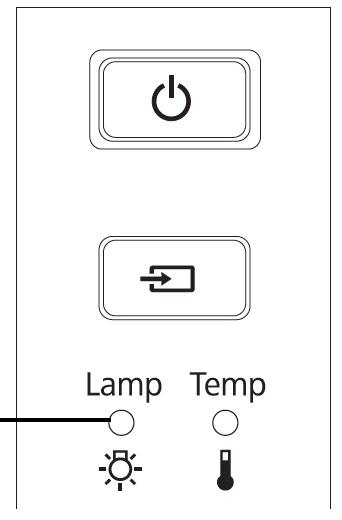
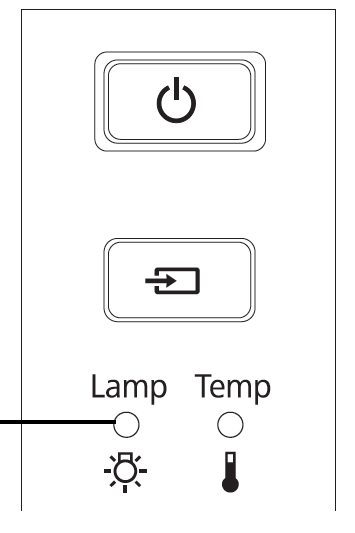
When it’s time to replace the InFocus IN24 projector lamp you may seen the following signs:
- The projector image gets darker and starts to deteriorate.
- The projector lamp flashes red.
- The warning message REPLACE THE LAMP appears on screen.
Replace the InFocus SP-LAMP-024 immediately.
Installing the replacement projector lamp
Follow these important safety steps BEFORE installing the replacement
- Turn off the InFocus IN24 projector and unplug the power cord.
- To avoid getting burned, let the InFocus IN24 projector fully cool before changing the lamp.
- Do not operate the projectors while any of the lamps are removed as this may result in malfunctions, fire hazard and other accidents.
- Caution: Don’t touch the screen or the actual bulb with your finger since the oil from your skin can cause a black spot on the bulb.
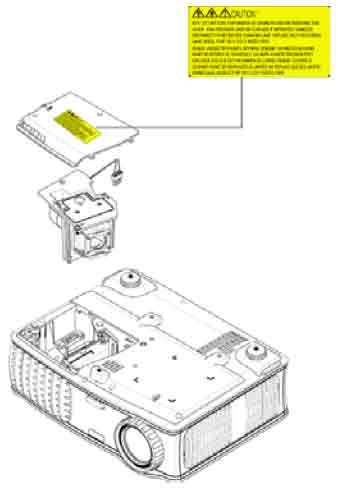
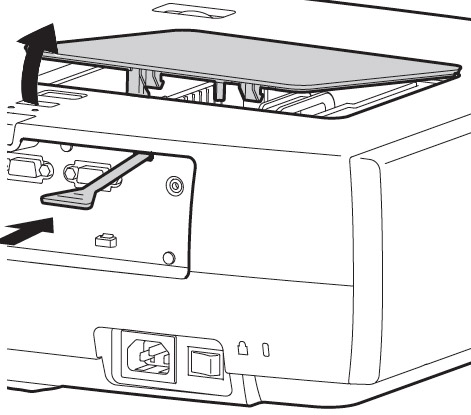
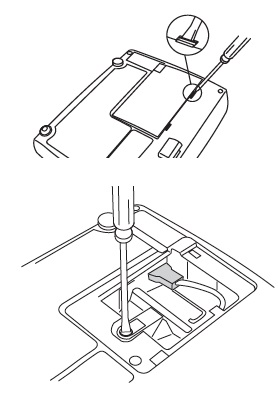
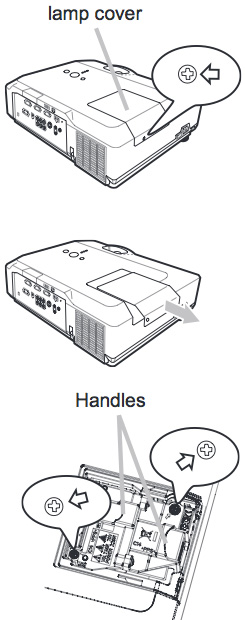
- Turn the projector upside down onto a soft surface.
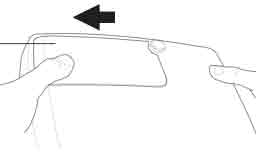
- Gently slide projector lamp cover out of its slot.

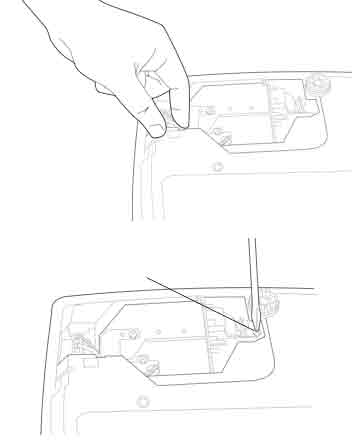
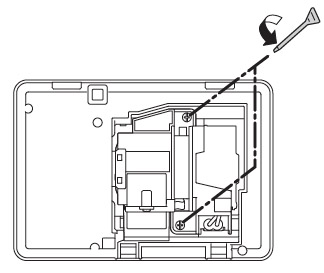
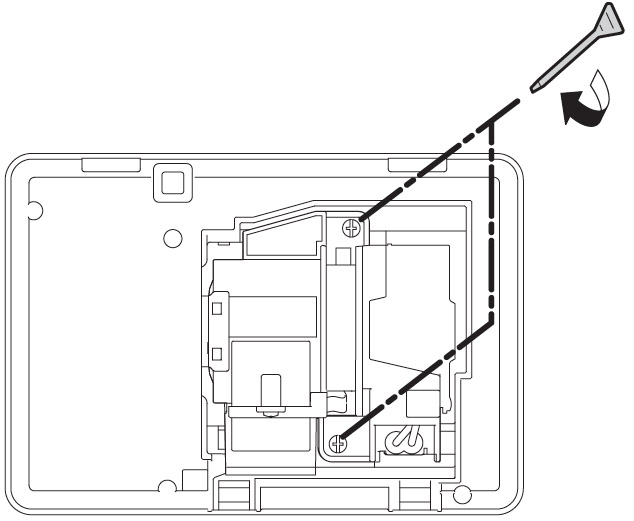
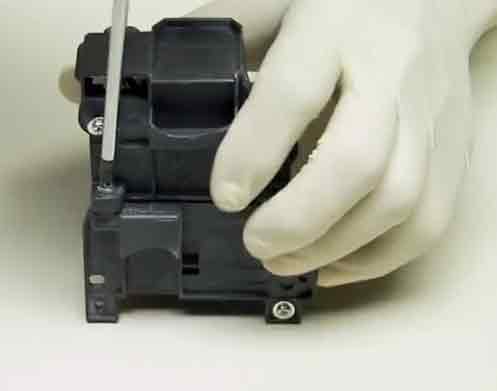
- Using the screw driver to loosen the screw holding the InFocus SP-LAMP-024 in place.
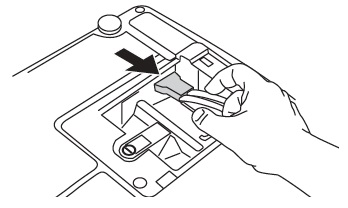
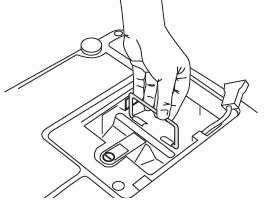
- Detach the lamp connector attaching the InFocus SP-LAMP-024 to the InFocus N24 projector by pressing the locking tab on the connector and gently pulling.
- Loosen the screw on the projector lamp to loosen the lamp.
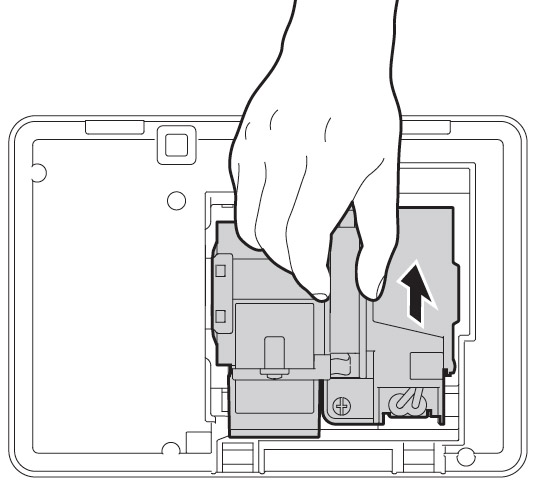
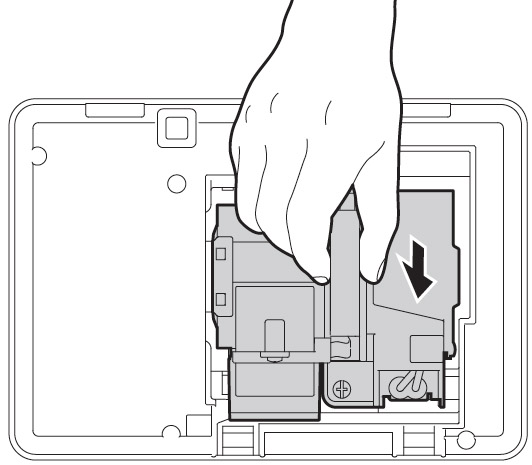
- Grab the InFocus SP-LAMP-024 lamp handle and carefully lift the lamp cage up.Pulling too quickly can cause the bulb to shatter. Learn what to do should the bulb break.
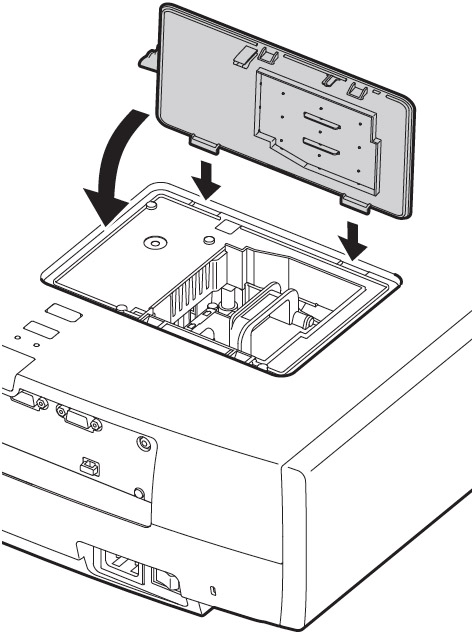
- Install the new InFocus SP-LAMP-024 lamp housing and tighten the screw.
- Connect the connection wire from the lamp to the projector
- Slide the lamp door back in place, making sure it is aligned so it clicks into place.
- You are ready to reset the lamp hours.
NOTE: The InFocus SP-LAMP-024 projector lamp contains mercury and should not be thrown into regular garbage. Recycle your used lamps!
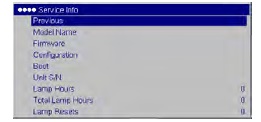
Reset the projector lamp timer
 After replacing the InFocus SP-LAMP-024 projector lamp be sure to reset the lamp hours. Failure to do so will mean your InFocus IN24 projector will NOT TURN ON.
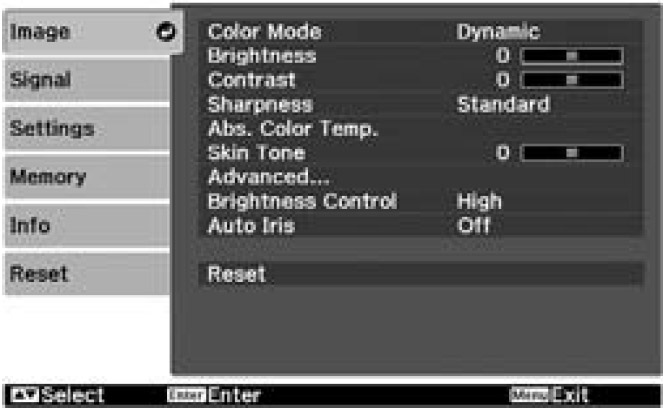
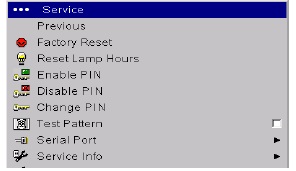
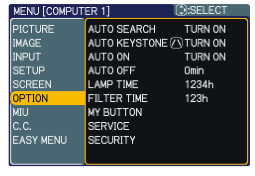
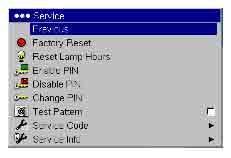
- Open the MAIN menu. Press SELECT
- Scroll down to the SERVICE menu.
- Scroll down to RESET LAMP HOURS.
- Lamp hours will be reset to zero.
Tips for longer lamp life
- Keep your air filters clean to avoid overheating the projector.
- Turn off the InFocus IN24 projector and let it stand for at least one hour ever 24 hours.
- Make sure there is enough airflow around the projector particularly if it’s been permanently mounted.
- Top tips for extending DLP projector lamp life