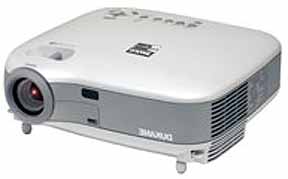
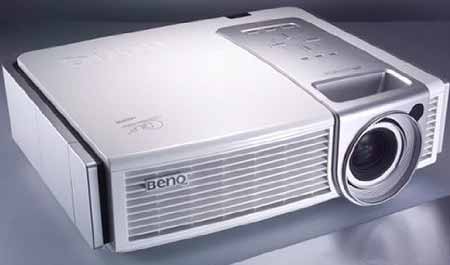
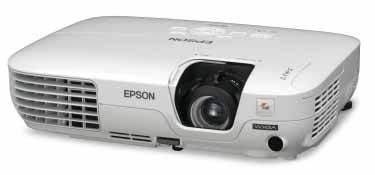
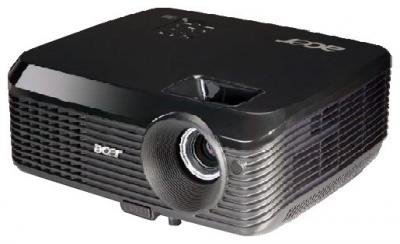
How to install a new Optoma PRO350W projector lamp
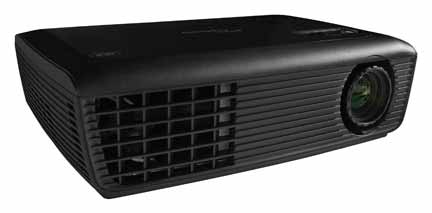 Here is a step-by-step guide to help you replace the Optoma PRO350W projector lamp.
Invest in authentic replacement projector lamps
When buying on the Internet, make sure you are buying an OEM Optoma PRO350W projector lamp and look for the seal of approval. Generic lamps have a shorter lamp life than original lamps and are created with toxic materials. When you buy copy-cat lamps you get no guarantee or refunds and they can damage the sensitive electronics in your projectors. Keep your Optoma PRO350W projector working at optimum levels by investing in an authentic projector lamp. Learn How to spot a counterfeit.
End of life warnings
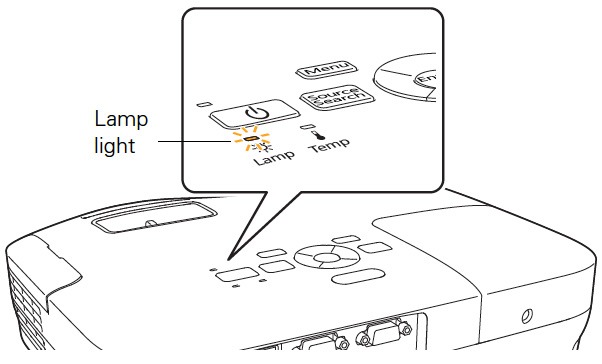
 When the Optoma BL-FU185A projector lamp is reaching end of life, you will notice the Lamp-LED light flashing red on the Optoma PRO350W projector. A lamp warning message also appears on screen.
If you hear a loud pop when turning on the projector, the Optoma BL-FU185A projector lamp has broken. Learn what to do if the projector lamp has exploded inside the projector.
Be sure to have your back-up replacement Optoma BL-FU185A projector lamp ready so you can replace it immediately when needed
Find this lamp sold on Amazon by these authorized dealers:
- Optoma BL-FU185A, UHP, 185W Projector Lamp
Optoma BL-FU185A Projector lamp – UHP – 185 Watt – for Optoma DS316, ES526, EW536, EX536, Pro350, TS526, TW536, TX536, Home Theater Series HD66
- BL-FU185A Optoma Projector Lamp Replacement. Projector Lamp Assembly with Genuine Original Philips UHP Bulb Inside.
- Optoma BL-FU185A Replacement Lamp for TS526/PRO150S/DS316/TX536/PRO250X/DX619 Projectors
- Optoma 00185 – BL-FU185A Projector Light Bulb
4-steps to installing the Optoma BL-FU185A projector lamp
Follow these important safety tips before replacing the Optoma BL-FU185A projector lamp:
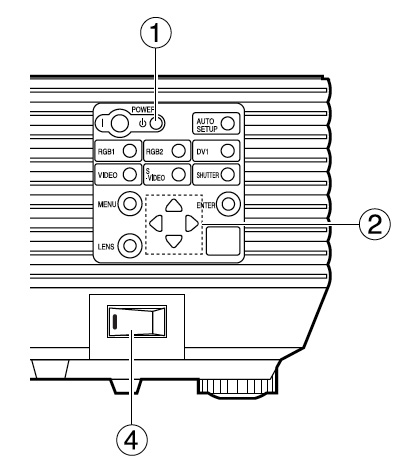
- Switch off the power to the Optoma PRO350W multimedia projector by pressing the Power/Standby button.
- Disconnect the power cord.
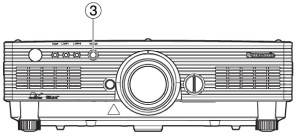
- Allow the Optoma PRO350W projector to cool down for at least 30 minutes. These projectors run using high temperatures and you can burn yourself badly if you don’t allow the projector to cool down.
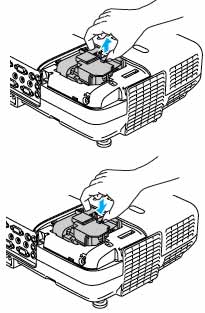
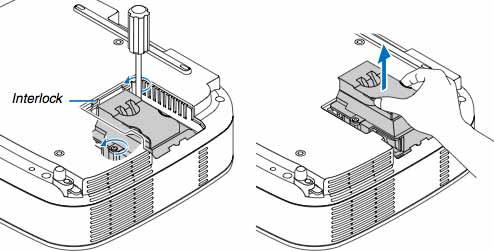
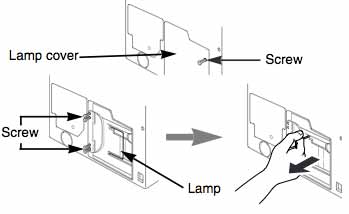
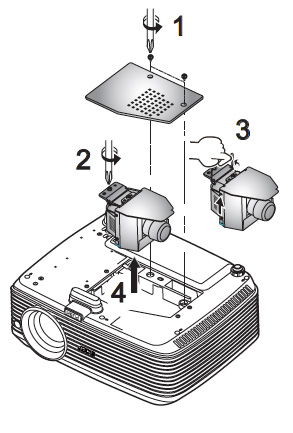
 Steps to remove the old projector lamp
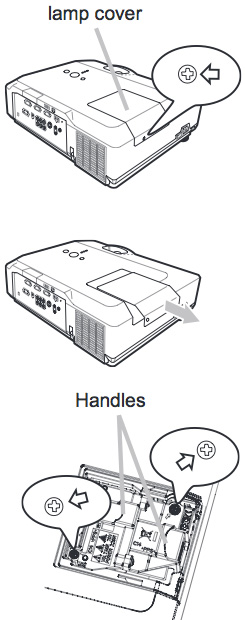
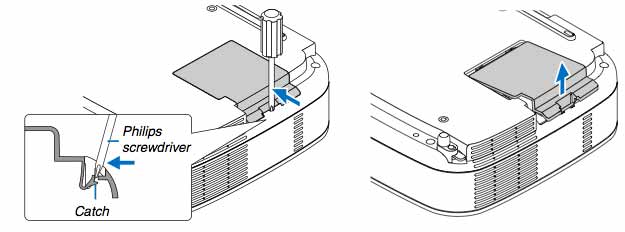
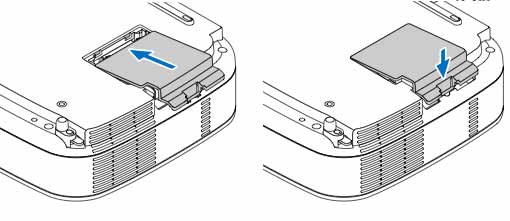
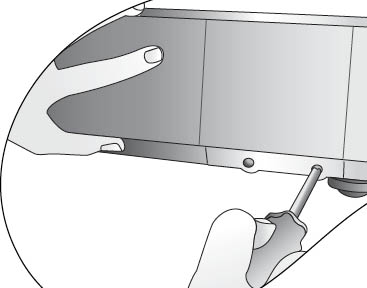
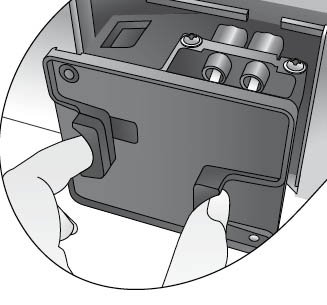
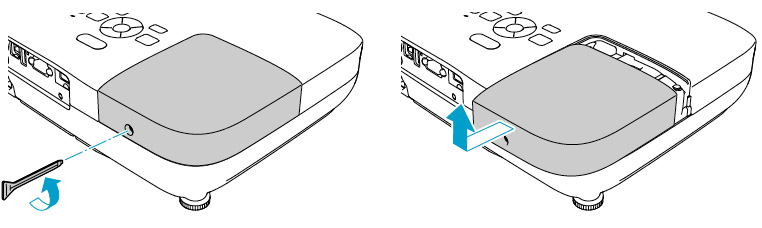
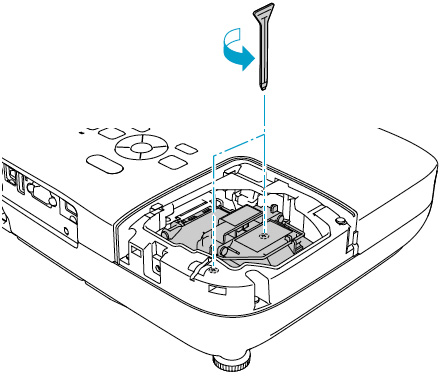
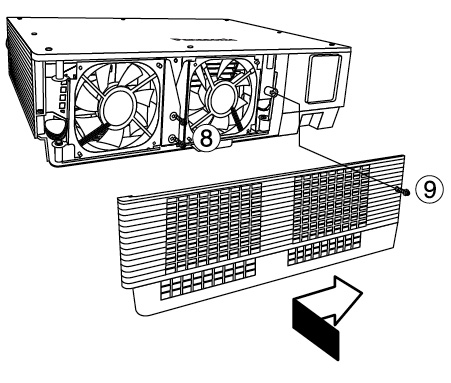
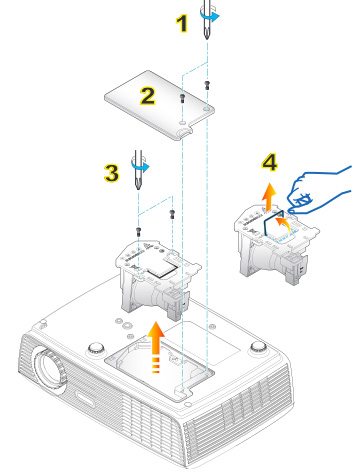
1. Use a screwdriver to undo the two screws holding the projector lamp cover in place. The screws on the lamp cover and the lamp cannot be removed.
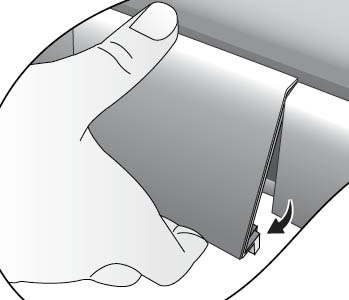
2. Remove the lid and place to one side. Don’t lose the lid as the Optoma PRO350W projector will not turn back on until the lamp cover has been properly installed.
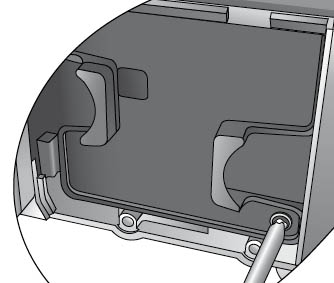
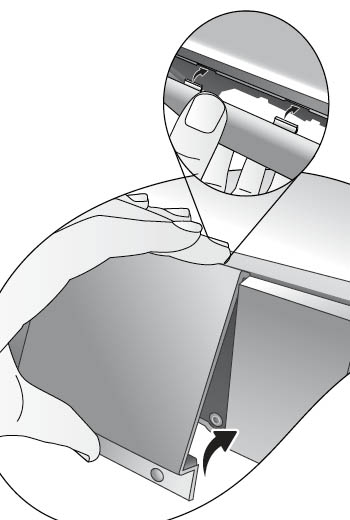
3. Remove the two screws holding the Optoma BL-FU185A (SP.8EH01GC01) projector lamp in place.
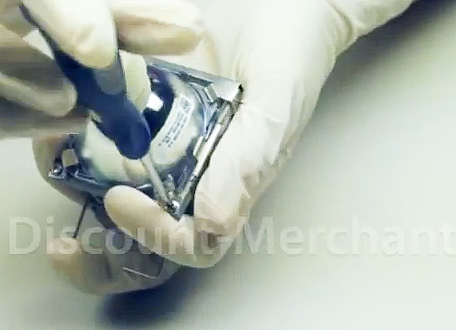
Note: The used Optoma BL-FU185A projector lamp contains mercury and should be properly recycled. Don’t throw it into regular garbage.
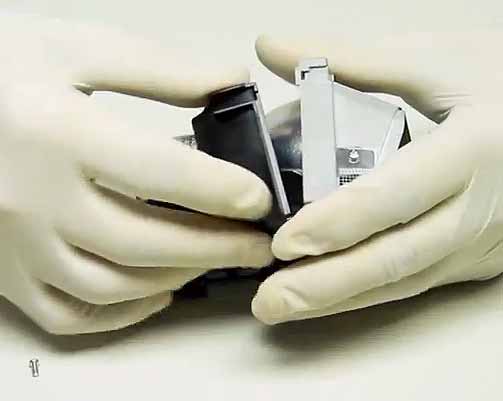
4. Lift up the wire handle on the Optoma BL-FU185A projector lamp and slowly remove it from the projector. Be careful not to bang the lamp against the projector as this may case the bulb to break. Learn how to clean up a broken lamp.
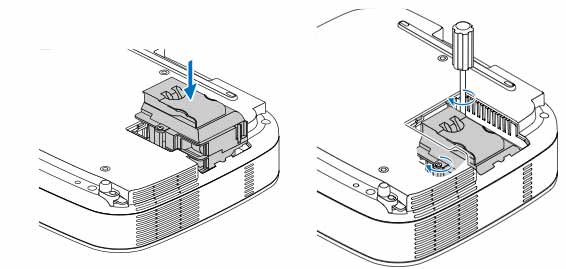
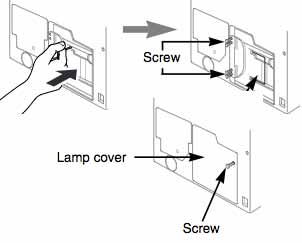
Steps to install the new projector lamp:
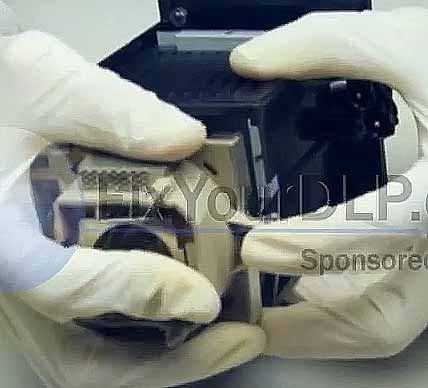
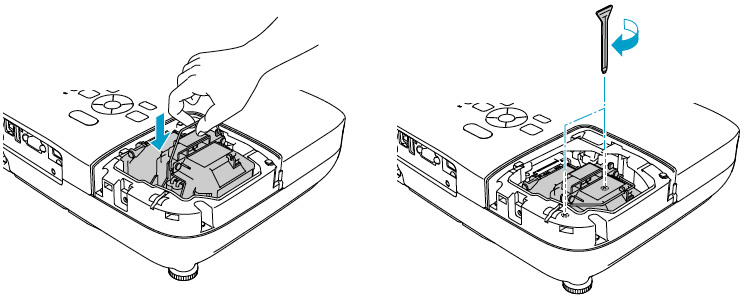
1. Remove the new Optoma BL-FU185A projector lamp from its packaging. Taking care not to touch the actual bulb, lift up the handle on the new lamp and insert it gently into the Optoma PRO350W projector.
2. Tighten the two screws on the projector lamp.
3. Replace the lamp cover and tighten its two screws.
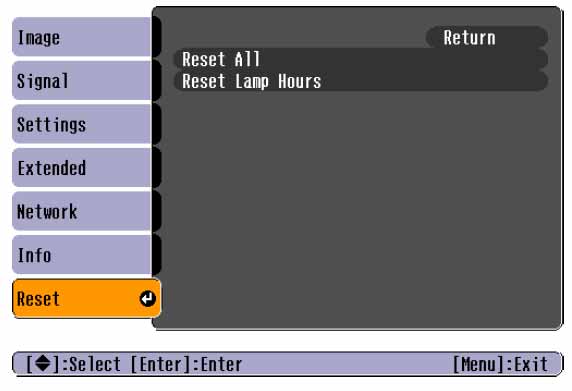
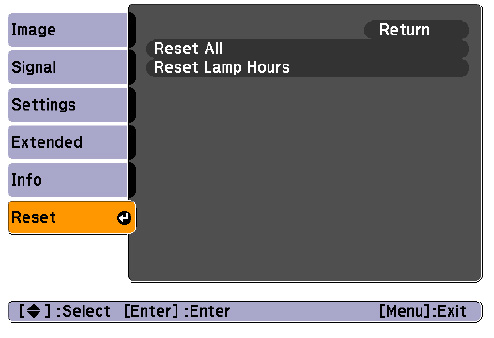
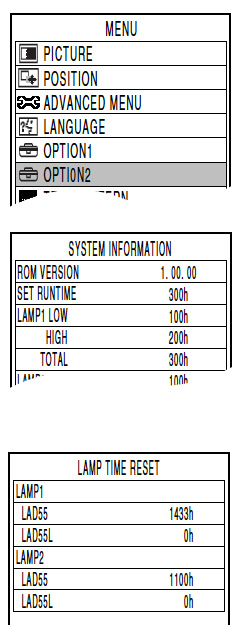
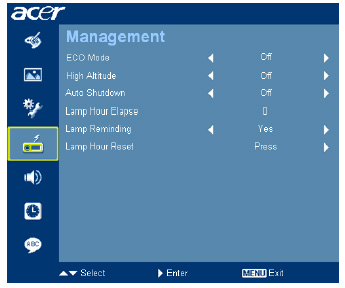
4. Reset the lamp replacement timer
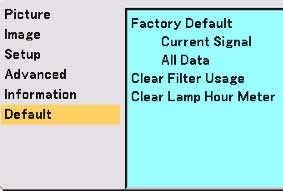
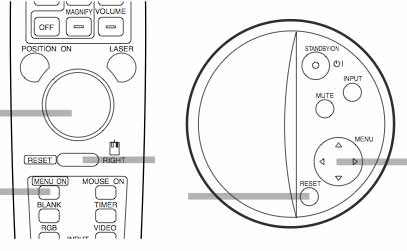
Reset the Projector Lamp Replacement Timer
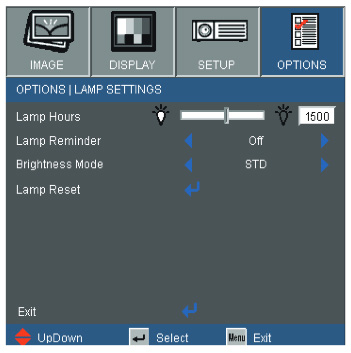 The Optoma PRO350W projector has an automatic projector lamp timer that tracks the numbers of hours left in the lamp. If you don’t reset the lamp replacement timer you run the risk of the lamp being used beyond its recommended life and possibly exploding in the projector.
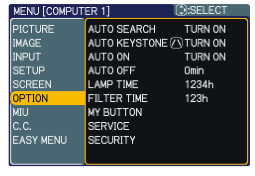
To reset the Projector Lamp Replacement Timer:
- Turn on the projector.
- Using the remote press MENU
- Select OPTIONS
- Select LAMP SETTINGS
- Select LAMP RESET
- Select YES.
- Press MENU to exit.
Tips for extending Optoma BL-FU185A projector lamp life:
- Chose the “STD” mode to to dim the projector lamp and lower power consumption. This will extend the lamp life by up to 130%.
- Keep your air filters clean to avoid overheating the projector.
- Every 24 hours, turn off the projector and let it stand for 1 hour
- Make sure there is enough airflow around the Optoma PRO350W projector particularly if it’s been permanently mounted.
- Learn more with Top tips for extending DLP projector lamp life.
Green your Optoma PRO350W projector
The Optoma PRO350W projector has the option of re-using the existing lamp cage and replacing only the actual bulb. You recycle and reduce waste this way. Watch our Optoma BL-FU185A training video to learn more.