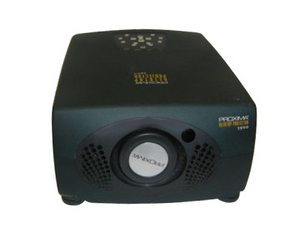
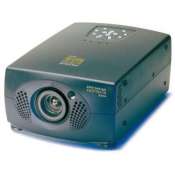
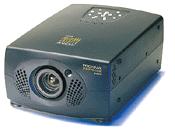
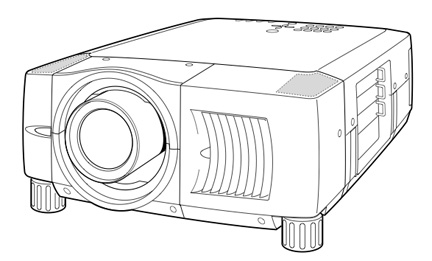
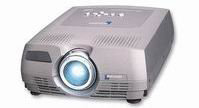
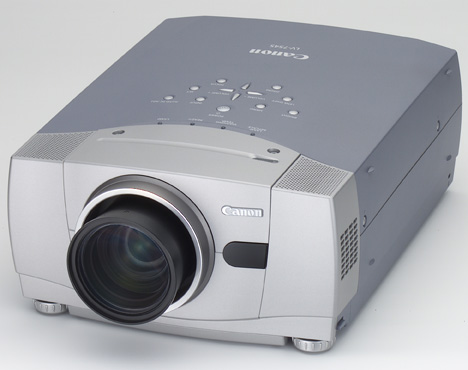
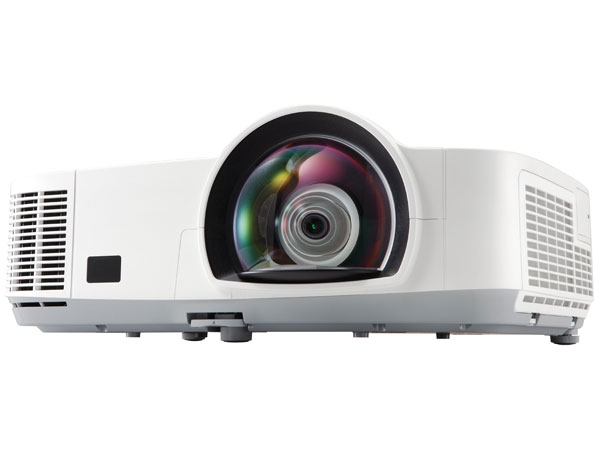
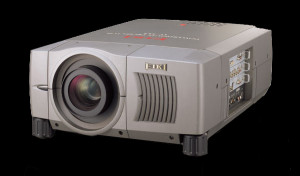
Swapping the Eiki LC-SX4LA projector lamp
 Replacing your Eiki LC-SX4LA projector lamp is quick and easy when you follow our guide.

The Eiki LC-SX4LA is equipped with two projection lamps for a brighter image. It’s recommended that you change both Eiki POA-LMP39 lamps at the same time as well as the air filter. An authentic Eiki LC-SX4LA projector lamp is the best route to go.
Buying the right projector lamp
Always install an authentic projector lamp in your Eiki LC-SX4LA to keep it working properly. Look for the seal of approval before buying a Eiki POA-LMP39 projector lamp.
Why avoid generics? Here are six good reasons:
- shorter lamp life than original lamps
- toxic materials and carcinogenic parts including Krypton-85
- prone to explosions
- incompatibility causing damage to the sensitive electronics in your projectors
- no guarantee or refunds
Go with original OEM projector lamps and keep your Eiki LC-SX4LA projector working.
Find this lamp sold on Amazon by these authorized dealers:
- SpArc Platinum for Eiki POA-LMP39 Projector Replacement Lamp with Housing
- Eiki POA-LMP39 OEM Replacement Projector Lamp bulb – High Quality Original Bulb and Generic Housing
- Eiki POA-LMP39 Replacement Projector Lamp bulb with Housing – High Quality Compatible Lamp
- Eiki POA-LMP39 TV Lamp with Housing with 150 Days Warranty
- Lutema POA-LMP39-L01-2 Eiki POA-LMP39 610-292-4848 Replacement LCD/DLP Projector Lamp, Economy
- EIKI POA-LMP39 Projector Lamp 200-Watt 1500-Hrs UHP (Replacement)
End of life warnings
 Lamp Mode Changeover: Lamp Management Function automatically changes the combination of lighting lamp (Lamp Mode) by detecting the status of each lamp. When any of the two lamps goes out, Lamp Mode is changed over from 2 lamps to 1 lamp. Lamp Mode can be switched to 2 lamps or 1 lamp manually. Check the number of lamps being used on the Lamp Status.
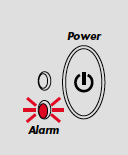
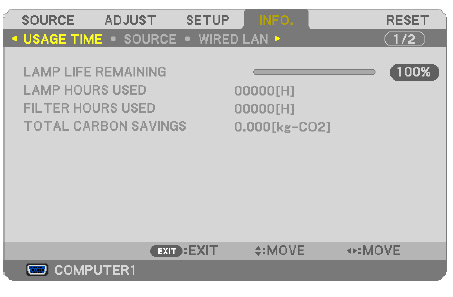
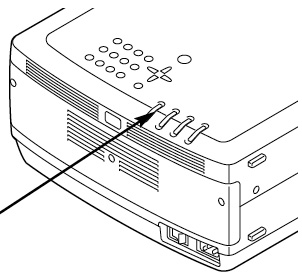
Lamp Status

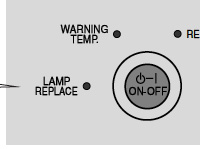
The Lamp Management Function detects the status of both lamps and displays it on screen. The lamp status is also displayed for 5 seconds when the projector is turned on. The LAMP REPLACE indicator lights yellow when either lamp is nearing end of life.
On screen status:
- ON: Yellow lamp on screen: Lamps are functioning normally.
- OFF: Dim Lamp: Lamp is turned off and not in use.
- NEAR END: Red lamp: Projection Lamp is nearing its end. When image becomes darker or color becomes unnatural, replace lamp. (The Lamp replace light on the projector lights yellow at the same time.
- OUT: X Mark on lamp: The lamp has reached its end of life and fails to turn on. It may also be defective. Replace lamp corresponding with number marked X.
How to replace the Eiki POA-LMP39 projector lamp
Follow these important safety steps before replacing the Eiki POA-LMP39 projector lamp.
- The Eiki LC-SX4L projector operates under very high temperatures. Let it cool for one full hour before attempting to replace the lamp in order to avoid being burned.
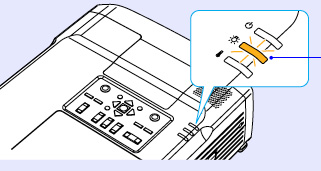
- Turn off the projector by pressing the power button. Wait for the light to stop flashing.
- Turn off the power switch at the back on the projector
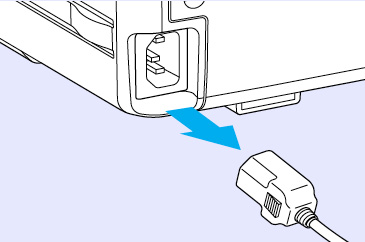
- Unplug any power cords.
NOTE: To maintain quality of picture (better balance of color and brightness in entire screen), replacing both projector lamps at the same time.
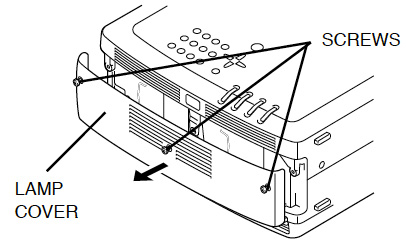
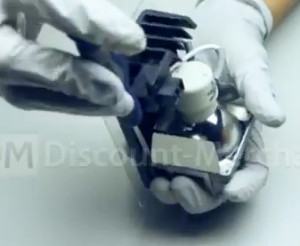
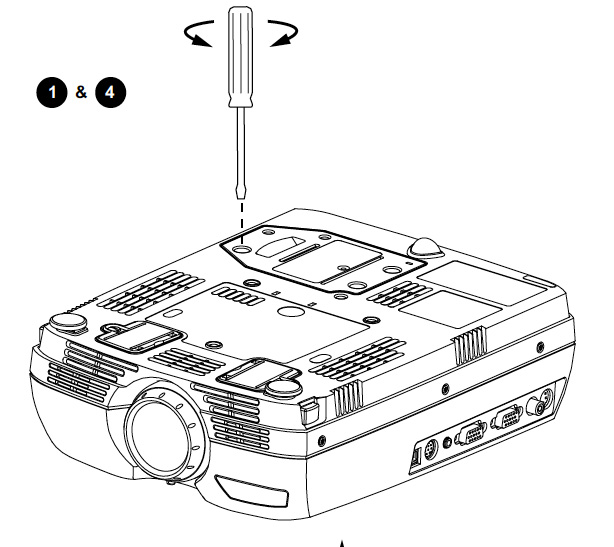
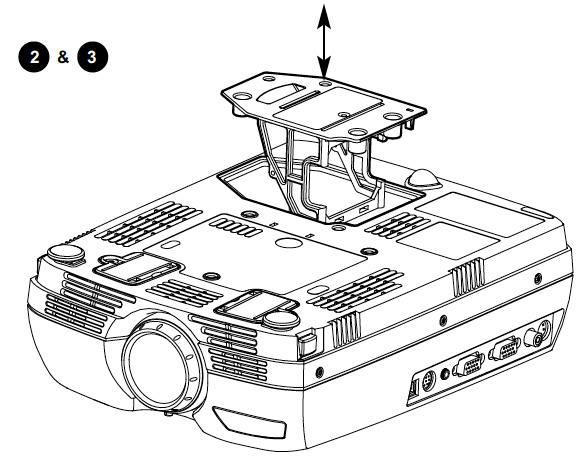
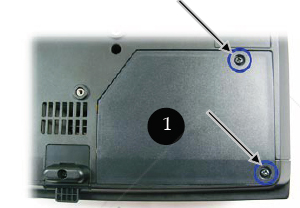
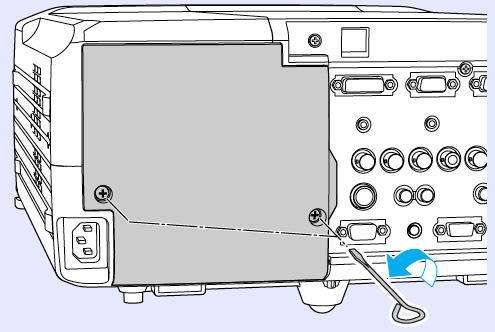
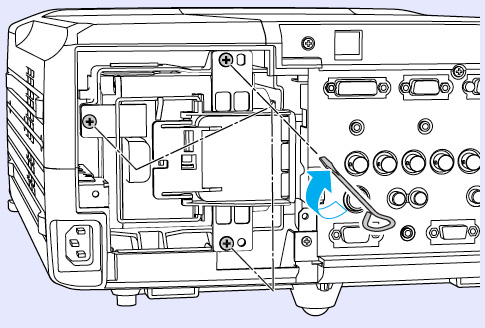
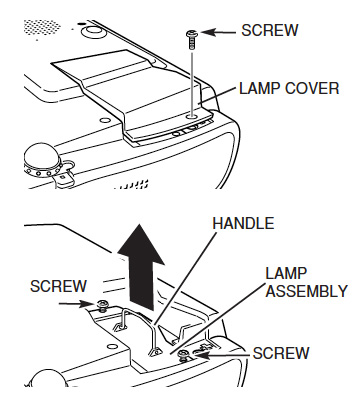
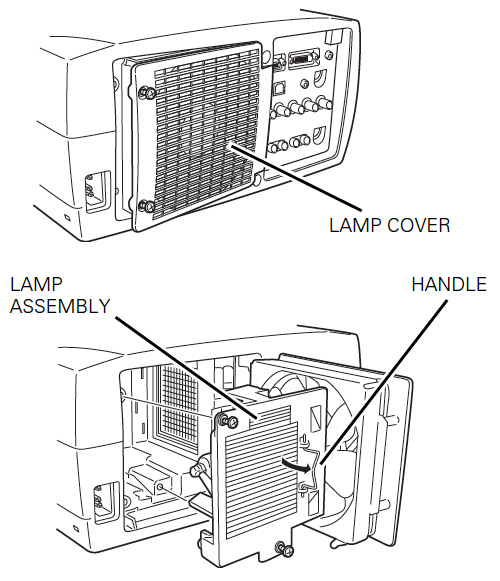
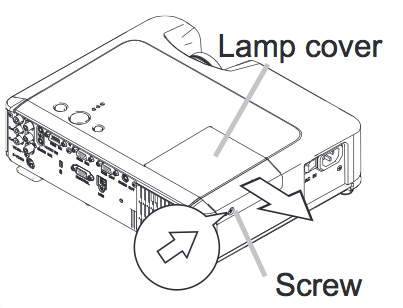
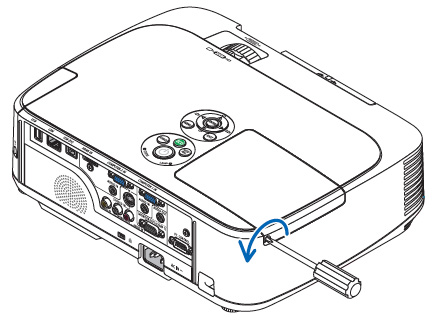
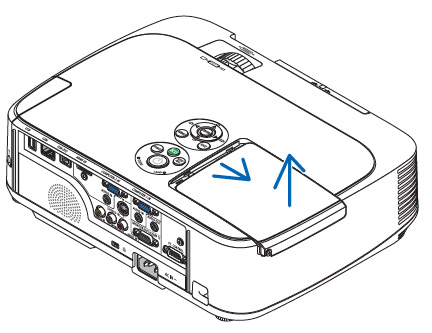
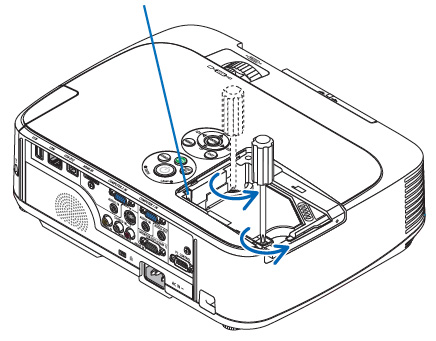
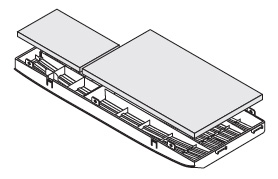
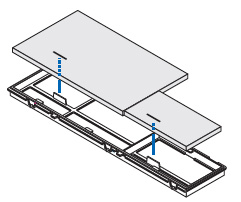
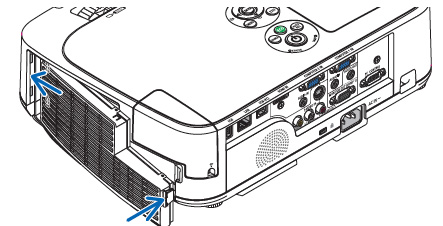
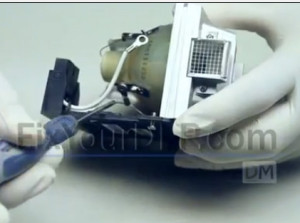
Loosen the three screws on Lamp Cover and remove Lamp Cover.
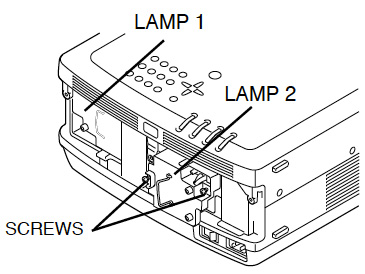
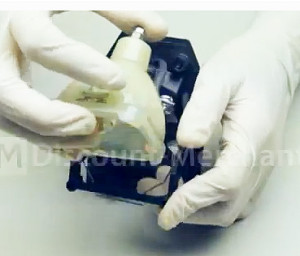
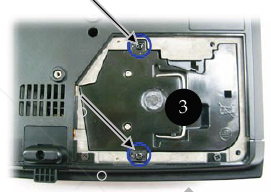
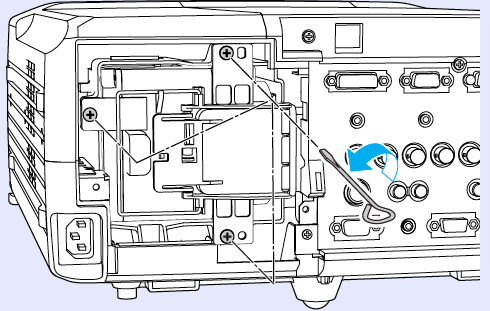
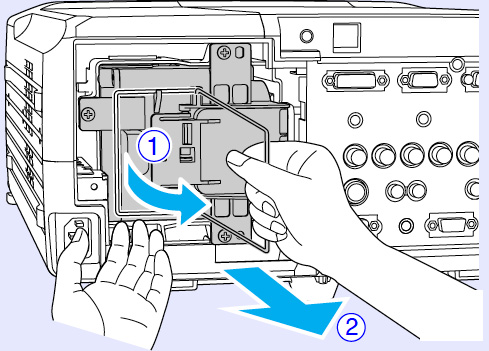
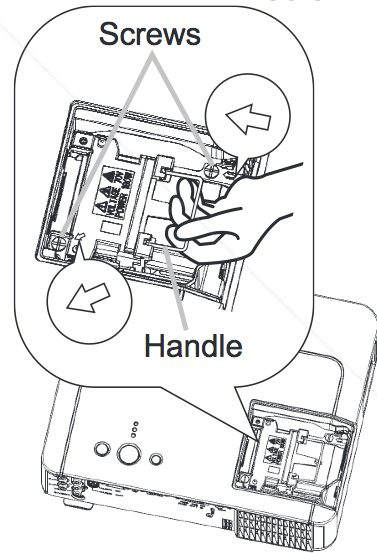
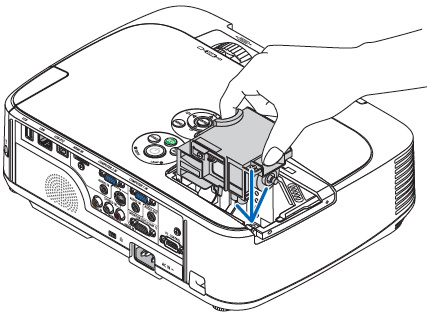
- Loosen the 2 screws. Using the wire handle and pull out the projector lamp. Pulling too quickly can cause the bulb to shatter. Learn what to do should the bulb shatter.
- Replace the Lamp Assembly.
- NOTE: The Eiki POA-LMP39 projector lamp contains mercury and should be properly recycled. Don’t place it into regular garbage.
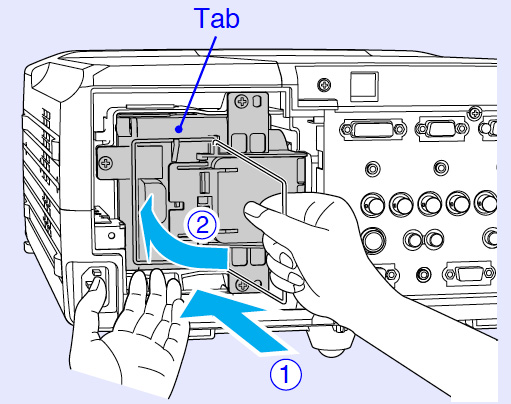
- Make sure that Lamp Assembly is set properly. Tighten the 2 screws on the new lamp
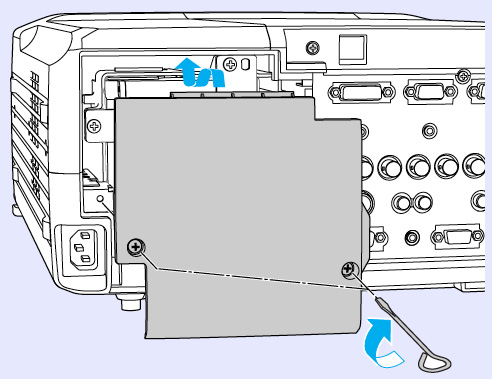
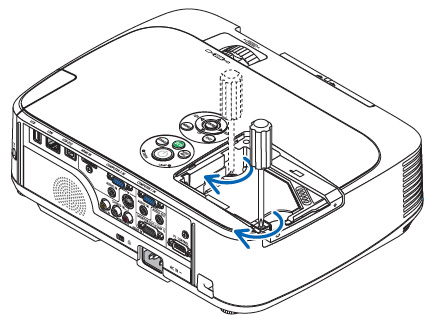
- Replace Lamp Cover and tighten 3 screws. Connect AC Power Cord to a projector and turn projector on.
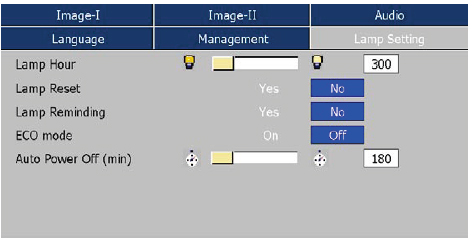
- Reset Lamp Replacement Counter.
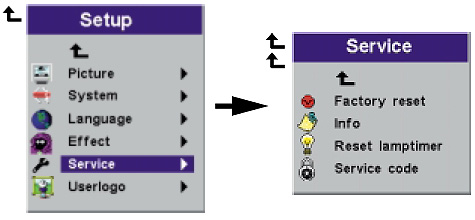
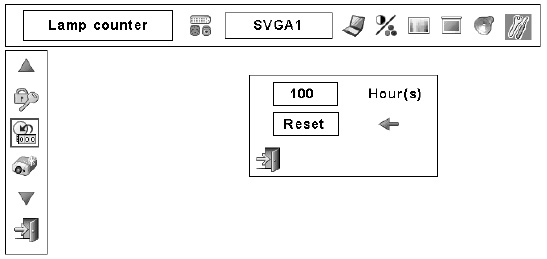
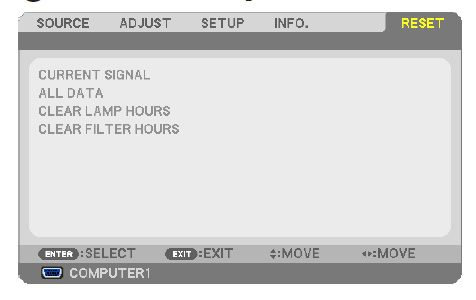
Reset lamp counter
- When the Lamp Replace Counter is reset, the LAMP REPLACE indicator stops lighting.
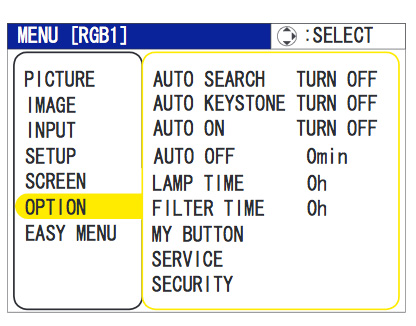
- Turn projector on, press MENU button and ON-SCREEN MENU will appear.
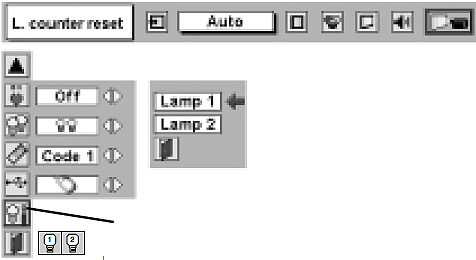
- Press POINT LEFT/RIGHT button(s) to move the red frame pointer to SETTING Menu icon. Press POINT DOWN button to move a red frame pointer to “Lamp counter reset.”
- Press SELECT button.
- Move arrow to select either lLamp 1 or Lamp 2. Press SELECT button.
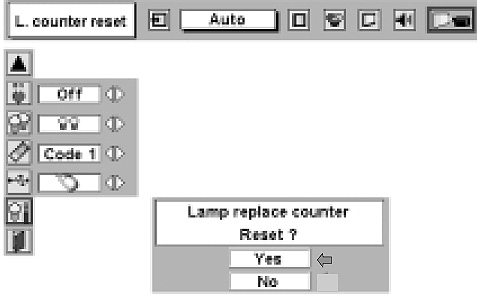
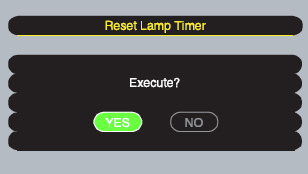
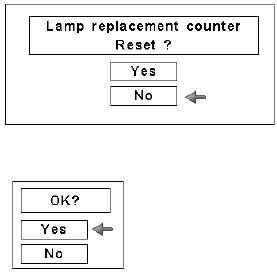
- Message “Lamp replace counter Reset?” is displayed.
- Move pointer to YES and then press SELECT button.
- NOTE: Be sure to reset correct lamp number otherwise LAMP REPLACE indicator continues lighting.
- Another confirmation dialog box appears and select YES to reset Lamp Replace Counter.
- Do not reset Lamp Replace Counter except after Projection lamp is replaced.
Extend the life of the Eiki POA-LMP39 projector lamp
Get more hours from your Eiki POA-LMP39 projector lamp by following these maintenance tips:
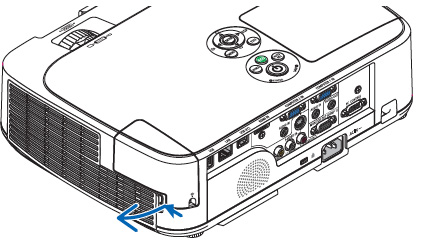
- Keep your air filters clean to avoid overheating the projector.
- Turn off the Eiki LC-SX4LA projector and let it stand unused for at least one hour ever 24 hours. An average use of four to five hours per day will ensure longer lamp life.
- Make sure there is enough airflow around the projector particularly if it’s been permanently mounted.
- Learn more with Top tips for extending DLP projector lamp life.
- Press the MENU button to exit.
Save money, go green
 Looking for a green alternative? Try replacing only the bulb and re-using the same plastic cage.
Watch this how to video guide to learn more.