We're now Screen and Projector! For updated content, visit ScreenAndProjector.com and follow @screenandproj on social media!

Optoma_EP773_proiector_BLFP260B

Replacement guide for the Optoma EP773 projector lamp

When you see the Lamp Replacement message on your projector screen, it’s time for a new Optoma 773 projector lamp. Installing a new lamp is simple. Follow our step-by-step guide to learn more.

When the Optoma BL-FP260B lamp is reaching end of life and the warning message has appeared, you have 30 hours or less before the projector shuts down. If you hear a loud popping sound, the lamp has burnt out and needs to be replaced immediately. The projector will not turn back on until the lamp has been replaced.

Buy this lamp on Amazon from the following authorized dealers:

To replace the Optoma BL-FP260B lamp

Be sure to buy an authentic an Optoma BL-FP260B (SP.86R01GC01) for the Optoma EP773 projector. Scroll down to find out why authentic lamps are so important for your projector.

Follow these step-by-step instructions to replace the Optoma BL-FP260B SP.86R01GC01:

Optoma_EP773_projector_Optoma_BL-FP260B_projector lamp_replacement1. Switch off the power to the projector by pressing the Power/Standby button. Allow the projector to cool down for at least 30 minutes. If should be cool to the touch. These projectors run using high temperatures and you can burn yourself badly if you don’t allow the projector to cool down.

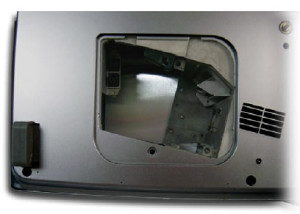
2. Disconnect the power cord. Using a screwdriver, remove the screws holding the cover in place.

Optoma_EP773_remove_lamp_projector_Optoma_BL-FP260B_projector lamp

3. Push the cover up to remove.


Optoma_EP773_remove_screws_projector_Optoma_BL-FP260B_projector lamp


4. Use a screwdriver to remove the two screws holding the lamp module in place.

5. Slowly put out the old lamp by grabbing the edge of the lamp. Be careful not to bang the lamp against the projector as this may case the bulb to break. Learn what to do if the lamp has exploded inside the projector.

Note: The Optoma BL-FP260B contains mercury and should not be thrown out with regular garbage and should be recycled properly.

Optoma_EP773_projector_insert_new_Optoma_BL-FP260B_projector lamp

6. Place the new Optoma BL-FP260B SP.86R01GC01 lamp into the Optoma EP773 projector. Tighten the two screws on the lamp. Replace the lamp cover and tighten its two screws.

You must now reset the Lamp Replacement Timer.

Reset the lamp timing on the Optoma EP773

  • Press the Menu option on either the remote or on the projector.
  • Scroll over the Lamp Setting. Press enter.
  • Select Reset Lamp Hours. Press Enter
  • The Execute/Cancel command line will appear.
  • Scroll over to choose Execute. Press Enter.
  • The lamp hours will be reset to zero.
  • Turn on the Eco Mode to lower power consumption and extend the lamp life by 130%.

Why buy authentic?

Optoma_BL-FP230A_projector_lamp_EP747_Lamp_Replace_LampThere are lots of choices out there for buying an Optoma BL-FP260B SP.86R01GC01 lamp but to keep your Optoma EP773 projector working properly, you’ll want to invest in an authentic lamp. Since selling online has few regulations, it’s easy to get duped into buying an inferior knock-off lamp posing as an authentic one.

The tell tale sign is a price that seems too good to be true.

Why avoid generics:

Learn how to spot the copycat fake lamps with 7 Ways to Spot a Counterfeit Lamp.

Tagged with: , ,

Optoma_EP747T_projectors_Optoma_BL-FP230A_projector_lampOur step-by-step guide shows how to replace Optoma EP747T projector lamp

At 3o hours, when the Optoma EP747T projector lamp is reaching end of life, you will see the Lamp Replacement message on your screen.

Be sure to buy authentic lamps and avoid generic lamps. Optoma EP747T projector lamp generic lamps may appear to be a bargain but actually less durable than authentic lamp.

Find this lamp from the following OEM manufacturers on Amazon:

Replace the Optoma EP747T projector lamp

NOTE: The Optoma BL-FP230A lamp contains mercury and should not be thrown into regular garbage. Recycle your used lamps! If you bought from an authentic manufacturer they will recycle the lamp for you at no extra cost. Generic manufacturers don’t recycle.

Step 1

Lamp_Replacement_Remove_screws_Optoma_BL-FP230H_projector_lamp_projector_EP747T

  • Switch off the power to the Optoma EP747T projector by pressing the Power/Standby button.
  • Allow the projector to cool down for at least 30 minutes. If should be cool to the touch. These projectors run using high temperatures and you can burn yourself badly if you don’t allow the projector to cool down.
  • Disconnect the power cord. Using a screwdriver, remove the screws holding the cover in place. Push the cover up to remove.

Replacement_remove_cover_Optoma_BL-FP230A_projector_lamp_Optoma_EP747T_projector

EP747T_Lamp_Replacement_remove_lamp_screws_Optoma_BL-FP230A_projector_lamp

Step 2

  • Use a screwdriver to remove the two screws holding the Optoma EP747T lamp module in place.
  • Slowly put out the old lamp by grabbing the edge of the lamp. Be careful not to bang the lamp against the projector as this may case the bulb to break. Learn what to do if the lamp has exploded inside the projector.

Optoma_EP747T_projector_remove_ BL-FP230A_lamp

Step 3

  • Place the new Optoma BL-FP230A (SP.83R01G001) into the Optoma EP747T projector. Tighten the two screws on the lamp. Replace the lamp cover and tighten its two screws.
  • You must now reset the Lamp Replacement Timer.

Reset the lamp timing on the Optoma EP747T

Optoma_EP747T_projector_Lamp_Control_Menu_Optoma_BL-FP230A_projector_lamp

  • Press the Menu option on either the remote or on the projector.
  • Scroll over the Lamp Setting. Press enter.
  • Select Reset Lamp Hours. Press Enter
  • The Execute/Cancel command line will appear.
  • Scroll over to choose Execute. Press Enter.
  • The lamp hours will be reset to zero.

Turn on the Eco Mode to lower power consumption and extend the lamp life by 130%.

Why buy authentic lamps?

Optoma_BL-FP230A_projector_lamp_EP747_Lamp_Replace_LampThere are lots of choices out there on the Internet. Since selling online has few regulations, it’s easy to get duped into buying an inferior knock-off lamp posing as an authentic Optoma BL-FP230A.

The tell tale sign is a price that seems too good to be true. These counterfeit manufacturers will advertise their lamp as “compatible.” However, it’s anything but compatible.

Learn how to spot the copycat fake lamps with 7 Ways to Spot a Counterfeit Lamp.

6 reasons to avoid generics:

Tagged with: , ,

laptop_connected_to_projectorYou’re ready to connect your laptop to your projector. Here’s how to get everything up and running.

Follow this guide to your laptop to your projector.

It’s always a good idea to do a test run before the big presentation.

Types of connections

Know what connections you can plug into your projector:

  • VGA: Video Graphics Array
  • DVI: Digital Visual Interface
  • HDMI: High Definition Multimedia Interface
  • RS-232 serial port is found on older computers used to connection peripheral devices.


Connect_Projector_to_Laptop


Connect_Projector_Computer_Cables_Available

Every projector will have a VGA connection but not all will have a DVI, HDMI, S-video, composite video. Most projectors will have at least one HDMI and some will have more than one. You want to use the projector with built-in speakers with video and audio signals, check that the HDMI can handle 1.3 or a higher version. Older version of HDMI connection will not support audio transmissions.

Your projector should detect your source automatically. You may need to refer to your projector manual for further information if the basic steps are not working.

Basic steps for connection

  • Your laptop needs to be turned off.
  • Connect the VGA cable (usually VGA) from your laptop’s external video port to the projector.
  • If you want audio for your presentation, connect the laptop’s “audio out” port to the projector, or to another sound system
  • Plug your projector into an electrical outlet and press the “power” button to turn it ON.
  • Turn on your laptop.
  • Sync the projector and laptop by holding down the FUNCTION key and pressing one of the following keys to toggle.

Connect your PC

  • Press Windows Key + P Connect_PC Computer_to_DLP_projector
  • You can also go to the Control Panel
  • Under Appearance and Personalization, click Adjust Screen Resolution
  • Click Project to a Second Screen
  • You’ll see a new screen slide into view from the right side

Connecting your Mac

  • On your laptop, open the System Preferences dialogue box. Connect_MAC_Laptop_to_DLP_1808p_projector
  • Click Displays.
  • Click Arrangement
  • If the box for “Mirror Displays” is unchecked, check it.
  • Click Display
  • In the Resolution Window, select 1024 x 768
  • In the Refresh Rate select 60 Hertz
  • The laptop and projector will not display the same image


Tagged with: , ,

Optoma_EP747N_projectors_Optoma_BL-FP230A_projector_lampGuide to replacing the Optoma EP747N projector lamp

If you’ve seen the replacement warning for the Optoma EP747N projector lamp, keep reading! Our step-by-step guides will show you how to replace the lamp in three easy steps.

Your Optoma EP747N uses a Optoma BL-FP230A lamp.  Be sure to buy authentic lamp and keep your projector working as its best. Generic are not worth the trouble even if they are less expensive!

Find this lamp from the following OEM manufacturers on Amazon:

6 reasons to avoid generics:

Replace the Optoma EP747H projector lamp

When the Optoma BL-FP230A lamp is reaching end of life, you will see the Lamp Replacement message. You have 30 hours or less before the projector shuts down.

Step 1

Lamp_Replacement_Remove_screws_Optoma_BL-FP230H_projector_lamp_projector_EP747N

  • Switch off the power to the Optoma EP747H projector by pressing the Power/Standby button.
  • Allow the projector to cool down for at least 30 minutes. If should be cool to the touch. These projectors run using high temperatures and you can burn yourself badly if you don’t allow the projector to cool down.
  • Disconnect the power cord. Using a screwdriver, remove the screws holding the cover in place.Push the cover up to remove.


EP747N_Lamp_Replacement_remove_lamp_screws_Optoma_BL-FP230A_projector_lamp

Step 2

  • Use a screwdriver to remove the two screws holding the lamp module in place.
  • Slowly put out the old lamp by grabbing the edge of the lamp. Be careful not to bang the lamp against the projector as this may case the bulb to break. Learn what to do if the lamp has exploded inside the projector.
  • Note: The used Optoma BL-FP230A lamp contains mercury and should not be thrown out with regular garbage and should be recycled.

Optoma_EP747N_projector_remove_ BL-FP230A_lampStep 3

  • Place the new Optoma BL-FP230A into the Optoma EP747N projector. Tighten the two screws on the lamp. Replace the lamp cover and tighten its two screws.
  • You must now reset the Lamp Replacement Timer.


Reset the lamp timing on the Optoma EP747N

Optoma_EP747N_projector_Lamp_Control_Menu_Optoma_BL-FP230A_projector_lamp

  • Press the Menu option on either the remote or on the projector.
  • Scroll over the Lamp Setting. Press enter.
  • Select Reset Lamp Hours. Press Enter
  • The Execute/Cancel command line will appear.
  • Scroll over to choose Execute. Press Enter.
  • The lamp hours will be reset to zero.

Turn on the Eco Mode to lower power consumption and extend the lamp life by 130%.

Why buy authentic lamps?

Optoma_BL-FP230A_projector_lamp_EP747_Lamp_Replace_LampThere are lots of choices out there on the Internet. Since selling online has few regulations, it’s easy to get duped into buying an inferior knock-off lamp posing as an authentic Optoma BL-FP230A.

The tell tale sign is a price that seems too good to be true. These counterfeit manufacturers will advertise their lamp as “compatible.” However, it’s anything but compatible.

Learn how to spot the copycat fake lamps with 7 Ways to Spot a Counterfeit Lamp.

Tagged with: , , ,

Guide to replacing the Optoma EP705H projector lamp

optoma-EP705H_projector

Wondering when to replace the Optoma EP705H projector lamp? Just follow our quick guide. When the Optoma BL-FU150A lamp is reaching end of life, you will see the Lamp Replacement message. You have 30 hours or less before the projector shuts down. Be sure to buy an authentic an Optoma EP705H projector lamp.

Buy this lamp on Amazon from the following authorized dealers:

Replace the Optoma EP705H projector lamp

NOTE: The Optoma BL-FU150A lamp contains mercury and should not be thrown into regular garbage. Recycle your used lamps!

Optoma_EP7055H_1080p_projector_BL-FU150A_projector_lamp

Step 1:

  • Switch off the power to the Optoma EP705H projector.
  • Allow the projector to cool down for at least 30 minutes or until it is cool to the touch. These projectors run using high temperatures and you can burn yourself badly if you don’t allow the projector to cool down.Disconnect the power cord.
  • Using a screwdriver, remove the screw holding the cover in place.
  • Remove the cover from the Optoma EP705H projector.


Optoma_EP7055H_1080p_projector_REPLACE_BL-FU150A_projector_lamp Step 2:

On the left side of the lamp module, push the electrical connector up to disengage it from the projector base.

Step 3:

  • Loosen the three screw holding the Optoma BL-FU150A lamp into the Optoma EP705H.
  • Remove the three screws from the lamp module.

Step 4:

  • Pull out the lamp manually.
  • Gently slide in the new BL-FU150A (SP.82902.001). Take care not to touch the actual bulb as this may cause black spots to appear when the oil from your fingerprint heats up.
  • Tighten the two screws on the lamp.
  • Replace the lamp cover and tighten its two screws.

You must now reset the Lamp Replacement Timer.

Reset the lamp timing on the Optoma EP705H

  • Press the Menu option on either the remote or on the projector.
  • Scroll over the Lamp Setting. Press enter.
  • Select Reset Lamp Hours. Press Enter
  • The Execute/Cancel command line will appear.
  • Scroll over to choose Execute. Press Enter.
  • The lamp hours will be reset to zero.

Turn on the Eco Mode to lower power consumption and extend the lamp life by 130%.

Why buy authentic lamps?

There are lots of choices out there on the Internet. Since selling online has few regulations, it’s easy to get duped into buying an inferior knock-off lamp posing as an authentic Optoma EP705H.

The tell tale sign is a price that seems too good to be true. These counterfeit manufacturers will advertise their lamp as “compatible.” However, it’s anything but compatible.

Why avoid generics:

Learn how to spot the copycat fake lamps with 7 Ways to Spot a Counterfeit Lamp.

Tagged with: , ,

Optoma_EP747H_projectors_Optoma_BL-FP230A_projector_lampReplace the Optoma EP747H projector lamp in three easy steps.

Be sure to buy an authentic an Optoma EP747H projector lamp. Scroll down to learn why authentic lamps are so important for your projector.

At 30 hours, when  the Optoma EP747H projector lamp is reaching end of life, you will see the Lamp Replacement message. Replace immediately!

Find this lamp from the following OEM manufacturers on Amazon:

Replace the projector lamp

Step 1:

  • Lamp_Replacement_Remove_screws_Optoma_BL-FP230H_projector_lamp_projector_EP747aSwitch off the power to the Optoma EP747H projector by pressing the Power/Standby button.
  • Allow the projector to cool down for at least 30 minutes. If should be cool to the touch. These projectors run using high temperatures and you can burn yourself badly if you don’t allow the projector to cool down.
  • Disconnect the power cord. Using a screwdriver, remove the screws holding the cover in place.

Replacement_remove_cover_Optoma_BL-FP230A_projector_lamp_Optoma_EP747H_projector

Push the cover up to remove.


EP747H_Lamp_Replacement_remove_lamp_screws_Optoma_BL-FP230A_projector_lamp

 Step 2

  • Use a screwdriver to remove the two screws holding the lamp module in place.
  • Slowly put out the old lamp by grabbing the edge of the lamp. Be careful not to bang the lamp against the projector as this may case the bulb to break. Learn what to do if the lamp has exploded inside the projector.
  • Note: The used Optoma BL-FP230A contains mercury and should not be thrown out with regular garbage and should be recycled.

Optoma_EP747H_projector_remove_ BL-FP230A_lamp

 Step 3

  • Place the new Optoma BL-FP230A (SP.83R01G001) into the Optoma EP747H projector. Tighten the two screws on the lamp. Replace the lamp cover and tighten its two screws.
  • You must now reset the Lamp Replacement Timer.


Reset the lamp timing on the Optoma EP747H

Optoma_EP747a_projector_Lamp_Control_Menu_Optoma_BL-FP230A_projector_lamp

  • Press the Menu option on either the remote or on the projector.
  • Scroll over the Lamp Setting. Press enter.
  • Select Reset Lamp Hours. Press Enter
  • The Execute/Cancel command line will appear.
  • Scroll over to choose Execute. Press Enter.
  • The lamp hours will be reset to zero.

Turn on the Eco Mode to lower power consumption and extend the lamp life by 130%.

Why buy authentic lamps?

Optoma_BL-FP230A_projector_lamp_EP747_Lamp_Replace_LampThere are lots of choices out there on the Internet. Since selling online has few regulations, it’s easy to get duped into buying an inferior knock-off lamp posing as an authentic Optoma BL-FP230A.

The tell tale sign is a price that seems too good to be true. These counterfeit manufacturers will advertise their lamp as “compatible.” However, it’s anything but compatible.

Why avoid generics:

Learn how to spot the copycat fake lamps with 7 Ways to Spot a Counterfeit Lamp.

Tagged with: , ,

Learn how to clean your DLP projector

Cleaning_DLP_1080p_projector

After several months of use, your DLP projector is going to need some cleaning. Basic cleaning includes keeping the air filter free of dust and lint, keeping the projector lens clean and removing any marks or dirt from the body of the projector. Follow these guidelines to to clean your DLP projector.

Cleaning the air filter

It’s important to clean the air filter regularly to prevent your DLP 1080p projector from overheating and possibly causing it to shut down. Most manufacturers recommend cleaning the filters at least every six weeks or whenever they are dusty. This will depend on how often you use the projector and your environment.

DO:

  • Use a can of compressed air to blow the dust away.
  • Vacuum the filter with a vacuum cleaner designed for computers and other office equipment.
  • Gently shake out the filter to release any dust.
  • Check with your manufacturer. Some recommend replacing the filter altogether rather than trying to clean it.

DON’T

  • Wash the filter with soap or water as this can damage the filter membranes.
  • Use a regular vacuum cleaner on the filter or inside the projector.
  • Unplug the projector while the fan is running.
  • Block the projector’s ventilation openings.

Need more information? Check out: Have you cleaned your 1080p projector filter today?


Cleaning the projector lens

A build-up of dust, lint, dirt and fingerprints on the projector lens can impact the image projected onto the screen. Keep your lens clear for optimal viewing.

DO

  • Clean immediately whenever you notice dust, fingerprints or dirt on the surface of the lens.
  • Use a soft, lint-free cloth to wipe the lens.
  • Use a canister of compressed air to remove dust from the outside of the lens.
  • Use lens-cleaning paper to remove fingerprints or other marks.
  • Wipe the lens in a single direction.

DON’T

  • Use abrasive cloths on the lens
  • Use wet cloths or abrasive cleaners.
  • Rub the lens with abrasive materials.
  • Wipe back and forth across the lens – this can scratch the lens.
  • Use a cloth that is very old.
  • Use a cloth washed with fabric softener or dryer sheets as these chemicals can cloud the lens.
  • Spray any type cleaner directly onto the lens surface.


Cleaning the projector body

Your projector is bound to pick up grime from everyday use, particularly if you are using it for presentations while on the road. Regularly cleaning will help keep your DLP 1080p projector looking like new.

DO

  • Wipe the entire surface of the projector using a clean, dry, soft cloth.
  • Turn off the projector before cleaning the body.
  • Unplug the power cord and the cables to any video sources.
  • Use a neutral, mild detergent watered down with a soft, moist cloth to remove stubborn stains.


DON’T

  • Use any cleaning product with wax, alcohol, solvents, benzene or other chemicals.
  • Use any abrasive cleaners since they can scratch the body.
  • Use cloths containing chemicals or made with scratchy fabric.

Read more about maintaining your DLP 1080p projector:


Tagged with: , , , ,

Optoma_EP749_projector_Optoma_BL-FP230C_projector_lampHas your Optoma EP749 projector lamp started to fade? Are you seeing warning messages?

Consult our guide to install a new Optoma EP749 projector lamp.

Start off right

Before you replace the Optoma EP749 projector lamp make sure you have the correct lamp. In order to keep your Optoma EP749 projector working at it’s best, look for a OEM authentic lamp to install. Look for the seal of approval to be  sure you’re getting an authentic Optoma EP749 projector lamp.

Why avoid generic lamps?

Counterfeit lamps are easy to come by and appear to be a great deal. But they come with a hidden price tag that works out to be more money in the long run. Since they are created with toxic materials used as substiutions, these projector lamps don’t have the proper safeguards to protect your eyesight.

They are also prone to explosions, don’t last as long as authentic and can damage the sensitive optics in your Optoma EP749 projector. Learn the 7 Ways to Spot a Counterfeit Lamp.

Buy this lamp on Amazon sold by these authorized dealers:

Replacing the Optoma BL-FP230C

Follow these important safety steps before installing a new Optoma BL-FS200B projector lamp:

  • The used Optoma BL-FS200B projector lamp contains mercury and should be properly recycled. Don’t throw it into regular garbage.
  • Switch off the power to the Optoma EP749 projector by pressing the Power/Standby button.
  • Disconnect the power cord.
  • Allow the projector to cool down for at least 30 minutes. If should be cool to the touch. These projectors run using high temperatures and you can burn yourself badly if you don’t allow the projector to cool down.

Optoma_EP749_remove_cover_Optoma_BLFP230C_projector_lamp

Place something soft underneath the Optoma EP749 and then turn the projector onto it’s back. Remove the two screws holding the cover in place.

Optoma_EP749_cover_Optoma_BLFP230C_projector_lamp

Push the projector lamp cover up to remove.

Optoma_EP7475_projector_remove_ BL-FP230A_projector_lampUse a screwdriver to remove the two screws holding the projector lamp module in place.

Slowly put out the old lamp by grabbing the edge of the lamp. Be careful not to bang the lamp against the projector as this may case the bulb to break. Learn what to do if the lamp has exploded inside the projector.

Place the new Optoma BL-FS200B projector lamp into the Optoma EP749 projector. Tighten the two screws on the projector lamp. Replace the projector lamp cover and tighten its two screws.

You must now reset the Lamp Replacement Timer.

Reset the lamp timing on the Optoma EP749

The Optoma EP749 projector has an automatic lamp reset timer that tracks the life of the lamp and triggers the lamp replacement warning. You need to reset the timer each time the projector lamp is replaced.

  • Press the Menu option on either the remote or on the projector.
  • Scroll over the Lamp Setting. Press enter.
  • Select Reset Lamp Hours. Press Enter
  • The Execute/Cancel command line will appear.
  • Scroll over to choose Execute. Press Enter.
  • The lamp hours will be reset to zero.

How to extend the life of the Optoma BL-FS200B

  • Turning on the Eco Mode to lower power consumption and extend the lamp life by 130%.
  • Keep your air filters clean to avoid overheating the projector.
  • Turn off the Optoma EP749 projector and let it stand for at least one hour ever 24 hours.
  • Make sure there is enough airflow around the projector particularly if it’s been permanently mounted.
  • Top tips for extending DLP projector lamp life
Tagged with: , ,

Aspect_Ratio_1080p_projectorsAspect ratio is one of the most important considerations when choosing a projector screen

Aspect ratio is just as important as the projector’s gain and material. It’s the proportion of width and height of an image projected onto the screen. It’s typically expressed as numbers, such as 4:3, but these numbers ARE NEVER the size of the screen.

The first number (4) is the width of the image while the second number is the height. So for example, 4:3 would mean that for every four inches of image width, you would have 3 inches of height.

The aspect ratio on your projector screen is going to depend on what you plan to watch. It will help you determine what screen to buy

Typical North America measurements are:

  • Standard 4:3
  • Widescreen: 16:9
  • Cinemascope: 2.35:1

4:3

This is the standard aspect ratio even though it’s considered somewhat dated. Despite our move to HD content, broadcasters still put out films and TV shows in 4:30 aspect ratio. All VHS tapes of older films and TV shows will be in this aspect ratio. Displaying them on a larger screen will make the image appear stretched or create black borders running along the edge called pillar boxing. The 4:3 aspect ratio is almost the standard for business presentations. However, with the introduction of laptops with widescreen displays, some businesses are moving away from this standard.  Any device or projector screen with the 4:3 aspect ratio will not be able to show High Definition visual since they requite widescreen resolutions. HD films, TV shows or videogame graphics and text when forced into the 4:3 resolutions are going to appear squashed due to the image compression.

16:9

Almost all HD film and TV programming is presented in the 16:9 ratio, particularly with sporting event. This is also the standard aspect ratio for all films including those on Blu-ray discs and DVDs so is the most often used in any home theater projectors.  HDTV programs’ images fit perfectly on a screen with 16:9 aspect ratios with no image distortion. You can watch 4:3 aspect ratio without any issues except for the black borders along the edges. These black bars are going to be seen more easily on white screens with a lower gain.

2.35:1

The 2.35:1 settings is most suited for film buff seeking the cinemascope experience with their home theater. Best suited for film buffs that want to use their projection screens primarily to watch modern movies. With a 2.35:1 screen, the height is always filled, no matter what the aspect ratio of the film to TV show.

Read more about choosing your projector:

Tagged with: , , ,

Epson_ELPLP38_projector_lampFollow this guide for instructions on replacing the Epson ELPLP38 lamp.

Find out if your projector is compatible with the Epson ELPLP38 lamp! The Epson ELPLP38 is an authentic projector lamp compatible with the following Epson Projectors:

Epson EMP-1700, Epson EMP-1705, Epson EMP-1707, Epson EMP-1710, Epson EMP-1715, Epson EMP-1717, Epson PowerLite 1505, Epson PowerLite 1700, Epson PowerLite 1700c, Epson PowerLite 1705c, Epson PowerLite 1710, Epson PowerLite 1710c, Epson PowerLite 1715c, Epson PowerLite 1717c.

Be sure to buy authentic

Before you install any Epson ELPLP38 lamp look for the seal of approval and be sure to buy authentic:

Buy this lamp on Amazon from the following authorized dealers:

For step-by-step instructions on replacing your Epson ELPLP38 lamp, click on your projector listed below:

powerlite_1705_epson_ELPLP38_light

Click here for step-by-step instructions on how to change the Epson ELPLP38 projector lamp for the Epson PowerLite 1505 projector.

Epson_PowerLite_1700c_Epson_ELPLP38

Click here for step-by-step instructions on how to change the Epson ELPLP38 projector lamp for the Epson PowerLite 1700 projector.

Epson_PowerLite_1700c_Epson_ELPLP38

Click here for step-by-step instructions on how to change the Epson ELPLP38 projector lamp for the Epson PowerLite 1700c projector.

Epson_EMP-1710_projector_Epson_ELPLP38

Click here for step-by-step instructions on how to change the Epson ELPLP38 projector lamp for the Epson PowerLite 1705c projector.

epson_powerlite_1710_projector

Click here for step-by-step instructions on how to change the Epson ELPLP38 projector lamp for the Epson PowerLite 1710 projector.

epson_emp-1717 projector

Click here for step-by-step instructions on how to change the Epson ELPLP38 projector lamp for the Epson PowerLite 1710c projector.

powerlite_1705_epson_ELPLP38_light

Click here for step-by-step instructions on how to change the Epson ELPLP38 projector lamp for the Epson PowerLite 1715c projector.

epson_Powerlite-1717_projector

Click here for step-by-step instructions on how to change the Epson ELPLP38 projector lamp for the Epson PowerLite 1717c projector.

How to extend the life of the Epson ELPLP38 lamp:

Extend the life of the newly installed Epson ELPLP38 with the following tips:

  • Keep your air filters clean to avoid overheating the projector.
  • Turn off the Epson projectors and let it stand for at least one hour ever 24 hours. An average use of four to five hours per day will ensure longer lamp life.
  • Make sure there is enough airflow around the projector particularly if it’s been permanently mounted.
  • Set the Brightness Mode to low or Econo Mode to extend lamp life.
  • Learn more with Top tips for extending DLP projector lamp life.
Tagged with: , , , , , , , , , , , , , ,
Join the discussion on Facebook! All your questions, answered! The Screen & Projector Group