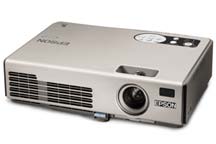
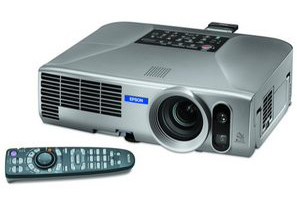
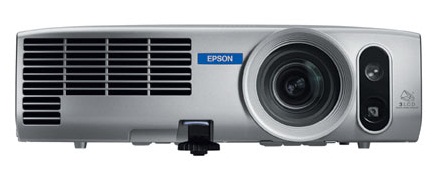
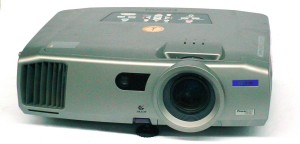
Install a new Epson PowerLite 750c projector lamp
 Replace the Epson PowerLite 750c projector lamp in three quick steps.
Save yourself unnecessary headaches and keep your warranty intact by investing in an authentic Epson PowerLite 750c projector lamp.
Step 1: Be prepared, buy the right lamp
There is no shortage Epson PowerLite 750c projector lamps to buy. The challenging part is finding an authentic merchant you can trust. The Internet has been flooded with copycat manufacturers who create these knock off lamps using toxic materials such Krypton-85. Counterfeit manufacturers advertise these projector lamps as “generic” or compatible but research has proven copycat lamps can damage the sensitive electronics in your projectors. Without access to proper materials and the correct schematics, generics can’t be properly calibrated to work with your machine and have shorter lamp life than original lamps as well as being prone to explosions.
Look for the seal of approval and buy authentic Epson PowerLite 750c projector lamp from a recognized dealer. You’ll be getting a far superior product. Read more about the 7 Ways to Spot a Counterfeit Lamp.
Find this lamp on Amazon sold by these authorized dealers:
- ELPLP32 Epson EMP-750 Projector Lamp
- Epson ELP-LP32 Projector Assembly with High Quality Osram Projector Bulb Inside
- Epson Projector Lamp Part ELPLP32-ER Model Epson EMP 732 EMP 750
- ELP-LP32 Epson Projector Lamp Replacement. Projector Lamp Assembly with High Quality Genuine Original Osram P-VIP Bulb inside.
Step 2: Know the end-of life signs
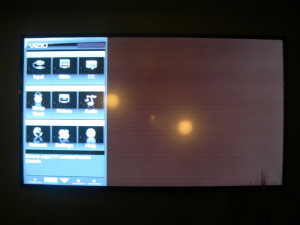
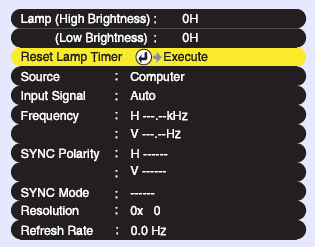
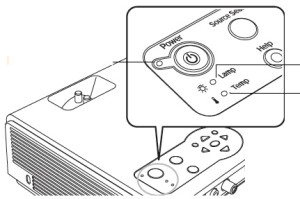 You can track the number of hours left in the Epson PowerLite 750c projector lamp on the Info menu found on the Main menu. The Epson PowerLite 750c projector lamp will last up to 2000 hours if the Brightness setting is on normal. Change the setting to low and the Epson PowerLite 750c projector lamp lamp will last up to 3000 hours. Watch for these signs as well to let you know the end of life is coming.
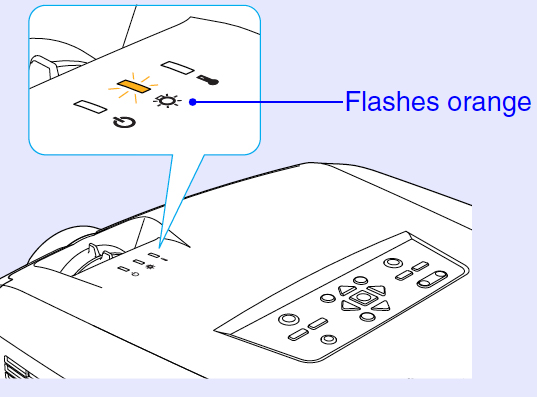
- The lamp warning light on the projector starts flashing orange. If it turns red and stays red, replace the Epson ELPLP32 projector lamp immediately.
- Imaged becomes dark, colours are off or appear to be deteriorating
- A message saying “Replace the lamp” appears on screen.
Step 3: Installing the new Epson ELPLP32
Installation will take under 10 minutes. You’ll need to install a Epson ELPLP32 projector lamp. Be sure to follow these preparation steps:
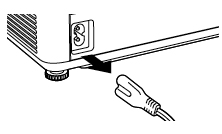
- Turn power button off and wait for the power light to stop flashing.
- Unplug the power cord from the Epson Powerlite 750c projector.
- The Epson Powerlite 750c should be cool to the touch before you try to change the Epson ELPLP32 lamp. This projector operate at a high temperatures so you can burn yourself badly if you don’t allow for the cool down period.
- Do not operate the projectors while any of the lamps are removed as this may result in malfunctions, fire hazard and other accidents.
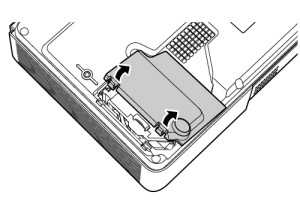
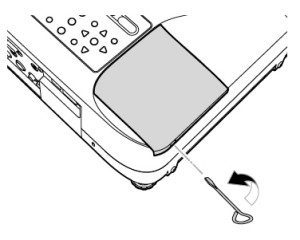
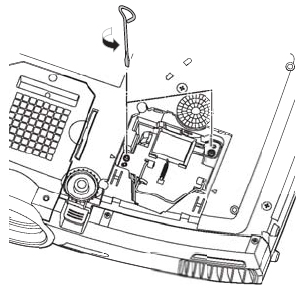
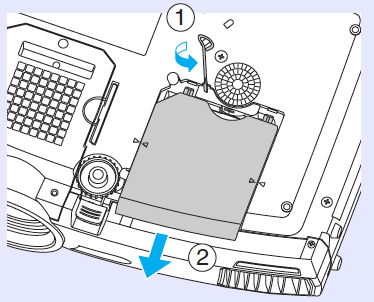
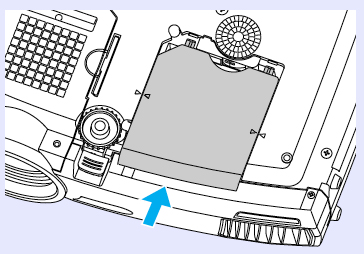
- Turn the Epson PowerLite 750c over and placing on a soft, scratch free surface.
- Press on the tabs located on top of the Epson PowerLite 750c cover. Lift up the lamp cover.
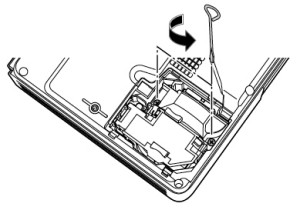
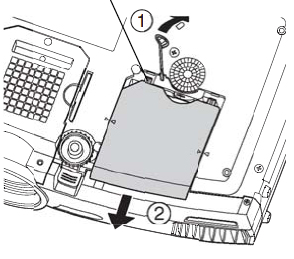
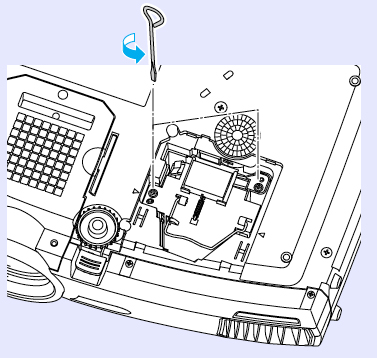
- Using the screw driver provided with the Epson PowerLite 750c projector, loosen the two screws holding the Epson ELPLP32 lamp in place.
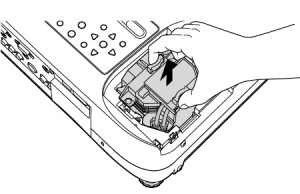
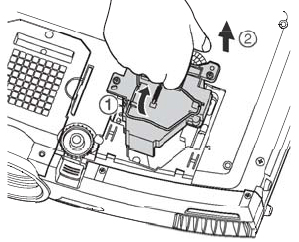
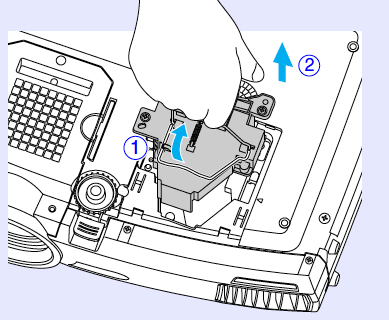
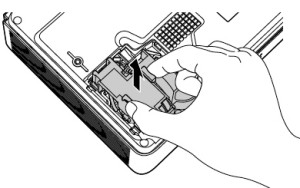 Pressing on the indents on the sides of the Epson ELPLP32, pull the projector lamp gently up out of the Epson PowerLite 750c projector. Take care not to bang the actual lamp or it may break. Learn how to do a proper clean up if the lamp breaks or explodes.
NOTE: The Epson ELPLP32 projector lamp contains mercury and should not be thrown into regular garbage. Recycle your used lamps and be good to the environment.
- Gently place the new Epson ELPLP32 lamp into the Epson PowerLite 750c making sure not to touch the actual bulb. The oil on your fingers will leave a burn mark on the lamp once it heats up and this can cause black out spots on the screen.
- Tighten the screws on the new Epson ELPLP32 lamp.
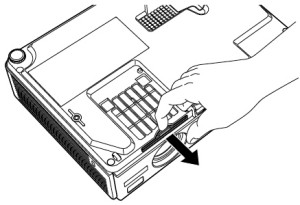
- Slide the air filter out and remove it immediately. Slide in the new filter that came with the Epson ELPLP32 lamp. Replace the lamp cover.
- You are now ready to reset the lamp timer.
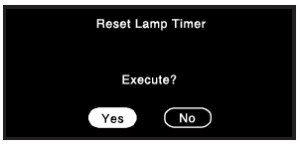
Reset the lamp timer in the Epson PowerLite 750c
Your Epson PowerLite 750c has a built-in timer to track the life of the Epson ELPLP32 projector lamp. So, it’s very important that you reset the lamp timer every time you replace the Epson ELPLP32 projector lamp. Here’s how:
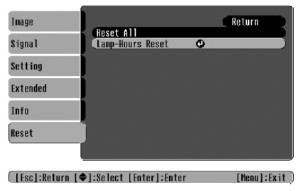
- Press the MENU button on either the remote control on the projector’s control panel.
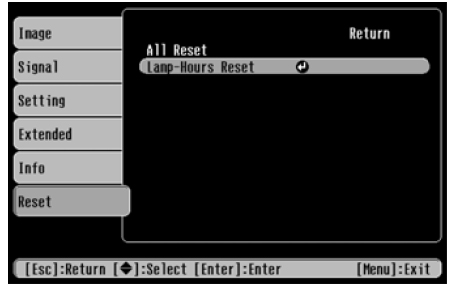
- Scroll down to the RESET option.
- Press Enter. The RESET ALL screen will appear.
- Scroll down to LAMP-HOURS RESET.
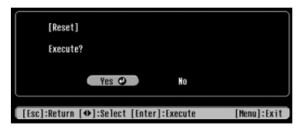
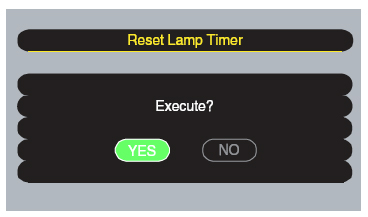
- Press ENTER to open up the confirmation screen
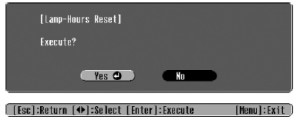
- Highlight YES.
- Press ENTER.
- Press ESC or MENU to exit this option.
Congratulations! You’ve just installed at new Epson ELPLP32 projector lamp in your Epson PowerLite 750c. Here are some tips to extend the life of your Epson ELPLP32 lamp:
- Keep your air filters clean to avoid overheating the projector.
- Turn off the Epson Powerlite 750c projector projector and let it stand for at least one hour ever 24 hours. An average use of four to five hours per day will ensure longer lamp life.
- Make sure there is enough airflow around the projector particularly if it’s been permanently mounted.
- Learn more with Top tips for extending DLP projector lamp life
 Follow this 3-step guide to replace the Epson PowerLite 835 projector lamp
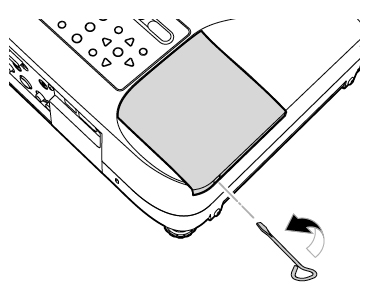


 Slide the Epson PowerLite 830p projector lamp cover off.
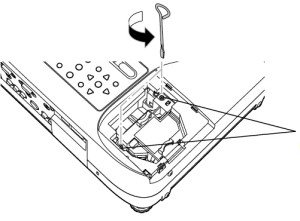
 Grab the
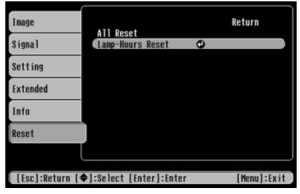
 Use this guide to replace the Epson PowerLite 7800 projector lamp
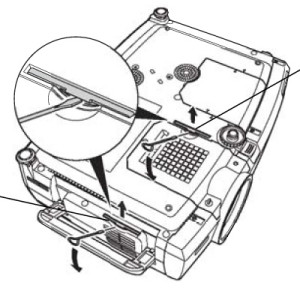


 When it’s time to replace the Epson V11H120020 projector lamp, use this guide for a quick and easy installation.
 Follow our step-by-step installation guide for a new Epson V11H170920 projector lamp.
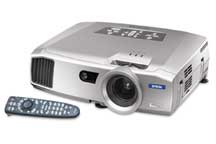 Follow this quick 3-step guide for replacing the Epson PowerLite 7800p projector lamp